It sounds like you’re looking for a delicious homemade dessert recipe that’s creamy, easy to make, and doesn’t require an oven or gelatin! Let’s dive into this, with a detailed recipe, instructions, and a bit of fun history and background for you.
Creamy No-Bake Dessert (Melt-in-Your-Mouth Treat!)
Introduction:
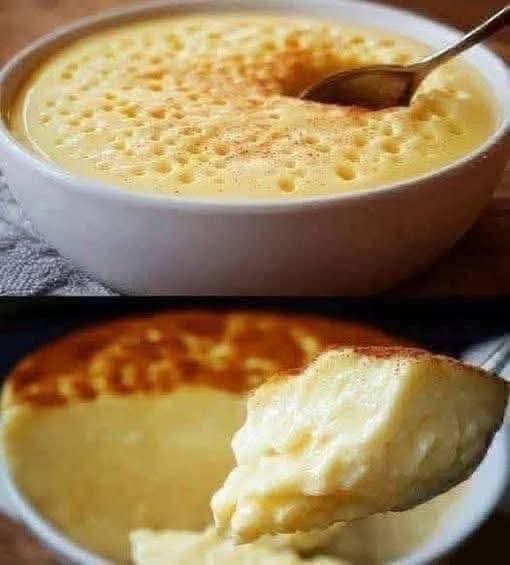
This dessert is the epitome of indulgence, offering a melt-in-your-mouth experience that’s both creamy and delightful. With no oven or gelatin required, it’s an easy, fuss-free dessert perfect for those who want something quick but luxurious. Ideal for last-minute cravings or when you want to impress guests with little effort, this creamy dessert is made in just 5 minutes and is sure to leave everyone asking for more!
History:
No-bake desserts have been popular for decades, especially in households where ovens weren’t always available or practical. The concept of no-bake sweets can be traced back to the early 20th century, when people began experimenting with alternative ways to create creamy, satisfying treats without needing to bake them in the oven. Over time, these recipes became popular in the form of chilled pies, mousse-like concoctions, and layered desserts. The no-bake style often uses simple ingredients like cream, milk, or whipped cream to create rich, velvety textures that are easily set in the fridge.
Ingredients:
- 1 ½ cups of heavy cream (or double cream)
- 1 cup of sweetened condensed milk
- 1 teaspoon vanilla extract
- ¼ cup of powdered sugar (optional for extra sweetness)
- 2 tablespoons of cornstarch (for thickening)
- A pinch of salt
- Crushed biscuits or graham crackers (optional for base/crust)
- Fresh fruit, chocolate shavings, or nuts (for topping)
Instructions:
- Prepare the Base (Optional): If you want a base for your dessert, crush biscuits or graham crackers into fine crumbs. Add melted butter (about 3-4 tablespoons) and press this mixture into the bottom of a pan or individual serving cups. Chill in the fridge while preparing the filling.
- Whip the Cream: In a mixing bowl, beat the heavy cream until soft peaks form. You can use an electric mixer or a hand whisk. Set aside.
- Make the Creamy Filling: In a saucepan, whisk together the sweetened condensed milk, cornstarch, powdered sugar (if using), and a pinch of salt. Cook on low to medium heat while continuously stirring until it thickens into a smooth, creamy custard-like consistency. This should take about 3-4 minutes.
- Combine: Once your mixture has thickened, remove it from the heat and stir in the vanilla extract. Allow it to cool for a few minutes.
- Fold in Whipped Cream: Gently fold in the whipped cream to the cooled mixture, being careful not to deflate it too much. The whipped cream will give the dessert its light and airy texture.
- Assemble: Pour the creamy mixture over the base (if you’ve made one), or directly into individual serving dishes. Smooth the top with a spatula.
- Chill: Place the dessert in the fridge for at least 2-3 hours, or until it firms up slightly. For a firmer texture, you can leave it overnight.
- Serve: Before serving, garnish with fresh fruit, chocolate shavings, or chopped nuts for extra flavor and texture. Enjoy!
Methods:
This dessert uses a combination of whipping cream for lightness, sweetened condensed milk for rich sweetness, and cornstarch as a thickener to create a luscious custard-like consistency. The folding technique is key to maintaining the airy texture. This method is simple yet effective, resulting in a rich yet light dessert without needing any baking skills or ingredients like gelatin.
Lovers:
This creamy, melt-in-your-mouth dessert is perfect for dessert lovers who enjoy the combination of sweet and creamy textures. It’s also a hit with those who are looking for quick and easy desserts to make without the need for complex techniques or long preparation times. Lovers of custards, mousses, and whipped cream-based desserts will find this treat to be the ultimate indulgence.
Formation:
The formation of this dessert is rooted in the simple yet effective principle of combining cream and sweetened milk with a thickener. The cornstarch ensures the creamy filling has a perfect texture that isn’t too runny or too firm. Whipping the cream provides the lightness needed to balance out the richness of the filling, creating a harmonious dessert that’s satisfying without being overwhelming.
Conclusion:
This homemade creamy dessert is an excellent choice for anyone looking to create a dessert that’s as simple as it is delicious. No oven, no gelatin, just pure creamy goodness! Whether served on a hot summer day or after a comforting meal, this dessert will make any occasion special. So, next time you’re craving something sweet but don’t want to spend hours in the kitchen, this dessert will have you covered in just 5 minutes!
Feel free to adjust the ingredients or add your personal touch. The beauty of this recipe is its flexibility! Would you like to see variations on this, or perhaps ideas for a themed topping?