Absolutely! Here’s a full, detailed “No-Knead Artisan Bread (Dutch Oven Method)” recipe — complete with a beautiful introduction, a touch of history, the ingredients, detailed methods, tips, and even a warm conclusion for bread lovers. 🍞🔥
🍞 No-Knead Artisan Bread (Dutch Oven Method)
🥖 Introduction
There’s something magical about the aroma of freshly baked bread wafting through your kitchen. This No-Knead Artisan Bread delivers a golden, crackly crust and a soft, airy interior that rivals any bakery loaf — yet it requires no kneading, no mixer, and no fancy skills. With just a few ingredients and a little patience, you can transform flour, water, yeast, and salt into pure rustic perfection.
This recipe is ideal for beginners and seasoned bakers alike. The secret lies in slow fermentation, which develops flavor and texture naturally while you relax. Whether you’re baking on a lazy Sunday or impressing dinner guests, this bread is your ticket to warm, comforting bliss.
📜 A Brief History of No-Knead Bread
The concept of no-knead bread became widely popular thanks to Jim Lahey of Sullivan Street Bakery in New York City. In 2006, he introduced a revolutionary technique: using time instead of effort to develop gluten. His method showed that with a long fermentation and a hot Dutch oven, anyone could bake a crusty, artisan-style loaf at home — no professional equipment needed!
Since then, the no-knead method has inspired home bakers worldwide to rediscover the joy of simple, old-fashioned breadmaking.
🧂 Ingredients
For 1 large loaf:
- 3 cups (375g) all-purpose flour or bread flour
- 1½ teaspoons salt
- ½ teaspoon instant yeast (or active dry yeast)
- 1½ cups (360ml) warm water (about 100°F / 38°C)
- Optional: 1 tablespoon honey or olive oil for a touch of flavor
- Extra flour or cornmeal for dusting
🥣 Method & Instructions
Step 1: Mix the Dough
- In a large mixing bowl, whisk together flour, salt, and yeast.
- Add warm water and mix with a wooden spoon or spatula until a shaggy, sticky dough forms.
- Cover the bowl with plastic wrap or a damp towel.
- Let it rest at room temperature for 12–18 hours (overnight is best).
- During this time, the dough will rise and develop bubbles — that’s the yeast doing its magic!
Step 2: Shape the Dough
- After the first rise, dust your counter with flour.
- Gently scrape the dough out of the bowl — it will be sticky.
- Sprinkle a little flour on top and fold the dough over itself a few times.
- Shape it into a rough ball and place it seam-side down on parchment paper or a floured towel.
- Cover again and let it rest for 30–60 minutes while you preheat the oven.
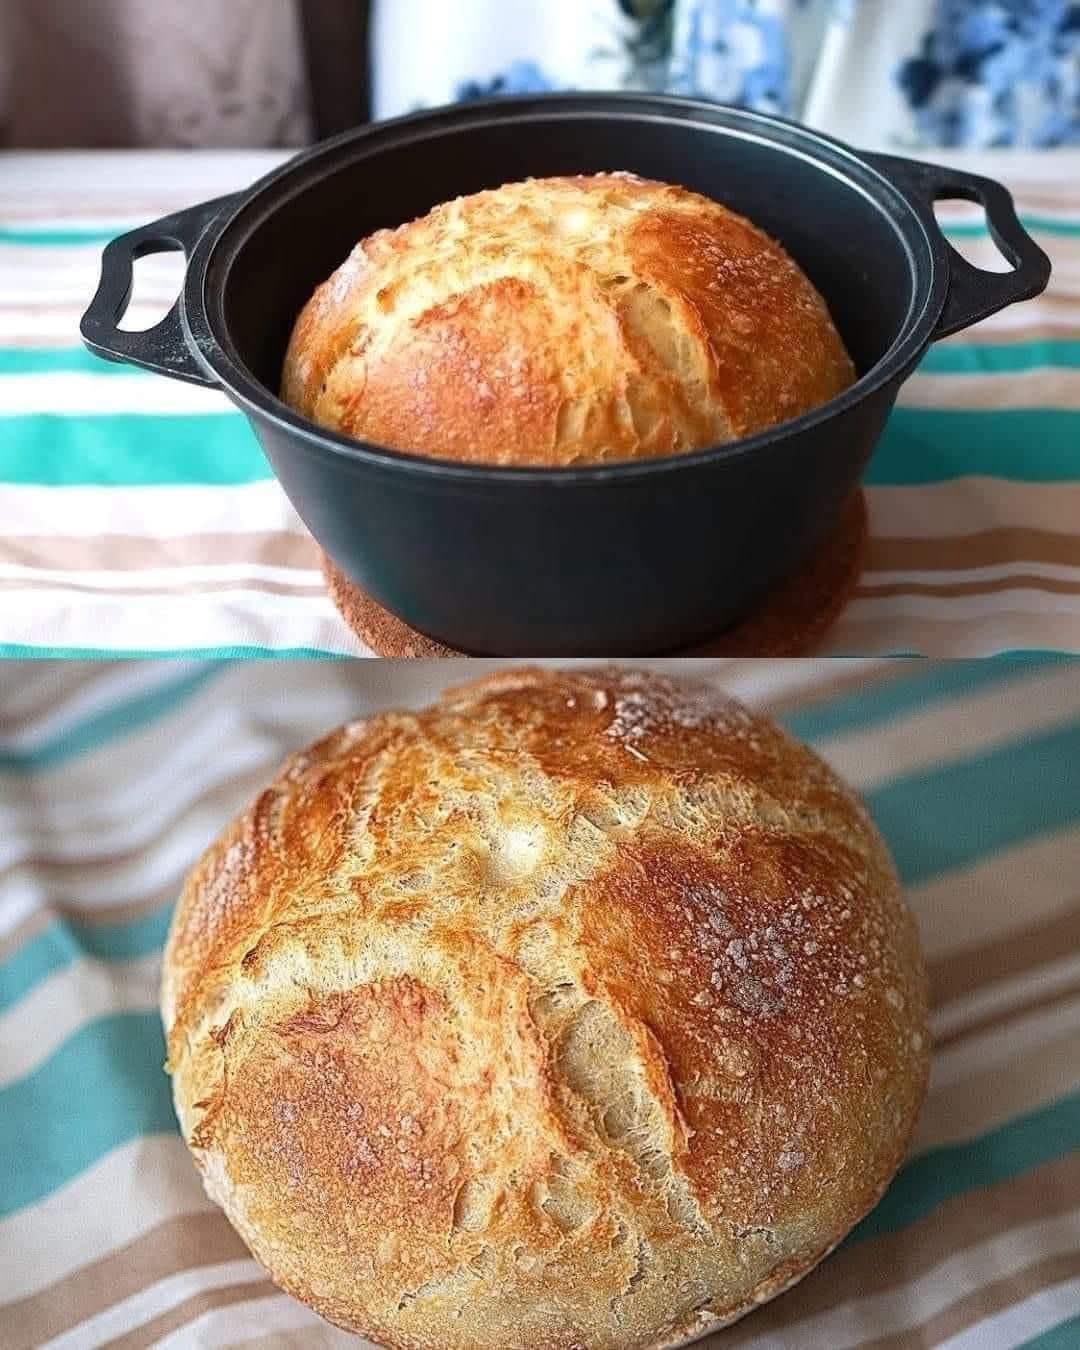
Step 3: Preheat the Oven & Dutch Oven
- Place your Dutch oven (with lid) into the oven and preheat to 450°F (230°C) for at least 30 minutes.
- This ensures the pot is blazing hot, which helps create that signature crispy crust!
Step 4: Bake the Bread
- Carefully remove the hot Dutch oven.
- Lift the dough with parchment paper and place it inside the pot.
- Cover with the lid and bake for 30 minutes.
- Remove the lid and bake for another 10–15 minutes, until the crust is deep golden brown.
- Use an instant-read thermometer — the internal temperature should be around 200°F (93°C).
Step 5: Cool & Enjoy
- Transfer the bread to a wire rack and let it cool for at least 1 hour before slicing.
- The crust will sing (crackle) as it cools — a sign of perfect baking!
💡 Tips & Variations
- Add-ins: Mix in herbs, roasted garlic, olives, cheese, or seeds before the first rise.
- Whole Wheat Version: Replace up to 1 cup of all-purpose flour with whole wheat flour.
- Crispier Crust: Leave the lid off a bit longer for an extra golden crunch.
- Soft Crust: Brush the top with butter while it cools.
❤️ For the Bread Lovers
Bread lovers know — this isn’t just food, it’s an experience. From the first rise to the first slice, no-knead bread connects us with centuries of baking tradition. The smell of freshly baked dough, the sound of the crust cracking, the warmth in your hands — it’s comfort, creation, and community all in one loaf.
Whether you share it with family or savor it alone with butter and honey, this bread carries love in every bite.
🏁 Conclusion
The No-Knead Artisan Bread is proof that simplicity can yield extraordinary results. With minimal effort, you can craft a rustic loaf that looks stunning, tastes incredible, and fills your kitchen with warmth. From ancient bakers to modern food lovers, bread remains a universal language of love and nourishment — and now, it’s your turn to bake a piece of that tradition.
Would you like me to include a step-by-step photo guide or a printable recipe card version of this next?