Sure! Here’s a big, full-featured version of the Decorated Sugar Cookie Cut-Outs recipe — complete with an engaging introduction, a touch of history, detailed ingredients and instructions, plus a sweet conclusion for all cookie lovers. 🍪✨
🌟 Melissa Falk’s Award-Winning Decorated Sugar Cookie Cut-Outs
🏆 Introduction
There’s something timeless and magical about sugar cookies — the way they fill the air with the comforting aroma of butter and almond, the joy of decorating them with family, and the satisfaction of biting into one that’s crisp on the edges yet tender in the middle.
Melissa Falk from Avon, Ohio, brought that magic to life in the 2024 Cookie Exchange, capturing hearts (and taste buds!) with her Decorated Sugar Cookie Cut-Outs. These cookies are not only beautiful to behold but melt-in-your-mouth delicious — a perfect combination of buttery richness and a delicate almond note.
🍪 A Little History
Sugar cookies date back to the 1700s, believed to have originated in Nazareth, Pennsylvania, where German Protestant settlers created a buttery, round cookie known as the Nazareth Sugar Cookie.
Over time, this simple treat evolved, gaining popularity for holidays and celebrations thanks to its versatility and ease of decorating. From royal icing artistry to family traditions passed down through generations, sugar cookies have become a canvas for creativity and love — just like Melissa’s winning recipe.
🧈 Ingredients
For the Cookies
- 2 sticks (1 cup) unsalted butter, at room temperature
- 1¼ cups granulated sugar
- 2 large eggs, at room temperature
- 2 teaspoons almond extract
- 1½ teaspoons baking powder
- ½ teaspoon salt
- 3¼ cups all-purpose flour
For the Royal Icing
- 2 lbs (1 bag) confectioners’ sugar
- 4 large egg whites, at room temperature
- 2 teaspoons almond extract
- 1 teaspoon water (add more if needed for consistency)
Optional Decorations
- Silver and gold edible beads
- Colored sprinkles or edible glitter
- Food coloring gels for tinted icing
👩🍳 Method & Instructions
Step 1: Prepare the Cookie Dough
- Preheat your oven to 375°F (190°C) and line baking sheets with parchment paper.
- In a large mixing bowl, cream butter and sugar together until pale, light, and fluffy — about 3 minutes.
- Add eggs one at a time, beating after each addition. Stir in the almond extract.
- In a separate bowl, whisk together flour, baking powder, and salt.
- Gradually add dry ingredients to the butter mixture. Mix on low speed until a soft dough forms.
- Divide dough in half, wrap in plastic wrap, and chill for 30 minutes for easier handling.
Step 2: Shape and Bake
- Lightly flour your surface and roll out dough to about ¼-inch thickness.
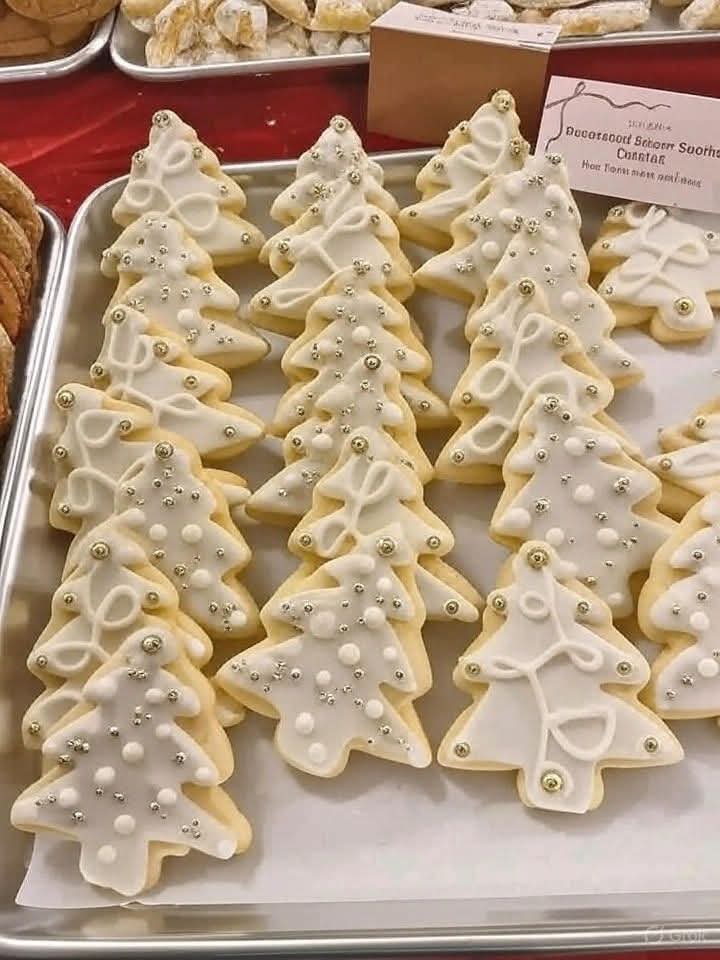
- Use a Christmas tree or festive-shaped cookie cutter to cut out shapes.
- Place cookies about 1 inch apart on the prepared sheets.
- Bake for 8–10 minutes, or until the edges are just starting to turn golden.
- Allow cookies to cool completely on a wire rack before decorating.
Step 3: Prepare the Royal Icing
- In a clean mixing bowl, beat the egg whites until frothy using an electric mixer.
- Gradually add the confectioners’ sugar, one cup at a time.
- Add almond extract and water; continue beating until the icing forms stiff, glossy peaks.
- Adjust consistency:
- For outlining, use thicker icing.
- For flooding, add a few drops of water to thin it slightly.
- Transfer icing to piping bags fitted with fine tips.
Step 4: Decorate Like a Pro
- Outline each cookie with icing and fill in the center.
- While still wet, add silver and gold beads or sprinkles to mimic holiday ornaments.
- Allow cookies to dry at room temperature for several hours or overnight until icing is completely firm.
❤️ Lovers’ Corner – Why People Adore These Cookies
- The Aroma: That irresistible almond scent makes any home smell like the holidays.
- The Texture: Buttery, tender, and delicately crisp — a perfect melt-in-your-mouth bite.
- The Look: Elegant and festive — each cookie becomes a little edible piece of art.
- The Memories: These cookies bring people together — from kids decorating at the kitchen table to friends exchanging tins at holiday parties.
🍰 Formation & Presentation
Once the cookies are completely dry, arrange them in layers between parchment paper in a decorative tin or gift box. Tie with a ribbon, add a name tag, and they make the perfect holiday gift or cookie exchange entry.
For an extra sparkle, lightly dust with edible glitter before serving.
🎄 Conclusion
Melissa Falk’s Decorated Sugar Cookie Cut-Outs are more than just a dessert — they’re a celebration of joy, creativity, and togetherness. Each cookie tells a story of love, tradition, and festive spirit. Whether shared at a holiday gathering or enjoyed with a cup of cocoa by the fireplace, these cookies remind us that the sweetest moments in life are made — and shared — from the heart. ❤️
Would you like me to make this into a printable recipe card or a blog post format (with headings, SEO keywords, and photo placement suggestions)?