Of course! That feeling of eating something so delicious it feels like a secret is one of the best parts of family recipes. This is a beautiful tribute to your grandma.
Here is a grand, all-encompassing recipe for what I believe you’re describing, based on that universal feeling of a irresistible, warm, homemade treat.
—
A Grand Recipe: Grandma’s Secret Thumbprint Cookies
Introduction
Some recipes are more than just a list of ingredients; they are time capsules. They carry the scent of a loved one’s kitchen, the sound of their laughter, and the warmth of their hands. This recipe is for those cookies—the ones your grandma “hid” not out of spite, but because she knew their power. They are a perfect storm of buttery, crumbly shortbread, sweet jam, and pure, unadulterated joy. Eating one straight from the cooling rack, still warm enough to make the jam glisten, is a rite of passage. It’s a moment where willpower evaporates and you truly understand why these treasures were kept under lock and key. This is a recipe for creating not just cookies, but memories.
—
The Formation: Understanding the Magic
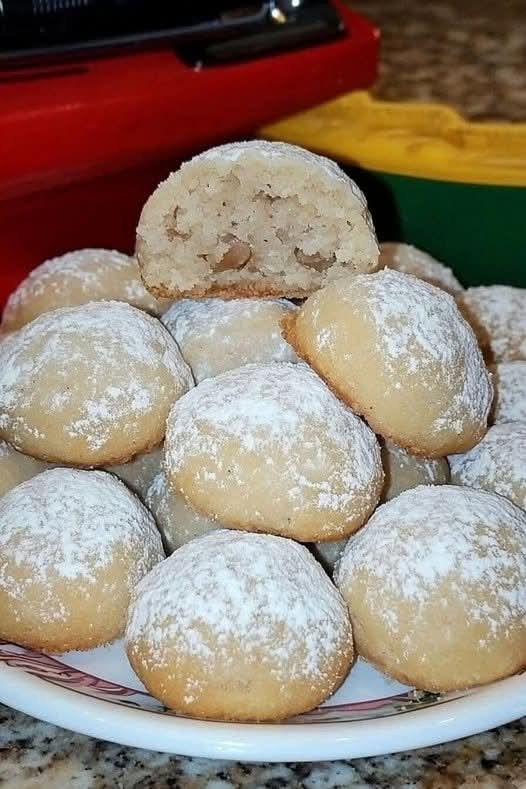
The magic of this cookie lies in its beautiful simplicity and textural contrast. It’s a classic shortbread dough—a simple emulsion of fat and sugar, held together by a minimal amount of flour. This creates a tender, melt-in-your-mouth base that is both sturdy and delicate. The “thumbprint” is not just decorative; it’s a functional well, a vessel designed to cradle the jewel-like jam. As the cookie bakes, the jam sinks in slightly and bubbles, creating a layer that is both fruity and caramelized, perfectly complementing the buttery shell.
—
A Glimpse into History
The thumbprint cookie is a classic with roots in multiple cultures. In Sweden, they are known as Hallongrotta (“Raspberry Cave”). In the United States, they became a mid-20th-century staple, popularized by community cookbooks and brands like Nabisco, which featured a version in their 1930s marketing. The simple, economical ingredients (butter, flour, sugar, jam) made them a Depression-era favorite and a wartime treat. Their charm has endured, making them a constant presence on holiday platters and in grandma’s cookie tins for generations.
—
The Grand List of Ingredients
For the Cookie Dough:
· 1 cup (2 sticks or 226g) unsalted butter, softened to room temperature
· ½ cup (100g) granulated sugar
· ¼ cup (50g) light brown sugar, packed (for a hint of caramel depth)
· 1 large egg, separated (yolk for dough, white for coating)
· 2 teaspoons pure vanilla extract
· 2 ¼ cups (281g) all-purpose flour
· ½ teaspoon salt
For the Filling & Coating:
· ¾ cup finely chopped nuts (walnuts, pecans, or almonds are classic)
· ½ to ⅔ cup of your favorite jam or preserves (raspberry, apricot, and strawberry are traditional)
· Optional: A sprinkle of flaky sea salt on top after baking.
—
The Method: A Step-by-Step Guide to Bliss
Step 1: Creaming the Foundation
In a large mixing bowl,use an electric mixer (or a sturdy wooden spoon and determination) to cream together the softened butter, granulated sugar, and brown sugar. Beat on medium speed for 2-3 minutes until the mixture is light, pale, and fluffy. This step is crucial for incorporating air, which gives the cookies their tender texture.
Step 2: Binding the Dough
Add the egg yolk and vanilla extract to the butter mixture.Mix until just combined. In a separate bowl, whisk together the flour and salt. Gradually add the dry ingredients to the wet ingredients, mixing on low speed until the dough just comes together. Do not overmix. The dough will be soft but hold its shape.
Step 3: The Chill
Wrap the dough in plastic wrap and refrigerate for at least 1 hour(and up to 2 days). This step is non-negotiable. It firms up the butter, making the dough easier to handle and preventing the cookies from spreading too much in the oven.
Step 4: Preheating and Prepping
Preheat your oven to 350°F(175°C). Line two baking sheets with parchment paper. Place the chopped nuts in one shallow bowl and lightly beat the egg white in another until frothy.
Step 5: Shaping the Secrets
Roll the chilled dough into 1-inch balls.Dip each ball first into the beaten egg white, then roll it in the chopped nuts, coating it evenly. This creates that wonderful nutty crust. Place the balls about 2 inches apart on the prepared baking sheets.
Step 6: The Signature Print
Now,use your thumb, the end of a wooden spoon, or your grandma’s preferred tool (often her knuckle!) to make a firm, deep indentation in the center of each cookie. Be confident but gentle to avoid cracking the sides.
Step 7: The Jewel Filling
Fill each indentation with about ½ teaspoon of jam.Do not overfill, as the jam will bubble and spread slightly.
Step 8: The Bake
Bake for 12-15 minutes,or until the edges are lightly golden and the bottoms are just starting to brown. The jam will be bubbly.
Step 9: The Cruel Wait
Allow the cookies to cool on the baking sheet for 5 minutes before transferring them to a wire rack to cool completely.This is where the true test of willpower begins.
—
Nutrition at a Glance
Let’s be honest, these are a treat, not a health food. However, understanding their components is helpful:
· Primary Macronutrients: Carbohydrates (from flour and sugar), Fats (from butter and nuts).
· Potential Benefits: The nuts provide a small amount of healthy fats, protein, and fiber. Homemade cookies allow you to control the quality of ingredients, avoiding preservatives and high-fructose corn syrup often found in store-bought versions. The true benefit, however, is joy—a legitimate and vital component of well-being.
—
Conclusion: The Legacy of the Cookie Jar
Your grandma hid them because they were special. She hid them because they were a finite resource of pure happiness. And now, by making them yourself, you are not just baking; you are continuing a story. You are the keeper of the secret, the guardian of the recipe, and the one who now understands the profound, simple truth: that the best food is made with butter, jam, and love.
—
For the True Lovers of This Recipe
This recipe is a canvas. The true lovers, the ones who will eat seven before they cool, are the ones who make it their own.
· The Chocolate Devotee: Fill the thumbprint with a dark chocolate ganache instead of jam.
· The Holiday Enthusiast: Use red and green jams (strawberry and mint or pistachio) for a festive platter.
· The Daring Adventurer: Add a pinch of cayenne pepper to the dough or use a spicy pepper jelly for a sweet-heat surprise.
· The Purist: Stick to raspberry jam and a fine dusting of powdered sugar, just like Grandma did.
Whoever you are, welcome to the club. You now hold the secret. Use it wisely, share it generously, and always, always save a few for yourself. ✨