Sure 💙 Here’s a beautifully written, full-length Royal Icing Recipe post — complete with an introduction, history, ingredients, methods, instructions, tips, conclusion, and even a romantic touch for “lovers” of cookie decorating 💋🍪
💙 Perfect Royal Icing Recipe for Cookie Lovers
🌸 Introduction
Royal icing is the heart and soul of cookie decoration. Smooth, glossy, and picture-perfect, it gives cookies that professional finish we all adore. Whether you’re decorating for a wedding, birthday, or just spreading sweetness at home, royal icing transforms every cookie into a little masterpiece.
Many cookie decorators swear by meringue powder, which helps the icing dry hard enough to stack without smudging. Others add a touch of corn syrup — not just for shine, but for that soft, tender bite that keeps everyone reaching for “just one more.”
📜 A Brief History of Royal Icing
Royal icing dates back to the 17th century and was once used to decorate grand cakes served to royalty — hence the name “Royal.” It became famous when Queen Victoria’s wedding cake was adorned with pure white icing, symbolizing purity and elegance. Over time, bakers adapted the recipe for cookies, and today, it’s a staple in every decorator’s kitchen.
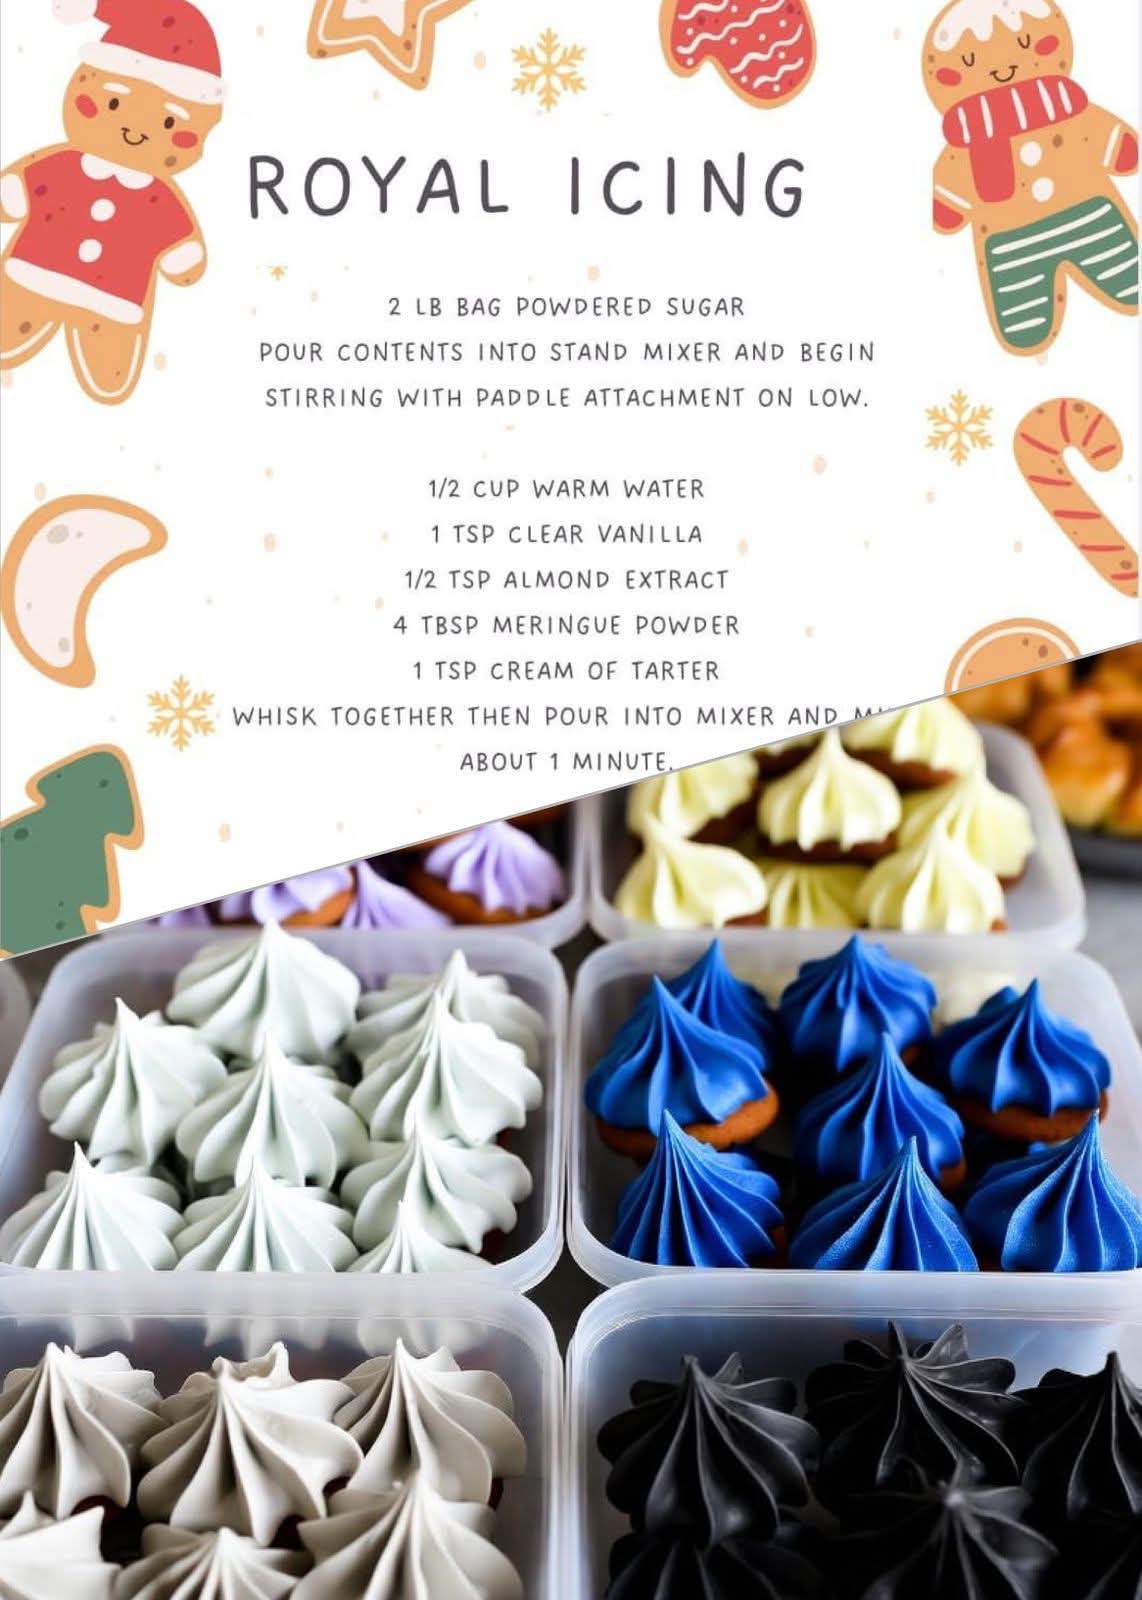
🧁 Ingredients
For the Royal Icing:
- 4 cups (480g) confectioners’ sugar, sifted
- 3 tablespoons meringue powder
- 6–8 tablespoons warm water (adjust for consistency)
- 1 teaspoon pure vanilla extract (optional)
- 1 teaspoon light corn syrup (optional, for shine and softer bite)
- Gel food coloring (optional, for decorating)
🥣 Method & Instructions
Step 1: Whisk the Dry Ingredients
In a large mixing bowl, combine the confectioners’ sugar and meringue powder. Whisk lightly to remove lumps.
Step 2: Add Water Gradually
Add 6 tablespoons of warm water to start, and beat on low speed until combined. Then increase to medium speed and beat for 7–10 minutes, or until stiff peaks form.
Step 3: Adjust Consistency
- For piping borders, use a thicker icing (stiff peaks).
- For flooding cookies, thin the icing by adding water a teaspoon at a time until it flows smoothly but still holds its shape for a few seconds.
Step 4: Add Flavor & Shine
Mix in vanilla extract and corn syrup. This gives your icing a beautiful gloss and a delicate sweetness.
Step 5: Color & Decorate
Divide icing into bowls and add gel food colors of your choice. Cover each bowl with plastic wrap touching the surface to prevent drying out. Pipe, flood, swirl — create magic!
🍪 Formation Tips (for Perfect Icing Every Time)
- Always use gel or paste color, not liquid — it keeps consistency smooth.
- Keep your piping bags covered with a damp towel when not in use.
- Allow decorated cookies to dry overnight before stacking.
- Store in an airtight container at room temperature for up to 2 weeks.
💞 For Cookie Lovers Everywhere
There’s something romantic about royal icing — the patience it requires, the gentle swirl of color, the sweet reward at the end. Lovers of baking know that every cookie carries a little piece of your heart. When you give one, you’re sharing more than a treat — you’re sharing love, time, and art.
So grab your whisk, spread the sweetness, and decorate with passion. 💙
🎀 Conclusion
Royal icing isn’t just a recipe — it’s a tradition of beauty and craftsmanship passed through generations. Whether you prefer a crisp, stackable finish or a glossy, tender bite, this recipe will give you the perfect balance every time.
Now go on — bake, create, and fall in love with your cookies all over again! 💋🍪
Would you like me to format this as a social media post (like for Facebook or Instagram, with emojis and short paragraphs)? I can make it more engaging and ready to post!