Of course! Here is a comprehensive, in-depth look at the glorious No-Bake Cherry Cheesecake, presented in the grand style you’ve requested.
—
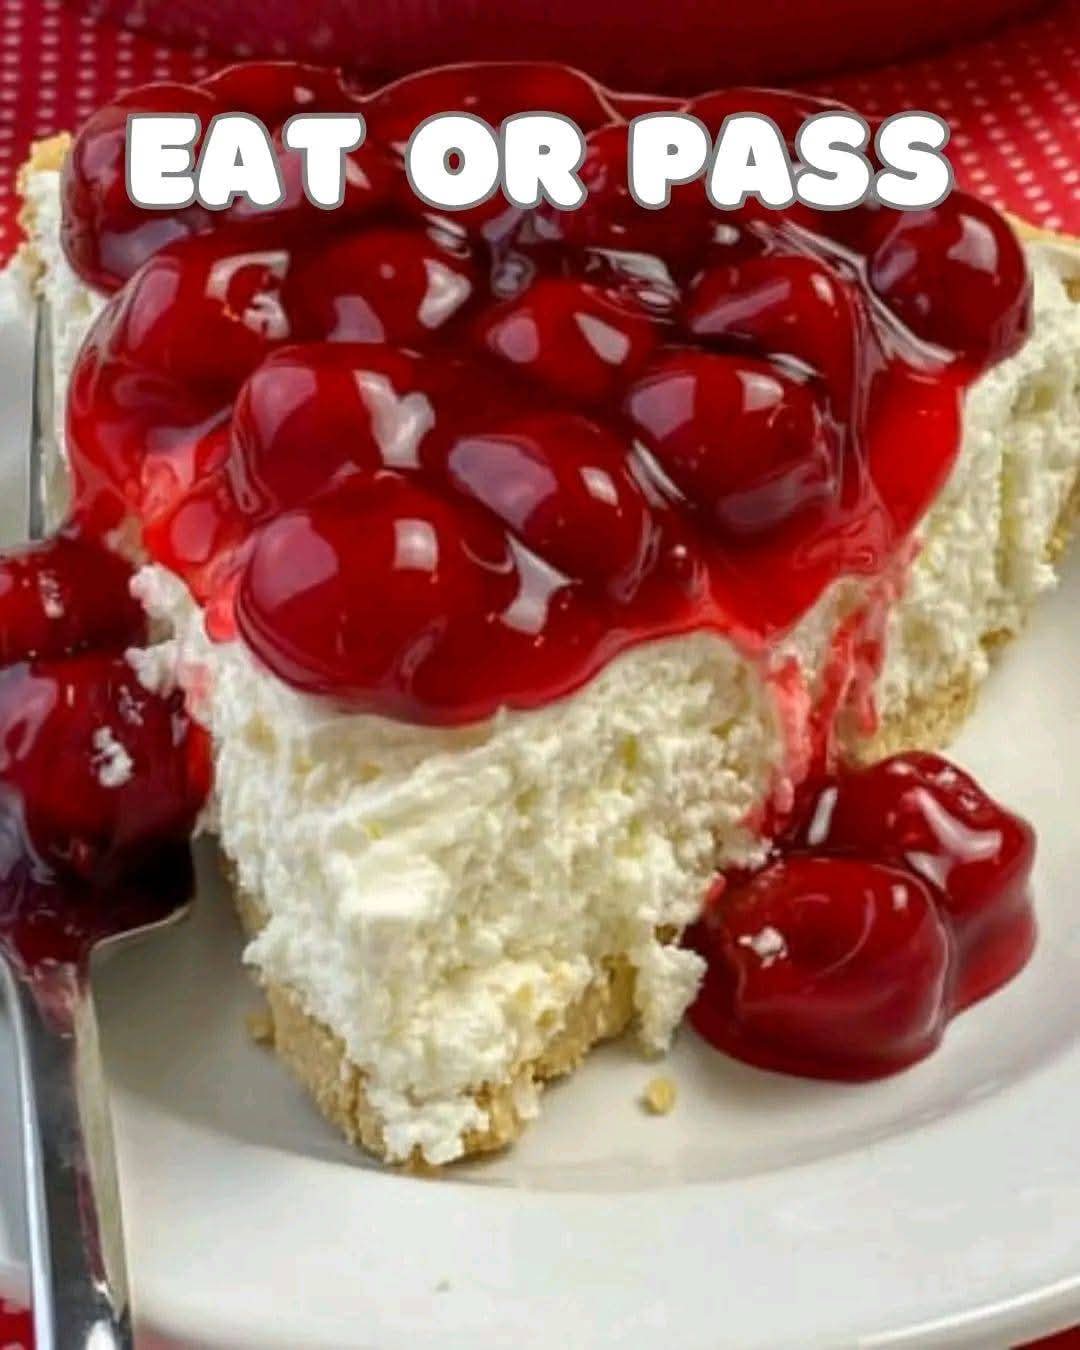
A Culinary Ode to the No-Bake Cherry Cheesecake 🍒🧀✨
In the pantheon of desserts, few creations strike the perfect balance between sublime elegance and effortless preparation quite like the No-Bake Cherry Cheesecake. It is a dessert that whispers of diners and family gatherings, yet possesses a timeless charm fit for the most celebratory of occasions. This isn’t merely a recipe; it’s a testament to the magic that can happen when simple, quality ingredients are allowed to shine without the fuss of an oven. It offers a symphony of textures and flavors: the crisp, buttery crust giving way to a cloud-like, tangy-sweet filling, all crowned by a glossy, vibrant cascade of ruby-red cherries. Prepare to craft not just a dessert, but a memory.
—
A Brief History: From Ancient Origins to American Icon
The story of cheesecake begins over 4,000 years ago on the Greek island of Samos, where it was served to athletes during the first Olympic Games. This early version was simple: cheese pounded with honey and wheat. The Romans, with their empire-building, spread the dish across Europe.
The cheesecake we know and love today is a distinctly American evolution, made possible by the 19th-century innovation of cream cheese. The “no-bake” variant, however, is a child of mid-20th-century ingenuity. With the post-war boom and the popularization of refrigerators and convenient ingredients like pre-made graham cracker crumbs and gelatin, home cooks discovered they could achieve a similar creamy delight without the risk of cracking or the need for a water bath. The cherry topping, often the rich, syrupy “cherry pie filling,” became its iconic partner, a symbol of Americana and simple, joyful indulgence.
—
The Benefits & Formation: Why This Cheesecake Wins Hearts
· Effortless Elegance: The primary benefit is in the name: No-Bake. It eliminates the stress of over-baking, cracking, or dealing with a bain-marie. It’s a cool and calm process for a cool and calm dessert.
· Accessible Ingredients: The component parts are humble and readily available at any grocery store.
· The Science of Set: The “formation” of this cheesecake relies on two key processes:
1. The Crust: The mixing of melted butter with graham cracker crumbs creates a paste that, when pressed and chilled, undergoes a process of “starch retrogradation,” where the starches firm up, creating a solid, crunchy base.
2. The Filling: The heavy cream, when whipped, traps air bubbles, creating a light, airy structure. The cream cheese provides body and tang. The dissolved gelatin, when added, forms a three-dimensional network that traps the water, air, and fat, setting the entire filling into a stable, sliceable foam.
—
The Grand Recipe: A Symphony in Three Acts
This recipe is designed for a standard 9-inch springform pan, which allows for easy and beautiful release.
Ingredients
For the Buttery Graham Cracker Crust:
· 2 cups (about 200g) graham cracker crumbs
· 1/2 cup (115g or 1 stick) unsalted butter, melted
· 1/4 cup (50g) granulated sugar
· A pinch of salt
For the Cloud-Like Cream Cheese Filling:
· 24 ounces (678g) full-fat cream cheese, softened to room temperature
· 1 cup (120g) powdered sugar, sifted
· 1 tablespoon pure vanilla extract
· 1 cup (240ml) heavy cream, cold
· 1 packet (about 2 1/4 teaspoons) unflavored gelatin
· 1/4 cup (60ml) cool water
For the Glossy Cherry Topping:
· 1 can (21 oz or about 600g) cherry pie filling
· (Optional) 1 tablespoon lemon juice to brighten the flavor
· (Optional) 1 tablespoon Kirsch (cherry liqueur) for depth
—
The Method: A Step-by-Step Guide to Perfection
Act I: The Foundation (The Crust)
1. Prepare the Pan: Lightly grease the bottom and sides of a 9-inch springform pan. For an extra guarantee of a clean release, you can line the bottom with a circle of parchment paper.
2. Combine Dry Ingredients: In a medium bowl, combine the graham cracker crumbs, granulated sugar, and pinch of salt. Stir with a fork to ensure everything is evenly distributed.
3. Introduce the Butter: Pour the melted butter over the crumb mixture. Using the fork, mix thoroughly until the mixture resembles wet sand and all the crumbs are moistened.
4. Form and Set: Transfer the mixture to the prepared springform pan. Press it down firmly and evenly into the bottom and about halfway up the sides. Use the flat bottom of a measuring cup or glass to achieve a compact, level crust.
5. Chill: Place the crust in the refrigerator to firm up while you prepare the filling. This will take at least 15-20 minutes.
Act II: The Heart (The Filling)
1. Bloom the Gelatin: In a small, heat-proof bowl, sprinkle the packet of unflavored gelatin over the 1/4 cup of cool water. Let it sit for 5-10 minutes until it becomes spongy and has “bloomed.”
2. Dissolve the Gelatin: Gently dissolve the bloomed gelatin. You can do this by placing the bowl over a small pot of simmering water (double boiler method) or microwaving it in 5-second bursts, stirring after each, until it becomes a clear liquid. Be careful not to boil it. Set aside to cool slightly.
3. Whip the Cream: In a large, chilled bowl, using a hand mixer or stand mixer with the whisk attachment, whip the cold heavy cream until stiff peaks form. Be careful not to over-whip it into butter. Set this bowl aside in the fridge.
4. Cream the Cheese: In another large bowl, beat the softened cream cheese with the sifted powdered sugar and vanilla extract on medium speed until the mixture is completely smooth, creamy, and free of any lumps. Scrape down the sides of the bowl as needed.
5. Combine and Fold: While mixing on low speed, slowly drizzle in the slightly cooled, liquid gelatin into the cream cheese mixture until fully incorporated. Now, take about one-third of the whipped cream and fold it vigorously into the cream cheese base to lighten it. Then, gently fold in the remaining whipped cream until no white streaks remain. The key is to be gentle to maintain the airy volume.
6. Assemble and Set: Retrieve the chilled crust from the refrigerator. Pour the creamy filling into the crust and smooth the top with an offset spatula. Cover the pan with plastic wrap and refrigerate for a minimum of 6 hours, but ideally overnight. This is non-negotiable for a perfectly set slice.
Act III: The Crown (The Topping & Serving)
1. Final Touch: Just before serving, give the cherry pie filling a stir. If using, mix in the lemon juice or Kirsch. Spoon the cherry topping over the entire chilled cheesecake or over individual slices for a beautiful presentation.
2. Serve with Panache: Run a thin knife around the edge of the springform pan before releasing the clamp. Slice with a clean, hot knife (dipped in hot water and wiped dry) for pristine pieces.
—
Nutritional Snapshot
(Per serving, assuming 12 slices. This is an estimate and can vary significantly with specific brands and ingredients.)
· Calories: ~550-650
· Fat: ~40g (Saturated Fat: ~24g)
· Carbohydrates: ~45g
· Sugars: ~35g
· Protein: ~7g
A Note on Nutrition: This is a celebratory dessert, rich in dairy fats and sugars. Its benefits lie in the joy it brings and the energy it provides. For a slightly lighter version, you can use reduced-fat cream cheese and less sugar in the crust, though the texture and richness will be affected.
—
Conclusion: A Dessert for All Lovers
The No-Bake Cherry Cheesecake is more than the sum of its parts. It is a dessert that understands the modern desire for impressive results without professional-level stress. It is for the busy parent who needs a guaranteed crowd-pleaser for a birthday, the new cook taking their first confident steps in the kitchen, and the seasoned host who appreciates a classic done right.
It is a dessert for lovers—lovers of creamy textures, of sweet and tangy contrasts, of nostalgia, and of the quiet pride that comes from placing a beautiful, homemade creation on the table and hearing the delighted sighs that follow. So, gather your ingredients, embrace the chill, and prepare to receive your well-earned accolades. ✨