Homemade Maple Donut Bars: Sweet, Soft & Glazed to Perfection
Introduction:
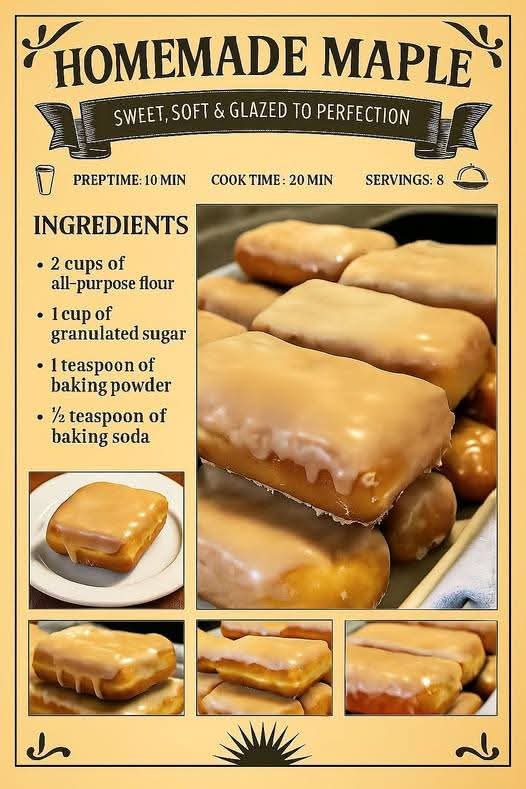
There’s something irresistible about the combination of soft, fluffy donuts paired with the rich, caramel-like sweetness of maple glaze. If you’re a fan of those melt-in-your-mouth treats you find at a classic bakery, then this homemade Maple Donut Bar recipe is going to become your new favorite go-to. These donuts are a hybrid between a cake donut and a traditional fried bar, making them tender on the inside with just the right amount of crunch on the outside.
The real magic happens with the maple glaze—it’s the perfect balance of sweet and maple-flavored goodness. Whether you’re serving them at a family breakfast, as an afternoon snack with coffee, or as a fun weekend project, these donuts are sure to impress!
Ingredients:
For the Donut Bars:
- 2 cups all-purpose flour
- 1 cup granulated sugar
- 1 teaspoon baking powder
- ½ teaspoon baking soda
- ½ teaspoon salt
- ¾ cup buttermilk
- 2 large eggs
- ¼ cup melted butter
- 1 teaspoon vanilla extract
- Vegetable oil, for frying
For the Maple Glaze:
- 1½ cups powdered sugar
- 3 tablespoons pure maple syrup (preferably Grade A)
- 1 tablespoon milk (or more if needed to adjust consistency)
- ½ teaspoon maple extract (optional for a stronger flavor)
Instructions:
Step 1: Make the Donut Dough
- In a large mixing bowl, whisk together the dry ingredients: flour, sugar, baking powder, baking soda, and salt. This ensures they’re evenly distributed.
- In another bowl, combine the wet ingredients: buttermilk, eggs, melted butter, and vanilla extract. Whisk until fully blended.
- Slowly pour the wet mixture into the dry ingredients and stir gently until just combined. Be careful not to overmix, or the dough can become tough.
- Cover the dough with a clean towel and let it rest for 10 minutes. This resting time allows the baking soda and powder to activate and helps the dough to rise.
Step 2: Shape the Donuts
- Lightly flour a clean work surface and roll the dough out to about ½-inch thickness.
- Using a knife or dough cutter, cut the dough into rectangles, about 3 inches long and 1½ inches wide, to form donut bars.
- Transfer the cut donut bars to a parchment-lined tray and refrigerate them for 10–15 minutes to help them firm up before frying.
Step 3: Fry the Donuts
- In a large, heavy-bottomed pot, heat 2–3 inches of vegetable oil to 350°F (175°C). You can use a thermometer to ensure the oil reaches the right temperature.
- Fry the donuts in batches, making sure not to overcrowd the pot. Fry each side for 1–2 minutes or until golden brown and crispy. Use a slotted spoon to carefully remove the donuts and let them drain on paper towels.
Step 4: Prepare the Maple Glaze
- While the donuts are cooling slightly, prepare the maple glaze. In a bowl, whisk together the powdered sugar, maple syrup, and milk. You want it to be smooth and drizzle easily, but not too runny. If needed, add more milk to adjust the consistency.
- For an extra burst of maple flavor, you can add a ½ teaspoon of maple extract.
Step 5: Glaze the Donuts
- While the donuts are still warm, dip each one into the maple glaze, coating it evenly on all sides.
- Let the excess glaze drip off, then transfer the glazed donuts to a wire rack to set. Allow the glaze to firm up before serving.
History of Donuts & Maple Glaze:
The humble donut has been a beloved treat for centuries, with origins tracing back to the Dutch settlers in America in the 17th century. The classic fried doughnut was originally a recipe for “olykoeks,” which translates to “oily cakes.” These early versions were often filled with fruit or sweet spices.
It wasn’t until the late 19th century that the modern shape of the donut, complete with a hole in the middle, became popular—thanks in part to the invention of the first donut cutter. In the early 20th century, donuts became a staple in American culture, especially with the rise of the donut shop and later, the ubiquitous chain coffee shops we know today.
Maple syrup has its own fascinating history, dating back to the Indigenous peoples of North America, who first discovered how to harvest and boil down sap from maple trees to make syrup. The pairing of maple syrup with donuts is a match made in heaven, as the syrupy sweetness perfectly complements the rich, fried texture of the donut, creating a timeless treat that’s enjoyed worldwide.
Methods for Perfecting Your Maple Donut Bars:
- Dough Consistency: If the dough feels too sticky, add a little more flour until it’s manageable. But remember, the dough should still be soft.
- Oil Temperature: Keep an eye on the temperature of the oil while frying. If the oil is too hot, the donuts will cook too quickly on the outside and remain raw inside. If it’s too cool, the donuts will absorb too much oil and become greasy.
- Chill the Dough: Chilling the donut bars before frying helps them hold their shape and ensures even cooking.
- Glaze Application: For an extra layer of flavor, double dip the donuts in glaze. It creates a thick, decadent coating!
Conclusion:
These Homemade Maple Donut Bars are the perfect balance of sweetness, texture, and flavor. With a soft, fluffy interior and a crispy exterior, they’re sure to delight anyone who takes a bite. The maple glaze takes them to the next level—rich, silky, and full of deep maple flavor.
Whether you’re an experienced baker or someone new to frying, this recipe offers a delicious way to enjoy a beloved treat from scratch. Serve these donut bars at your next brunch or special occasion, and watch them disappear in a flash! The joy of enjoying a homemade donut with a perfectly sweet glaze is hard to beat.
For the Lovers of Maple and Donuts:
If you adore maple-flavored treats and donuts in any form, this recipe is a must-try. The maple glaze brings a warm, comforting sweetness that makes these bars more than just donuts—they become a celebration of flavors that melt in your mouth. They’re perfect for cozy mornings, special occasions, or even just because you’re craving something sweet and homemade. Maple Donut Bars are the kind of treat you’ll want to share with loved ones, or perhaps, keep to yourself and savor each bite slowly.
Enjoy your homemade treat and the memories that come with it!