Here’s a big, full-style version of your Reese’s Swirl Cool Whip and Pudding Frosting recipe — with history, methods, introduction, and a lovely conclusion for all dessert lovers! 🍫🥜✨
Reese’s Swirl Cool Whip and Pudding Frosting
Introduction
If you are a fan of creamy, dreamy frostings that bring together the indulgent taste of chocolate, the rich nuttiness of peanut butter, and the fluffy sweetness of Cool Whip, this recipe will win your heart. Reese’s Swirl Cool Whip and Pudding Frosting is not just a topping—it’s an experience. Perfect for cakes, cupcakes, trifles, or even as a decadent fruit dip, this frosting balances the velvety smoothness of pudding with the playful crunch of Reese’s Peanut Butter Cups.
This dessert is inspired by the classic pairing of peanut butter and chocolate that dates back decades. Reese’s Peanut Butter Cups were invented in 1928 by H.B. Reese, who worked as a dairy farmer and shipping foreman for Milton Hershey. Combining his love for chocolate and peanut butter, he created one of the most beloved candy treats in America. Today, we celebrate that same perfect pairing with this frosting, adding Cool Whip for lightness and powdered sugar for sweetness.
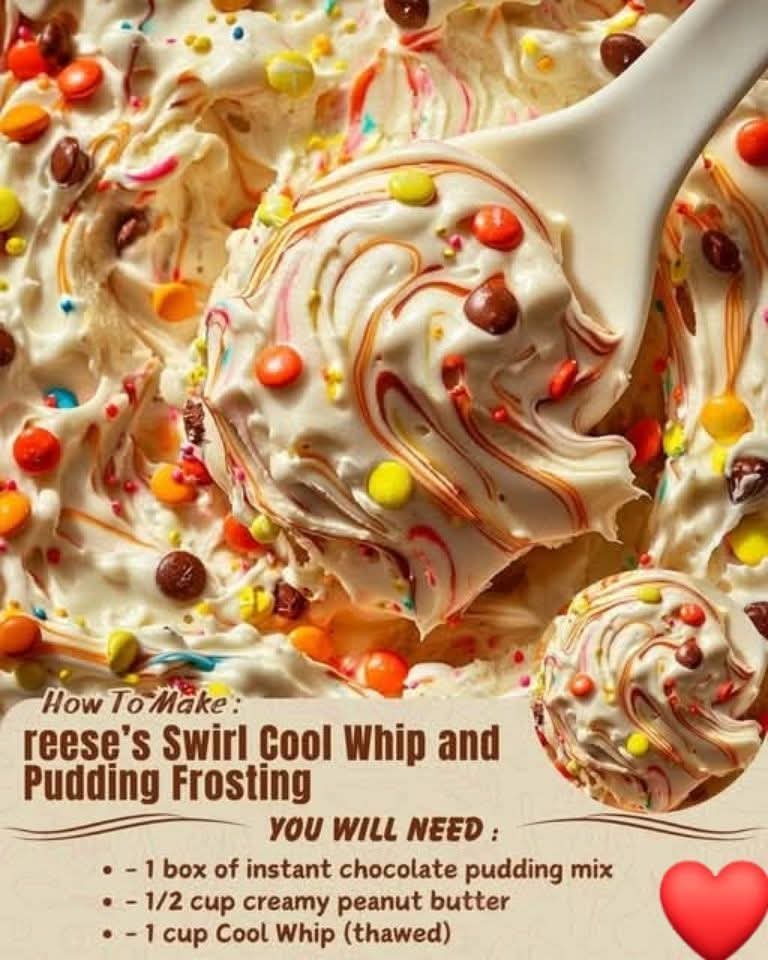
Ingredients
- 1 box (3.9 oz) instant chocolate pudding mix
- 2 cups cold milk
- 1 cup Cool Whip, thawed
- 1/2 cup creamy peanut butter
- 1/4 cup powdered sugar
- 1/4 cup crushed Reese’s Peanut Butter Cups (for garnish)
Instructions & Method
Step 1 – Prepare the Pudding
- In a medium mixing bowl, whisk the chocolate pudding mix with 2 cups of cold milk.
- Stir until smooth and creamy.
- Let the pudding rest for about 5 minutes to thicken.
Step 2 – Make the Peanut Butter Cream
- In a separate bowl, combine creamy peanut butter and powdered sugar.
- Mix until light and smooth, forming a sweet peanut butter base.
Step 3 – Fold in the Cool Whip
- Gently fold the Cool Whip into the peanut butter mixture.
- Stir carefully so the mixture stays fluffy and airy.
Step 4 – Swirl in the Chocolate Pudding
- Add the prepared chocolate pudding to the peanut butter-Cool Whip mixture.
- Gently fold until the swirl effect appears—don’t overmix.
Step 5 – Chill and Set
- Cover the bowl with plastic wrap.
- Refrigerate for at least 30 minutes to let the frosting firm up.
Step 6 – Serve and Garnish
- Spread over cooled cakes, cupcakes, or brownies.
- Sprinkle crushed Reese’s Peanut Butter Cups on top for texture and flavor.
- Alternatively, serve as a dip for strawberries, bananas, or graham crackers.
History & Formation
This frosting is a modern twist on the classic American buttercream. Instead of relying solely on butter and sugar, this version incorporates instant pudding and Cool Whip for a smoother, silkier consistency. The “swirl” technique comes from layering chocolate pudding with peanut butter cream—a nod to Reese’s iconic flavor balance.
The combination of Cool Whip and pudding became popular in the mid-20th century when households embraced quick, no-bake desserts. Adding Reese’s to the mix makes it a nostalgic yet indulgent treat for candy lovers.
For Lovers of Sweetness ❤️
- Chocolate lovers will adore the richness of the pudding base.
- Peanut butter lovers will fall for the creamy, nutty swirl.
- Dessert lovers will love how versatile this frosting is—whether spooned, spread, or dipped.
- Romantic gesture? Spread this frosting on heart-shaped cakes or serve with strawberries for a sweet date-night surprise.
Conclusion
Reese’s Swirl Cool Whip and Pudding Frosting is more than a topping—it’s a celebration of flavor. Each spoonful brings nostalgia, indulgence, and comfort. Whether you’re making this for family gatherings, birthdays, or just because you crave something sweet, this frosting is guaranteed to impress and satisfy.
So go ahead—grab a spoon, swirl it on thick, and enjoy the magic of chocolate and peanut butter together. 🍫🥜✨
Would you like me to expand this into a layered cake recipe that uses this frosting between the layers, or keep it as just a versatile frosting/dip guide?