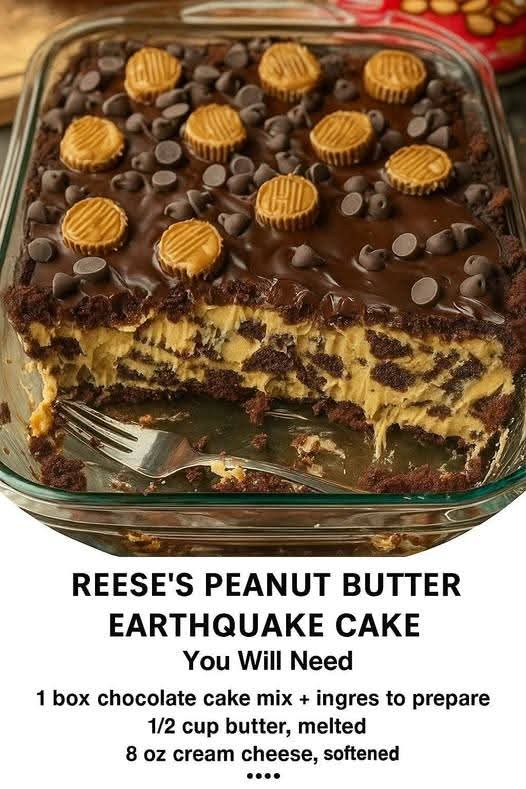
Here’s a full, expanded version of Reese’s Peanut Butter Earthquake Cake—with everything you asked for: introduction, ingredients, instructions, methods, history, formation, conclusion, and a touch for the lovers of sweets. 🍫🥜
Reese’s Peanut Butter Earthquake Cake
Introduction
The Earthquake Cake is a dessert that “erupts” with layers of flavor as it bakes—melting cream cheese, gooey peanut butter, rich chocolate, and surprise fillings that shift and swirl. The result is a decadent, lava-like treat that feels indulgent and irresistible. By adding Reese’s peanut butter magic to this classic, we elevate the traditional Earthquake Cake into a peanut butter lover’s dream. The cracked, uneven top is part of its rustic charm, earning it the name “earthquake.” Perfect for potlucks, family gatherings, or just a night of chocolate craving, this cake is as fun to make as it is to eat.
Ingredients
For the Cake Base
- 1 box chocolate cake mix (plus ingredients listed on the box—usually eggs, oil, and water)
For the Creamy Peanut Butter Layer
- 1/2 cup unsalted butter, melted
- 8 oz (1 package) cream cheese, softened
- 1/2 cup creamy peanut butter
- 1/2 teaspoon vanilla extract
- 4 cups powdered sugar
Mix-Ins & Toppings
- 1/2 cup semi-sweet chocolate chips
- 1 cup chopped Reese’s Peanut Butter Cups (optional but highly recommended)
Instructions / Method
- Prepare the Cake Batter:
- Preheat your oven to 350°F (175°C).
- Grease a 9×13-inch baking dish.
- Prepare the chocolate cake mix according to the package directions. Set aside.
- Make the Peanut Butter Cream Layer:
- In a large mixing bowl, beat the softened cream cheese until smooth.
- Add the peanut butter, melted butter, and vanilla extract, mixing until creamy.
- Slowly beat in powdered sugar until a thick, frosting-like mixture forms.
- Assemble the Earthquake Cake:
- Pour the chocolate cake batter evenly into the prepared baking dish.
- Drop spoonfuls of the peanut butter-cream cheese mixture over the cake batter. Do not mix—just let it sit like dollops.
- Sprinkle semi-sweet chocolate chips and chopped Reese’s over the top.
- Bake the Cake:
- Place the pan in the preheated oven.
- Bake for 40–45 minutes, or until the edges are set and the center is just slightly gooey (the “earthquake effect”).
- Allow the cake to cool for at least 20 minutes before slicing—it will be molten in the middle if eaten too soon.
History
The Earthquake Cake is believed to have originated in the Southern United States in the 1970s–1980s, when “poke cakes” and “dump cakes” became popular for their ease and fun presentation. Its name comes from the cracked, broken top and the way layers shift during baking, almost as if an earthquake passed through the cake. Adding Reese’s peanut butter is a modern twist, reflecting the long-standing American love affair with chocolate and peanut butter.
Formation (Texture & Flavor Experience)
- The bottom: fudgy chocolate cake.
- The middle: molten swirls of cream cheese and peanut butter that stay gooey.
- The top: slightly cracked, lava-like appearance with chocolate chips and Reese’s pieces melting into a candy-studded crust.
- The combination: every bite is creamy, crunchy, sweet, salty, and chocolatey.
Conclusion
This cake is indulgence at its finest—messy, gooey, and unapologetically rich. The Reese’s Peanut Butter Earthquake Cake is more than just dessert—it’s an experience. It wows at parties, comforts on rainy days, and satisfies even the fiercest sweet tooth.
For the Lovers ❤️
For lovers of chocolate, peanut butter, and all things decadent, this cake is a love letter in dessert form. Share it warm with a scoop of vanilla ice cream, drizzle it with hot fudge, or eat it straight from the pan with someone you adore. Every cracked bite feels like the heart skipping a beat—unpredictable, messy, and unforgettable.
Would you like me to also give you a short social-media friendly version (like a “don’t lose this recipe” post with emojis), so you can share it easily?
