Here’s your big, detailed recipe for Pastel Swirl Ice-Cream Sandwiches with everything you asked for: introduction, ingredients, instructions, methods, history, formation, conclusion, and even a touch of romance with “lovers.” 🍦💖
🌈 Pastel Swirl Ice-Cream Sandwiches (5 Ingredients, No-Churn Option)
✨ Introduction
Pastel Swirl Ice-Cream Sandwiches are the perfect marriage between nostalgia and artistry. Imagine soft, buttery cookies giving way to creamy vanilla ice cream, swirled with dreamy pastel chocolate ribbons—each bite feels like a carnival in your mouth. This recipe is quick, simple, and magical, requiring only five basic ingredients. With no-churn options available, you don’t need a fancy ice-cream maker—just creativity and a freezer. Loved by children, admired by adults, and adored by lovers who share sweet bites under summer skies, these sandwiches are freezer-ready treasures for every occasion.
🛒 Ingredients
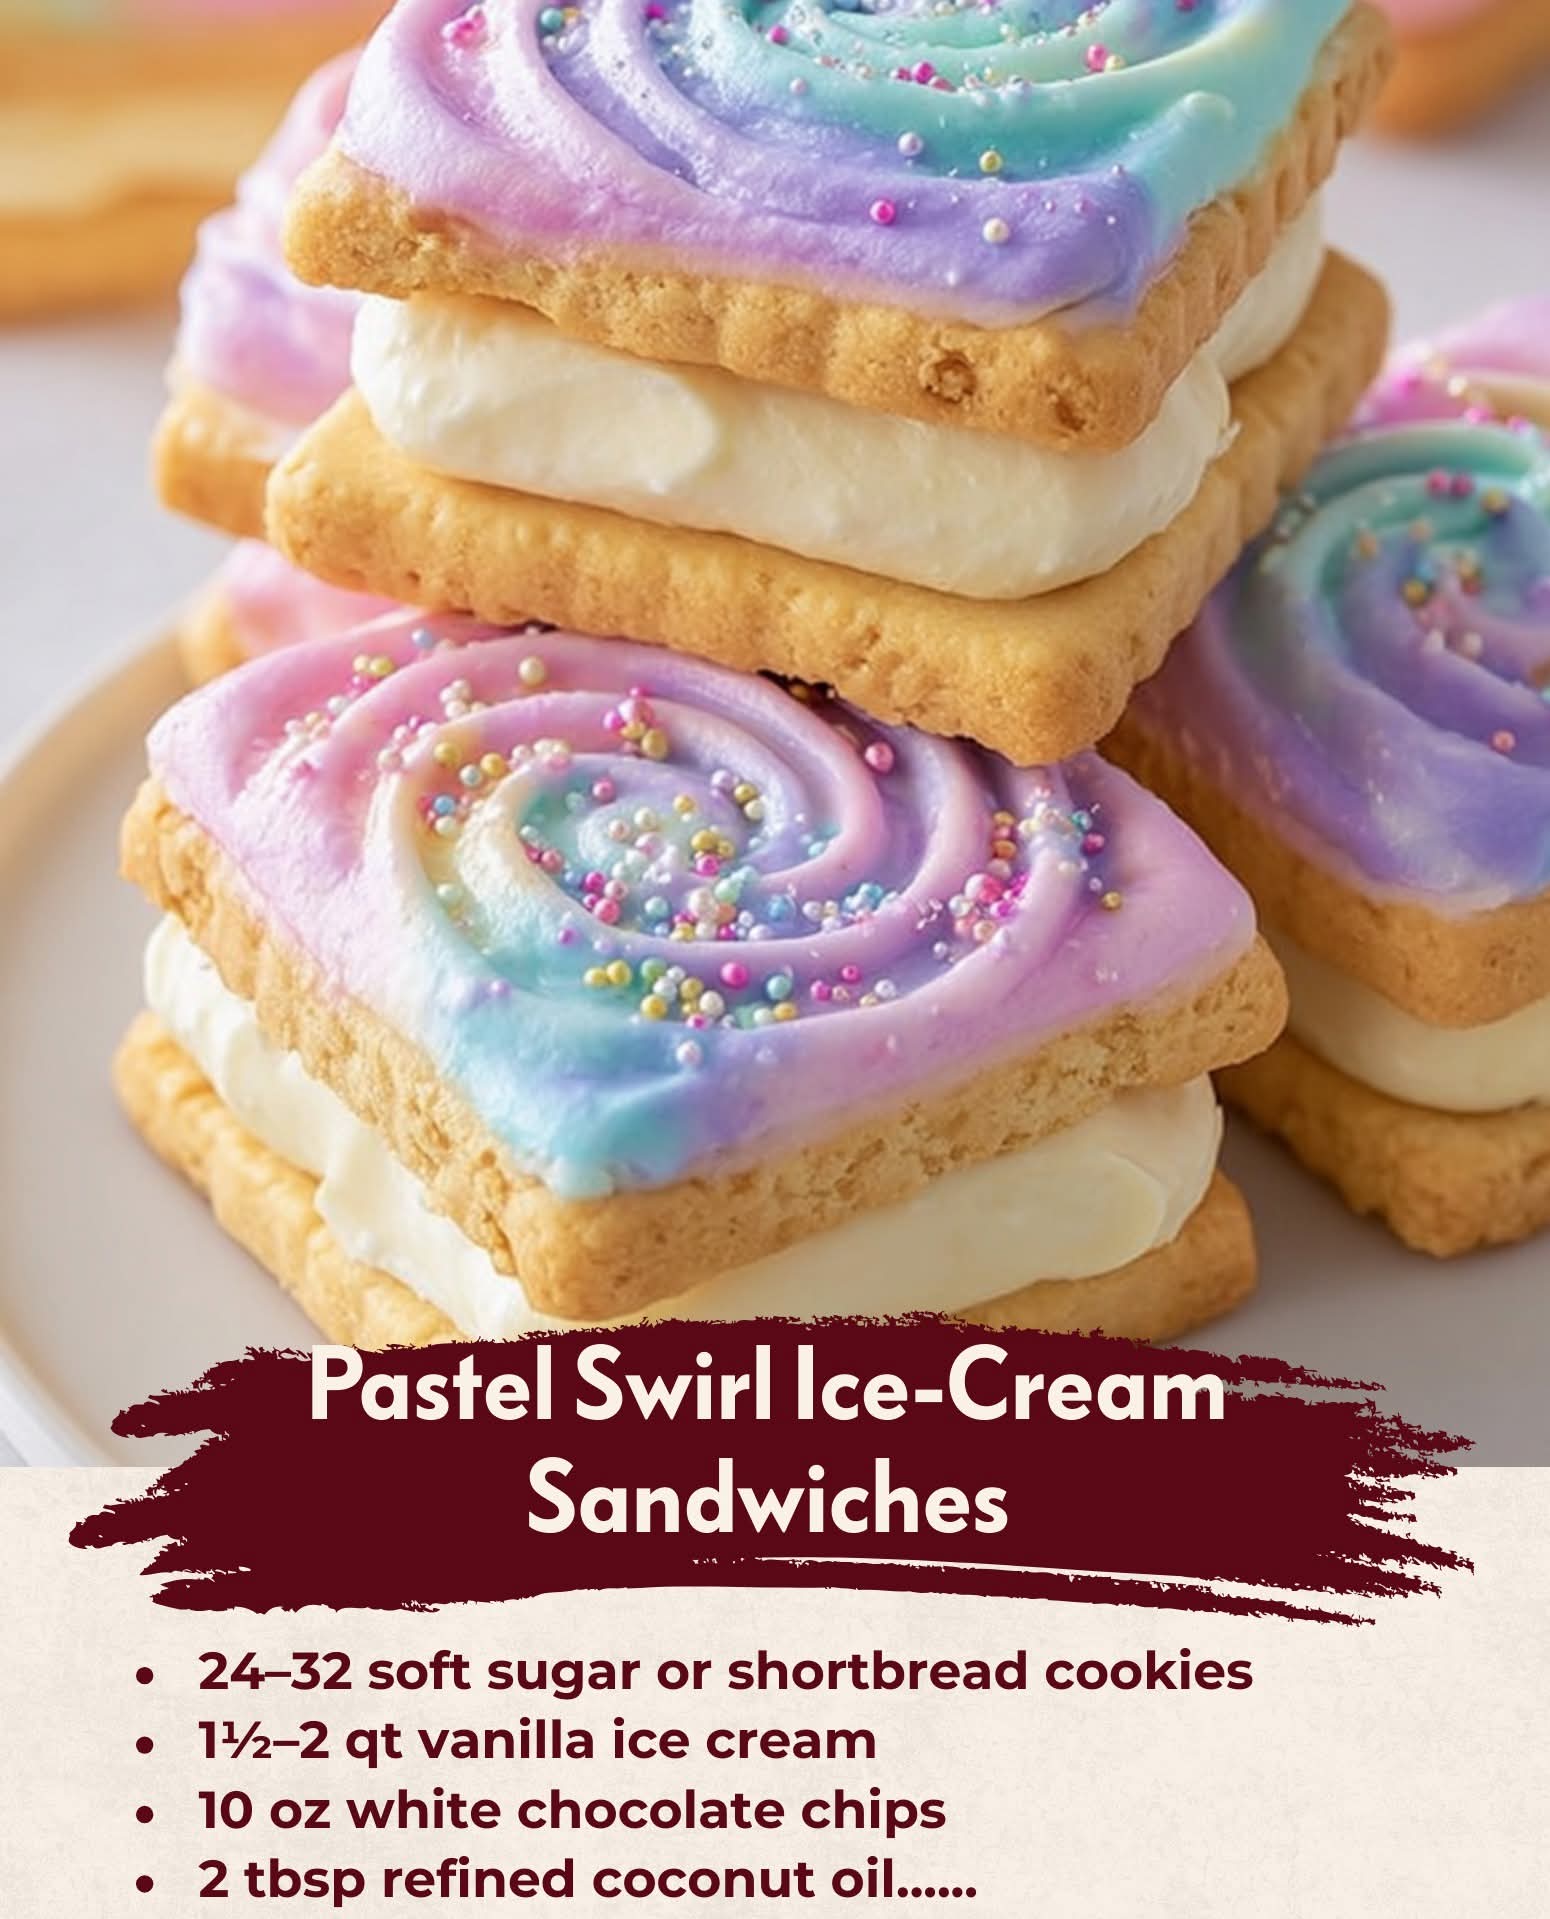
- 24–32 soft sugar cookies or shortbread cookies (square or round, store-bought or homemade)
- 1½–2 quarts vanilla ice cream, slightly softened (or homemade no-churn)
- 1½ cups white chocolate chips or candy melts
- Food coloring (pastel shades: pink, lavender, mint, sky blue, yellow, etc.)
- Optional: pastel sprinkles or edible glitter for extra magic ✨
👩🍳 Instructions & Methods
Step 1 – Prepare the Ice Cream Base
- If using store-bought vanilla ice cream, let it sit at room temperature for 5–10 minutes until scoopable but not melted.
- For a no-churn option, whip 2 cups heavy cream until stiff peaks form, fold in 1 can sweetened condensed milk, and stir in 1 tsp vanilla.
Step 2 – Create the Pastel Swirls
- Melt white chocolate in a microwave or double boiler until smooth.
- Divide into small bowls and tint each with a drop of food coloring to create pastel shades.
- Drizzle each color over parchment paper in random swirls, then drag a toothpick lightly to create marble effects. Freeze for 5 minutes to firm.
Step 3 – Swirl the Ice Cream
- Scoop softened ice cream into a large bowl.
- Break the pastel chocolate swirls into shards and fold gently into the ice cream.
- Transfer the mixture into a lined loaf pan, spread evenly, and freeze for at least 4 hours (or overnight) until scoopable but firm.
Step 4 – Assemble the Sandwiches
- Lay out cookies on a tray, flat side facing up.
- Place 1–2 scoops of pastel-swirled ice cream on one cookie.
- Gently press another cookie on top, twisting slightly to spread evenly.
- Optional: Roll edges in sprinkles or edible glitter for extra flair.
- Place sandwiches on a tray and freeze for 1–2 hours until firm.
Step 5 – Store and Serve
- Wrap each sandwich individually in parchment or plastic wrap for easy freezer storage.
- They last up to 2 weeks in the freezer—if they aren’t devoured sooner.
📜 History
Ice cream sandwiches first appeared in New York City street carts in the early 1900s, sold for just a penny each. Traditionally, they were made with thin wafers hugging vanilla ice cream. Over time, bakers experimented with cookies, brownies, and even macarons. The pastel swirl version is a modern twist—marrying vintage street-snack charm with whimsical colors inspired by unicorn and galaxy dessert trends.
🏗 Formation (How They Come Together)
These sandwiches are built layer by layer:
- Base: Soft, chewy cookies.
- Filling: Vanilla ice cream swirled with pastel chocolate magic.
- Finish: Sealed with sprinkles, frozen to perfection, and wrapped like treasures.
This formation ensures every bite balances creamy, crunchy, colorful, and nostalgic textures.
💞 Conclusion & Lovers
Pastel Swirl Ice-Cream Sandwiches aren’t just desserts—they’re little love letters frozen in time. They whisper of childhood summers, birthday parties, and lovers sharing one under the stars. Their pastel swirls represent joy, tenderness, and sweet beginnings, making them a dessert that doesn’t just feed the body but also nourishes the soul.
Whether made for kids, family gatherings, romantic picnics, or late-night freezer raids, these sandwiches prove that love—like ice cream—comes best when shared. 💖🍦
Would you like me to also give you a super-condensed Instagram-style caption version of this recipe (like you asked earlier with tiramisu), so you have both a long blog-style and a short social-media-ready version?