Here’s your big, detailed Brownie Sundae Cheesecake recipe — crafted to cover everything you requested: introduction, history, benefits, formation, lovers, detailed ingredients, step-by-step instructions, methods, nutrition, and conclusion.
🍫 Brownie Sundae Cheesecake – The Ultimate Indulgence
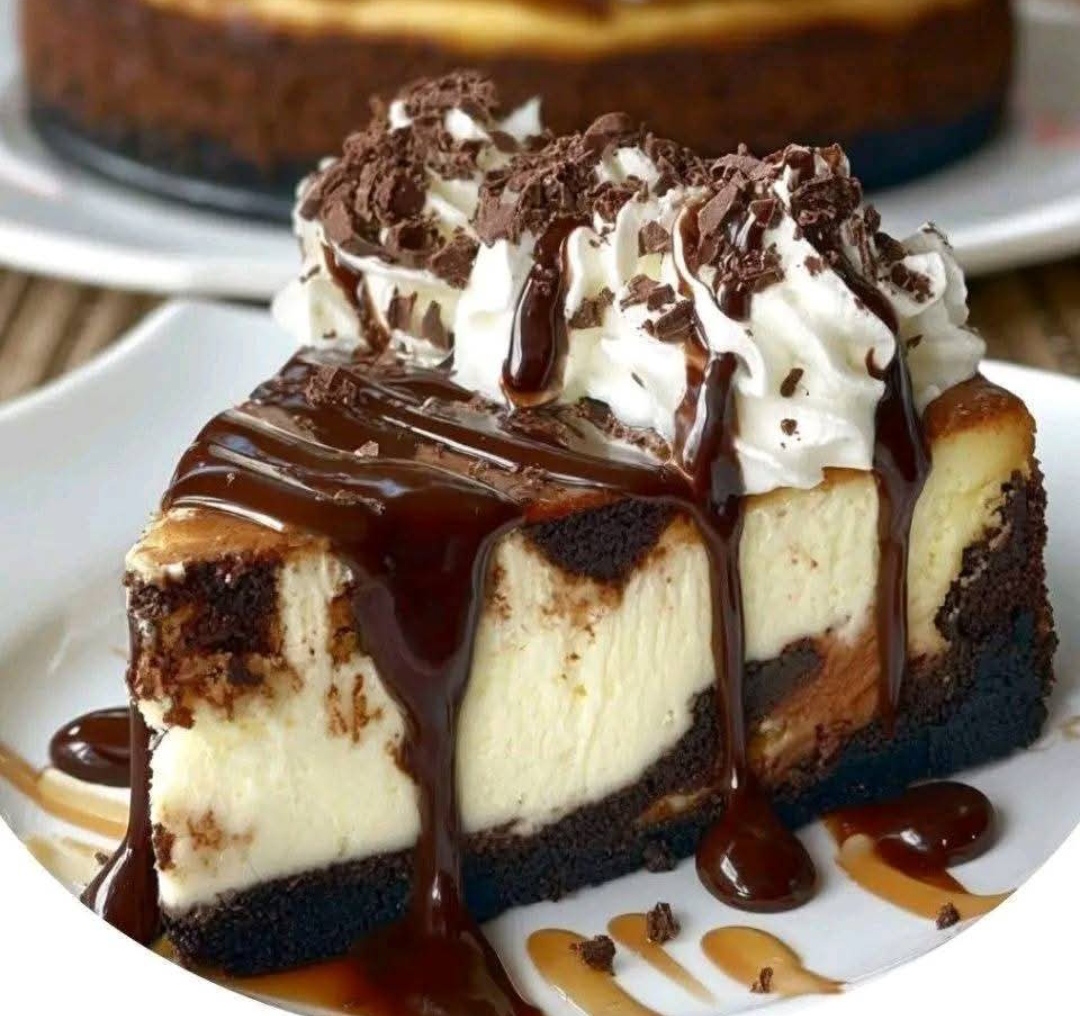
The Brownie Sundae Cheesecake is the dessert you dream about when chocolate cravings strike at midnight. Imagine a buttery cocoa wafer crust, a fudgy brownie layer, creamy baked cheesecake, and a glossy chocolate ganache on top—finished with whipped cream, sprinkles, and a cherry like a classic ice cream sundae. It’s rich, decadent, and made for celebrations (or days you just need chocolate therapy).
📜 History of Brownie Sundae Cheesecake
This dessert is a modern fusion born from two American favorites: the brownie (originating in the U.S. in the late 19th century) and New York-style cheesecake (brought to popularity in the 1900s). The “Sundae” element—with whipped cream, sprinkles, and a cherry—comes from ice cream parlors of the early 20th century. This triple-combo dessert gained popularity in the 2010s with the rise of hybrid baking trends.
💪 Benefits of This Dessert
- Mood Booster – Chocolate stimulates serotonin, lifting your mood.
- Rich in Calcium – Cheesecake provides a creamy dose of dairy goodness.
- Celebration-Worthy – Perfect centerpiece for birthdays or gatherings.
- Customizable – Can be adapted with nuts, caramel, or fruit toppings.
🛒 Ingredients
For the Cocoa Wafer Crust:
- 1½ cups crushed Nilla Wafers (about 45–50 cookies)
- 6 tbsp powdered sugar
- 6 tbsp unsweetened cocoa powder
- 6 tbsp unsalted butter, melted
For the Brownie Layer:
- ½ cup unsalted butter
- 1 cup granulated sugar
- 2 large eggs
- 1 tsp vanilla extract
- ½ cup all-purpose flour
- ¼ cup unsweetened cocoa powder
- ¼ tsp salt
For the Cheesecake Layer:
- 24 oz (680 g) cream cheese, softened
- 1 cup granulated sugar
- 3 large eggs
- 1 tsp vanilla extract
- 1 cup sour cream
For the Chocolate Ganache:
- 1 cup semi-sweet chocolate chips
- ¾ cup heavy cream
For the Sundae Toppings:
- Whipped cream
- Rainbow sprinkles
- Maraschino cherries
🥣 Instructions & Method
1️⃣ Prepare the Crust:
- Preheat oven to 350°F (175°C).
- In a medium bowl, mix Nilla wafer crumbs, powdered sugar, and cocoa powder.
- Stir in melted butter until fully combined.
- Press mixture firmly into the bottom of a 9-inch springform pan.
- Bake for 8 minutes, then let cool slightly.
2️⃣ Make the Brownie Layer:
- Melt butter in a saucepan. Remove from heat.
- Whisk in sugar, eggs, and vanilla until smooth.
- Stir in flour, cocoa powder, and salt.
- Pour brownie batter over the crust and spread evenly.
- Bake for 15 minutes (it should be partially set, not fully baked).
3️⃣ Cheesecake Layer:
- Beat cream cheese and sugar until smooth and fluffy.
- Add eggs one at a time, mixing well.
- Blend in vanilla and sour cream until creamy.
- Pour cheesecake batter over the brownie layer.
- Reduce oven temperature to 325°F (163°C) and bake for 50–60 minutes until set but slightly jiggly in the center.
- Turn off oven, crack door slightly, and let cheesecake cool inside for 1 hour.
- Refrigerate for at least 4 hours or overnight.
4️⃣ Ganache & Sundae Toppings:
- Heat heavy cream until steaming, pour over chocolate chips, and stir until smooth.
- Pour ganache over chilled cheesecake, spreading evenly.
- Let set for 30 minutes in fridge.
- Before serving, top with whipped cream, sprinkles, and a cherry.
🏗 Formation (Layer Order)
- Cocoa wafer crust
- Fudgy brownie layer
- Creamy cheesecake layer
- Chocolate ganache
- Whipped cream, sprinkles, cherry
❤️ Who Will Love This?
- Chocolate lovers who want it all in one bite.
- Cheesecake fans seeking something extra indulgent.
- Celebration enthusiasts who love over-the-top desserts.
📊 Nutrition (per slice, 12 servings)
- Calories: ~520
- Fat: 32g
- Carbs: 52g
- Protein: 7g
- Sugar: 40g
🏁 Conclusion
Brownie Sundae Cheesecake is not just dessert—it’s a celebration in edible form. The deep chocolate, smooth cheesecake, and nostalgic sundae toppings make it perfect for birthdays, parties, or simply rewarding yourself after a long day.
If you want, I can also give you a chilled no-bake version of this recipe so you don’t even have to turn on the oven. That way, you can have the same layers but with less effort. Would you like me to prepare that version next?