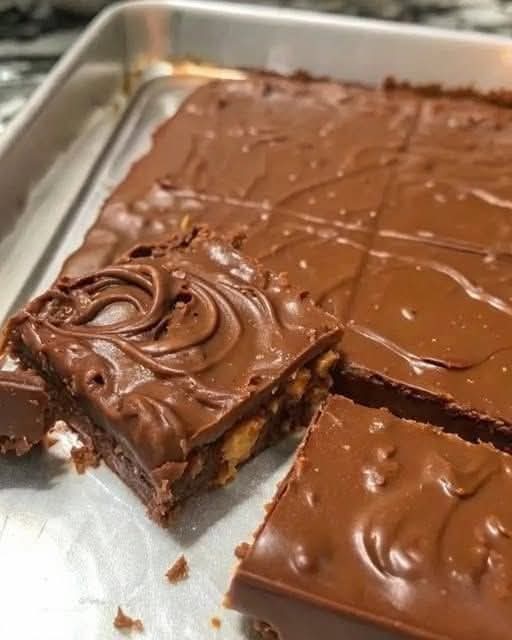
Absolutely! Here’s a rich, detailed, and complete recipe for the No-Bake Chocolate Peanut Butter Bars just like in your image. These layered treats are a dreamy combination of chocolate, peanut butter, and crunch—perfect for any sweet tooth.
🍫 No-Bake Chocolate Peanut Butter Bars
📖 Introduction
If you’re a chocolate and peanut butter lover, this no-bake dessert is your match made in heaven. These bars are indulgent, creamy, and crunchy all in one bite. Made with simple pantry ingredients and zero baking time, they are perfect for holidays, parties, or a late-night sweet craving. The layered look with smooth chocolate swirls on top is irresistible and totally Instagram-worthy!
🏺 History
The combination of chocolate and peanut butter has been popular in American desserts since the early 20th century. Inspired by Reese’s Peanut Butter Cups (created in 1928), these bars became a popular homemade alternative during the 70s and 80s. They’re a classic in potluck culture and often found in Midwestern American homes as a go-to no-bake treat.
💪 Benefits
- Protein-rich from peanut butter
- No oven required, making it great for summer
- Kid-friendly and fun to make
- Quick prep (15-20 minutes)
- Customizable with nuts, cereals, or toppings
🧪 Formation of the Bars
These bars are formed in three simple layers:
- Crunchy Base Layer – A mix of crushed graham crackers, peanut butter, and powdered sugar.
- Peanut Butter Layer – Smooth and creamy peanut butter mixture.
- Chocolate Ganache Topping – Melted chocolate and peanut butter, swirled for a glossy finish.
🛒 Ingredients
For the Base:
- 2 cups crushed graham crackers (or digestive biscuits)
- 1 cup unsalted butter, melted
- 1½ cups powdered sugar
- 1 cup creamy peanut butter
For the Chocolate Topping:
- 1½ cups semi-sweet chocolate chips
- ½ cup creamy peanut butter
🍽️ Instructions
Step 1: Prepare the Pan
- Line a 9×13 inch baking dish with parchment paper or lightly grease it. This makes lifting the bars out easier.
Step 2: Make the Base
- In a large bowl, mix together the melted butter, powdered sugar, peanut butter, and crushed graham crackers.
- Stir until well combined and evenly textured.
- Press the mixture firmly into the bottom of the prepared dish using a spatula or the back of a spoon.
Step 3: Make the Chocolate Topping
- In a microwave-safe bowl, combine the chocolate chips and peanut butter.
- Microwave in 30-second bursts, stirring each time until smooth and glossy. Alternatively, use a double boiler.
- Pour the chocolate mixture over the base and spread evenly with a spatula.
- Use a fork or knife to swirl the top for a beautiful pattern (optional).
Step 4: Chill
- Refrigerate for at least 2–3 hours or until completely set.
- Slice into squares or bars using a sharp knife. Wipe the knife between cuts for clean edges.
🧑🍳 Methods and Tips
- Microwave Method for chocolate saves time, but be careful not to overheat.
- Double Boiler Method is gentler and prevents chocolate from seizing.
- Crust Variations: Use crushed pretzels, cornflakes, or Nilla wafers instead of graham crackers for different textures.
- Add-ins: Chopped peanuts, marshmallows, or even mini M&M’s inside the base for extra fun.
🍽️ Nutrition (per serving – approx 1 bar)
| Component | Amount |
|---|---|
| Calories | ~250 |
| Carbohydrates | ~20g |
| Sugars | ~15g |
| Protein | ~5g |
| Fat | ~18g |
| Fiber | ~2g |
| Sodium | ~80mg |
Note: These values vary depending on exact ingredients and portion size.
💘 Conclusion
No-Bake Chocolate Peanut Butter Bars are a timeless dessert that combines simplicity, flavor, and nostalgia. They’re ideal for sharing with loved ones or treating yourself to a well-earned indulgence. Best of all? They’re almost foolproof.
🧡 Lovers of This Recipe Say…
- “This tastes like a homemade Reese’s cup but better!”
- “I made this for a party, and everyone asked for the recipe!”
- “Even my picky kids devoured these bars in minutes!”
🧁 Final Method Tip for Lovers
To elevate your bars:
- Sprinkle a touch of sea salt on the chocolate layer before chilling.
- Use high-quality chocolate for a richer taste.
- Cut them small – they’re rich and satisfying!
Would you like me to generate a printable PDF of this recipe too?