Sure! Here’s a rich and full recipe for a Classic Homemade Strawberry Cake, including a warm introduction, historical background, detailed ingredients and instructions, cake formation, and a sweet conclusion for all strawberry lovers out there.
🍓 Classic Homemade Strawberry Cake
Introduction
There’s something timeless and universally loved about the combination of soft, fluffy sponge cake and the sweet, slightly tart burst of fresh strawberries. Whether served at a spring picnic, summer birthday, or a quiet Sunday teatime, Classic Homemade Strawberry Cake offers a nostalgic joy in every bite. This recipe brings together the simplicity of old-fashioned baking with the freshness of seasonal fruit. It’s a cake made for sharing — with loved ones, with guests, or even just with yourself.
History
Strawberry cakes have graced family tables since at least the 19th century. While strawberry shortcake has deep roots in early American cuisine, layered strawberry cakes became especially popular in the South during the 20th century. Traditional recipes often featured a vanilla sponge, whipped cream, and fresh strawberries — evolving over time to include strawberry purees, glazes, and frostings. This version keeps it classic: a light sponge cake, whipped cream filling, and fresh berries, showcasing strawberries in all their natural glory.
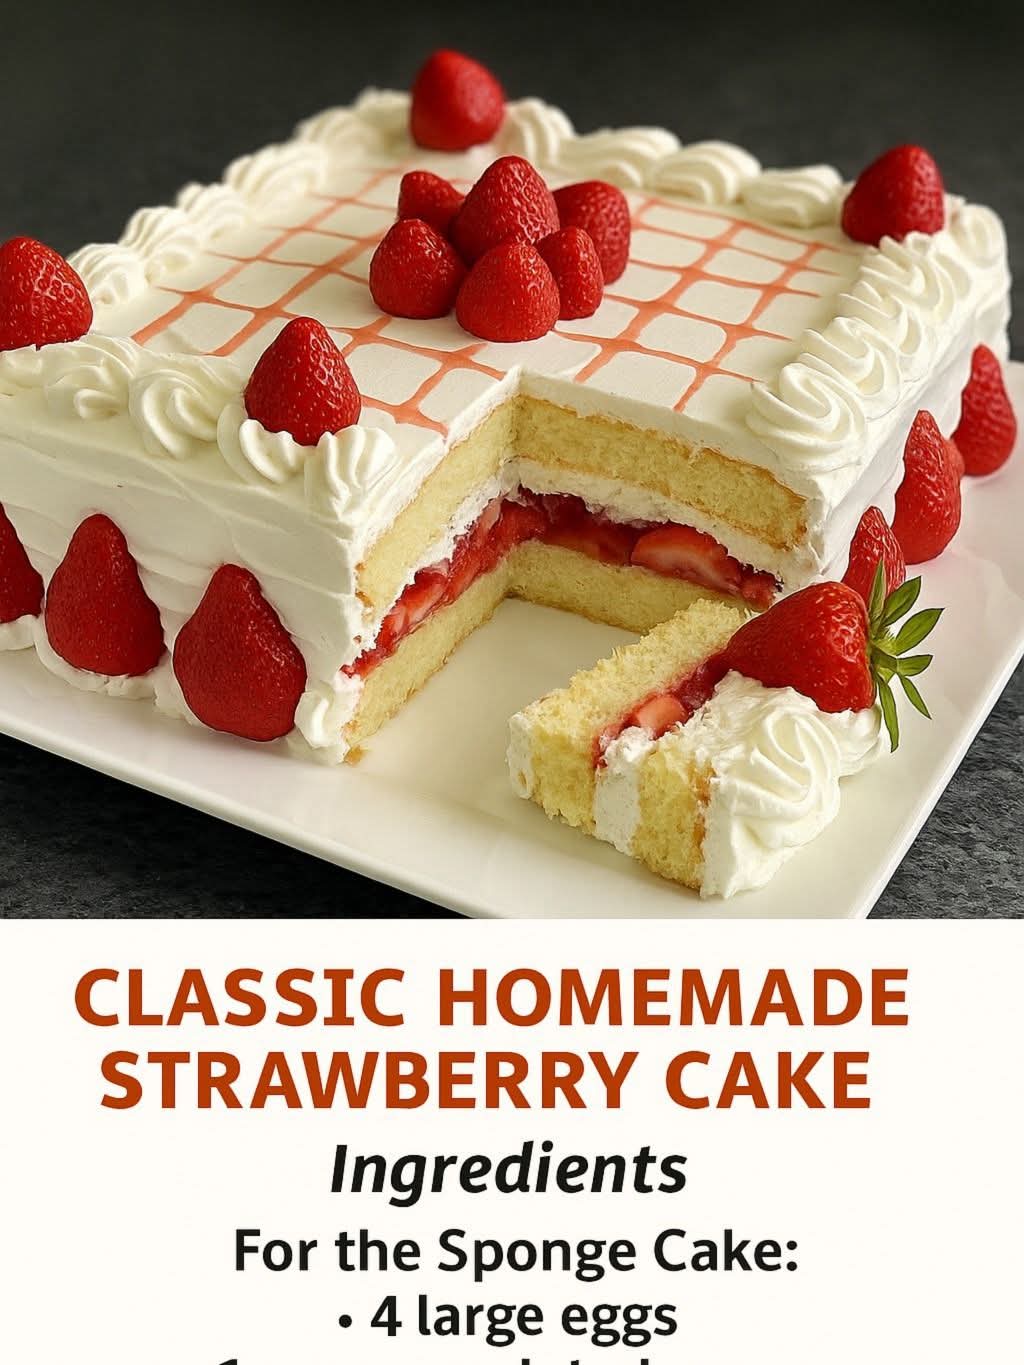
Ingredients
For the Sponge Cake:
- 4 large eggs, room temperature
- 1 cup granulated sugar
- 1 cup all-purpose flour
- 1 tsp baking powder
- 1 tsp pure vanilla extract
For the Strawberry Filling:
- 2 cups fresh strawberries, sliced
- 2 tbsp sugar (optional, depending on sweetness of berries)
- 1 tbsp lemon juice
For the Whipped Cream Frosting:
- 2 cups heavy whipping cream, chilled
- 1/2 cup powdered sugar
- 1 tsp vanilla extract
For Garnish:
- Whole strawberries with stems
- Mint leaves (optional)
Method
Step 1: Prepare the Sponge Cake
- Preheat your oven to 350°F (175°C). Grease and line two 8-inch round cake pans.
- In a large bowl, beat eggs and sugar with an electric mixer for 5–7 minutes, until pale and fluffy.
- Gently fold in the vanilla extract.
- Sift together flour and baking powder, then fold it into the egg mixture using a spatula. Do not overmix.
- Divide batter evenly between pans and smooth the tops.
- Bake for 20–25 minutes, or until a toothpick comes out clean.
- Let the cakes cool in pans for 10 minutes, then transfer to a wire rack to cool completely.
Step 2: Make the Strawberry Filling
- Combine sliced strawberries, sugar, and lemon juice in a bowl.
- Toss gently and let sit for 15 minutes to release juices.
Step 3: Whip the Cream
- In a chilled bowl, whip heavy cream, powdered sugar, and vanilla until stiff peaks form.
- Keep chilled until ready to use.
Step 4: Cake Formation
- Place one cake layer on a serving plate.
- Spread a layer of whipped cream over it, then spoon on half the macerated strawberries.
- Top with the second cake layer.
- Cover the top and sides with the remaining whipped cream.
- Arrange whole strawberries and mint leaves on top for garnish.
Conclusion
Voila! You’ve just created a Classic Homemade Strawberry Cake that looks as good as it tastes. With its airy sponge, fresh fruit, and cloud-like cream, it’s a celebration of simplicity and flavor. The kind of cake that feels like a warm hug from your grandmother’s kitchen.
For the Lovers of Strawberry Cake ❤️
To the strawberry lovers out there — this cake is for you. Whether it’s your favorite fruit or your favorite dessert, this recipe brings out the best in strawberries. Bake it for someone you love, or because you love baking. Add a drizzle of strawberry coulis or a layer of strawberry jam between the sponges if you’re feeling fancy.
Bonus Tips
- Use cake flour for an even softer crumb.
- You can also fold chopped strawberries into the whipped cream for extra bursts of flavor.
- If strawberries are out of season, use frozen berries for the filling and fresh ones just for the topping.
Would you like a printable version or a video tutorial?