Sure! Here’s a long, richly detailed version of your biscuit recipe — complete with a warm introduction, ingredient list, step-by-step instructions, methods, a bit of history, conclusion, and a sprinkle of romantic flair (for the lovers of biscuits!).
The Ultimate Homemade Southern Biscuit Recipe
Introduction: The Comfort in Crumbs
There’s something magical about the smell of warm biscuits rising in the oven — a moment that brings us back to simpler times, to breakfasts at grandma’s table, to southern kitchens filled with love and stories. Whether slathered in butter, drizzled with honey, or stuffed with jam, homemade biscuits are the heart and soul of comfort food. Their flaky layers and buttery goodness make them beloved across generations, cultures, and cuisines.
These biscuits are perfect for lovers — not just of food, but of life’s little pleasures. They’re tender enough to melt hearts, sturdy enough to hold together a sandwich, and always warm enough to share. Let’s dive deep into their history and make the kind of biscuit you fall in love with again and again.
A Brief History of Biscuits
The word biscuit comes from the Latin bis coctus, meaning “twice baked,” but today’s Southern-style biscuit is a far cry from that early definition. In the American South, biscuits began to rise (literally and figuratively) in the 1800s as baking soda and baking powder became household staples. These leavening agents transformed the dense hardtack of old into fluffy, golden beauties.
Over time, Southern biscuits became a staple of soul food and family gatherings. They were no longer a side dish—they were a centerpiece, served with gravy, fried chicken, or simply devoured hot from the oven. Today, biscuits are a culinary love letter to home, heritage, and hearty appetite.
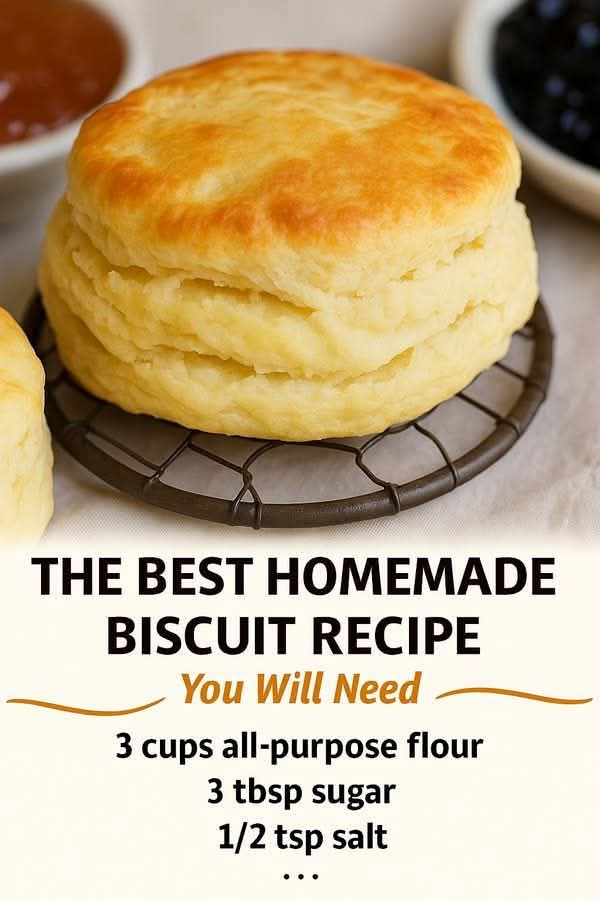
Ingredients (Makes 10–12 Biscuits)
- 3 cups all-purpose flour, plus more for dusting
- 3 tablespoons granulated sugar
- ½ teaspoon fine sea salt
- 1 tablespoon baking powder
- ½ teaspoon baking soda
- ¾ cup (1½ sticks) cold unsalted butter, cut into small cubes
- 1 cup cold buttermilk, plus more for brushing
- (Optional) 1 tablespoon honey or melted butter for brushing after baking
- (Optional) Fresh herbs, grated cheese, or cracked black pepper for variations
Tools You’ll Need
- Large mixing bowl
- Pastry cutter or fork
- Bench scraper or knife
- Rolling pin (optional)
- Biscuit cutter or round glass
- Baking sheet
- Parchment paper
- Pastry brush
Method: Step-by-Step Instructions
1. Preheat & Prepare
Preheat your oven to 425°F (218°C). Line a baking sheet with parchment paper or lightly grease it with butter. Place your butter and buttermilk in the fridge — keeping everything cold is the secret to flaky biscuits.
2. Mix Dry Ingredients
In a large bowl, whisk together:
- Flour
- Sugar
- Salt
- Baking powder
- Baking soda
Whisking helps distribute the leavening agents evenly, ensuring a consistent rise.
3. Cut in the Butter
Add your cold cubed butter to the dry ingredients. Using a pastry cutter or your fingertips, gently press the butter into the flour until the mixture resembles coarse crumbs — like small peas. Work quickly to keep the butter from warming up. Cold butter creates steam pockets, which give biscuits their signature layers.
4. Add the Buttermilk
Make a well in the center of the flour-butter mixture. Pour in the cold buttermilk and stir gently with a wooden spoon or spatula until just combined. Don’t overmix! The dough should be shaggy and slightly sticky.
5. Laminate the Dough (Secret to Flaky Layers)
Turn the dough onto a floured surface. Gently pat it into a rectangle about 1-inch thick. Fold it like a letter (in thirds), rotate, and pat it down again. Repeat this folding process 3 to 4 times — this step builds layers.
6. Cut the Biscuits
Pat the dough out to ¾-inch thickness. Use a biscuit cutter or floured glass to cut straight down — don’t twist, or it may seal the edges and prevent rising. Gather scraps, gently reform the dough, and cut more.
7. Chill (Optional but Ideal)
Place your biscuits on the baking sheet, close together for soft sides or spaced out for crisp edges. Pop them in the fridge or freezer for 10 minutes before baking. Cold dough = better rise.
8. Bake to Golden Perfection
Brush the tops with a bit of buttermilk for a golden crust. Bake at 425°F (218°C) for 14–17 minutes, or until the tops are golden brown and puffed.
9. Brush & Serve
Remove from the oven and brush with melted butter or honey while still warm. Serve immediately, or let cool slightly on a rack. Pair with jam, gravy, or love.
Variations for Biscuit Lovers
- Cheddar & Chive Biscuits: Add 1 cup grated cheddar and 2 tablespoons chopped chives to the dry mix.
- Sweet Biscuits: Increase sugar to ¼ cup and serve with strawberries and cream.
- Garlic Butter Biscuits: Add ½ tsp garlic powder and brush tops with garlic butter.
- Lovers’ Heart-Shaped Biscuits: Use a heart-shaped cookie cutter for romantic mornings.
Serving Suggestions: Made for Sharing
- Split and slather with salted butter and honey
- Layer with eggs, bacon, and cheese for a breakfast sandwich
- Top with sausage gravy for a Southern classic
- Serve warm beside fried chicken, stew, or roasted vegetables
- Toast lightly and top with whipped cream and berries for dessert
Formation & Food Chemistry Insight
- Butter: Must remain cold to form steam and create layers.
- Buttermilk: Its acidity reacts with baking soda, giving lift and tenderness.
- Folding: Laminates the dough, which is what makes those beautiful, defined layers.
- Resting: Helps gluten relax, producing a tender, less chewy biscuit.
Conclusion: For the Love of Biscuits
Whether shared on a lazy Sunday morning or served to impress at a dinner party, these biscuits are more than just bread — they’re expressions of love, tradition, and joy. Every golden crumb tells a story, every flaky layer offers a hug in edible form. For lovers of food, lovers of life, and literal lovers holding hands across a flour-dusted table — this biscuit is for you.
Would you like a printable version of this recipe, a visual step-by-step guide, or a variation for gluten-free or vegan biscuits?