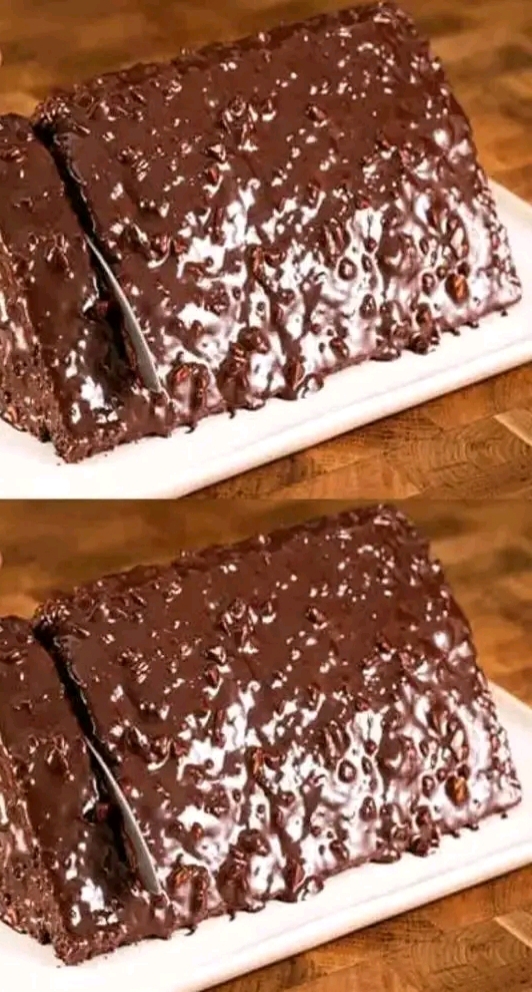
No-Bake Chocolate Cake: A Delicious Treat Without the Oven
Introduction
The No-Bake Chocolate Cake is a delightful and indulgent dessert perfect for chocolate lovers who want to create something extraordinary without the hassle of using an oven. This cake combines rich chocolate flavors with a satisfying crunch, making it a favorite for celebrations, gatherings, or just a sweet treat at home. Its simplicity and versatility make it a popular choice worldwide. Whether you’re a beginner or a seasoned baker, this recipe is a must-try!
Ingredients
For the Cake:
200g digestive biscuits or graham crackers (crushed into small pieces)
1 cup (150g) dark or milk chocolate (chopped)
1/2 cup (120g) unsalted butter
1/4 cup (60ml) heavy cream
1/4 cup (50g) granulated sugar (optional, adjust to taste)
1/4 cup (50g) chopped nuts (e.g., almonds, hazelnuts, or walnuts)
1/4 cup (50g) dried fruits (e.g., raisins or cranberries, optional)
1 tsp vanilla extract
For the Chocolate Ganache Topping:
1/2 cup (120ml) heavy cream
1 cup (150g) dark chocolate (chopped)
1 tbsp butter (optional, for extra shine)
Instructions
Preparing the Cake:
- Crush the Biscuits: Place the biscuits in a sealed bag and crush them into small chunks using a rolling pin. Do not crush them into fine crumbs; the texture is important.
- Melt the Chocolate Mixture: In a saucepan, combine the butter, chopped chocolate, heavy cream, and sugar (if using). Melt over low heat, stirring until smooth and fully combined. Remove from heat.
- Add Flavorings: Stir in the vanilla extract, chopped nuts, and dried fruits (if using).
- Combine with Biscuits: Pour the melted chocolate mixture over the crushed biscuits. Mix until all pieces are evenly coated.
- Shape the Cake: Transfer the mixture into a loaf tin or round cake pan lined with parchment paper. Press it down firmly to create an even layer. Refrigerate for 2-3 hours or until set.
Preparing the Ganache Topping:
- Heat the heavy cream in a small saucepan until it just begins to simmer (do not boil).
- Pour the hot cream over the chopped chocolate in a bowl. Let it sit for 2 minutes, then stir until smooth and glossy.
- Add the butter for extra shine, if desired.
Final Assembly:
- Remove the cake from the refrigerator and pour the ganache over it. Spread evenly with a spatula.
- Refrigerate for another 1-2 hours until the ganache is set.
- Slice and serve chilled or at room temperature.
Methods of Enjoyment
As a Dessert: Serve chilled after a meal.
With Coffee or Tea: Pairs wonderfully with a warm cup of coffee or tea.
At Celebrations: Perfect for birthdays, anniversaries, and special occasions.
Customizable: Add your favorite ingredients like marshmallows or flavored syrups for a personalized twist.
History and Origins
The No-Bake Chocolate Cake has roots in European cuisine, particularly in recipes that became popular during the mid-20th century when ovens were less common. It shares similarities with Italian “Salame di Cioccolato” and other biscuit-based desserts. Over time, it has evolved into a globally loved treat due to its simplicity and adaptability.
Formation of the Cake
The No-Bake Chocolate Cake is formed by combining the creamy chocolate mixture with the crunchy biscuit base. This balance of textures is its signature appeal. Once pressed into a mold and set in the fridge, the cake becomes firm enough to slice but retains its melt-in-the-mouth richness.
For the Chocolate Lovers
This cake is a dream come true for chocolate enthusiasts. Its rich chocolate flavor satisfies cravings without overwhelming sweetness. The addition of nuts and dried fruits enhances its complexity, making it an irresistible treat.
Conclusion
The No-Bake Chocolate Cake is more than just a dessert; it’s a celebration of simplicity and flavor. Its ease of preparation, combined with its decadent taste, ensures it remains a timeless favorite. Whether you’re entertaining guests or treating yourself, this cake is a guaranteed hit. Enjoy the process of making it as much as savoring the results!
Would you like a printable version of this recipe or additional variations?
