Absolutely! Let’s turn that cozy little post into a full, detailed recipe experience for your “Cracked, Glossy Chocolate Kiss Blossoms.” Here’s a comprehensive version for you:
Cracked Chocolate Kiss Blossoms
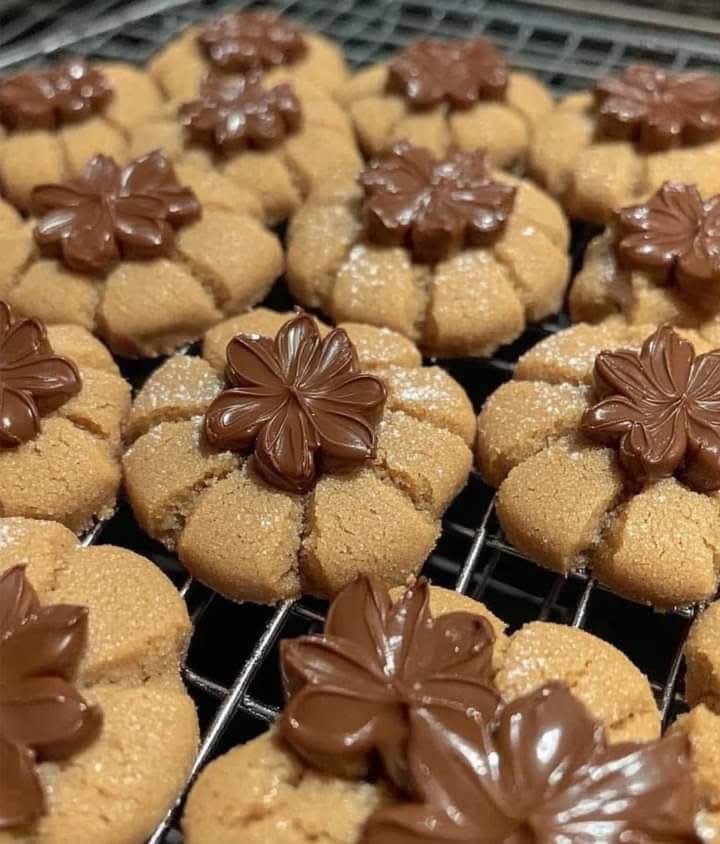
Soft, nutty, and nostalgic — these cookies are more than just a treat. They crackle with sweetness, wear a glossy chocolate kiss like a crown, and carry the warmth of family traditions with every bite. My grandma taught me the little pressing trick that gives them their signature shape, and now they’re the star of our festive celebrations. Perfect with a cup of tea or as a gift, these blossoms are little bites of joy.
Ingredients
For the Cookies:
- 1 cup unsalted butter, softened
- 1 cup granulated sugar
- 1/2 cup packed brown sugar
- 2 large eggs, room temperature
- 2 tsp vanilla extract
- 2 1/2 cups all-purpose flour
- 1 tsp baking powder
- 1/2 tsp baking soda
- 1/4 tsp salt
- 1 cup finely chopped nuts (walnuts, pecans, or almonds work beautifully)
For the Topping:
- 1 package of chocolate kisses (or chocolate drops)
- Optional: a pinch of sea salt for sprinkling
Instructions & Methods
Step 1: Prepare the Dough
- Preheat your oven to 350°F (175°C) and line baking sheets with parchment paper.
- In a large mixing bowl, cream together the butter, granulated sugar, and brown sugar until light and fluffy — about 3 minutes.
- Beat in the eggs, one at a time, followed by the vanilla extract. Mix until smooth.
- In a separate bowl, whisk together the flour, baking powder, baking soda, and salt. Gradually add to the wet mixture until just combined.
- Fold in the chopped nuts gently to distribute them evenly.
Step 2: Shape the Blossoms
- Roll the dough into 1-inch balls.
- For the traditional “blossom” look, press each ball lightly with your palm or use the bottom of a small glass.
- Bake for 10–12 minutes, until the edges are set but the centers are still soft.
Step 3: Add the Chocolate Kiss
- Remove the cookies from the oven and immediately press a chocolate kiss into the center of each cookie.
- Let the cookies cool on the baking sheet for 5 minutes, then transfer to a wire rack to cool completely.
- Optional: sprinkle a tiny pinch of sea salt over the chocolate to enhance the flavor.
History & Formation
Chocolate blossom cookies have roots in mid-20th-century American baking, often seen at holiday tables. The iconic “pressed chocolate center” was a grandmotherly trick to make cookies both visually charming and indulgently chocolatey. Over time, families have personalized them with nuts, spices, or flavored chocolates, turning a simple cookie into a symbol of warmth, love, and nostalgia.
Tips & Lovers’ Tricks
- Nut Lovers: Toast the nuts before adding for extra depth of flavor.
- Chocolate Lovers: Use dark chocolate kisses for a rich contrast or white chocolate for a sweeter, festive twist.
- Pressing Trick: Press gently — too hard and the cookies will flatten too much; too soft and the chocolate won’t stay centered.
- Storage: Store in an airtight container at room temperature for up to a week. Freeze for longer shelf life.
Conclusion
These cracked chocolate kiss blossoms are more than cookies — they’re little celebrations on your plate. Every crackle, every glossy chocolate top, every nutty bite carries the warmth of family traditions. They’re perfect for gifting, sharing, or savoring solo with a hot drink.
If you want, I can also create a “visual step-by-step version with photos” like a festive blog-style recipe so it looks as magical as it tastes. It would be perfect for Instagram or a family recipe album.
Do you want me to do that next?