Absolutely! Here’s a detailed, “big” recipe for Peanut Butter Sheet Cake with Peanut Butter Frosting with all the elements you requested. I’ve crafted it to be rich, engaging, and complete:
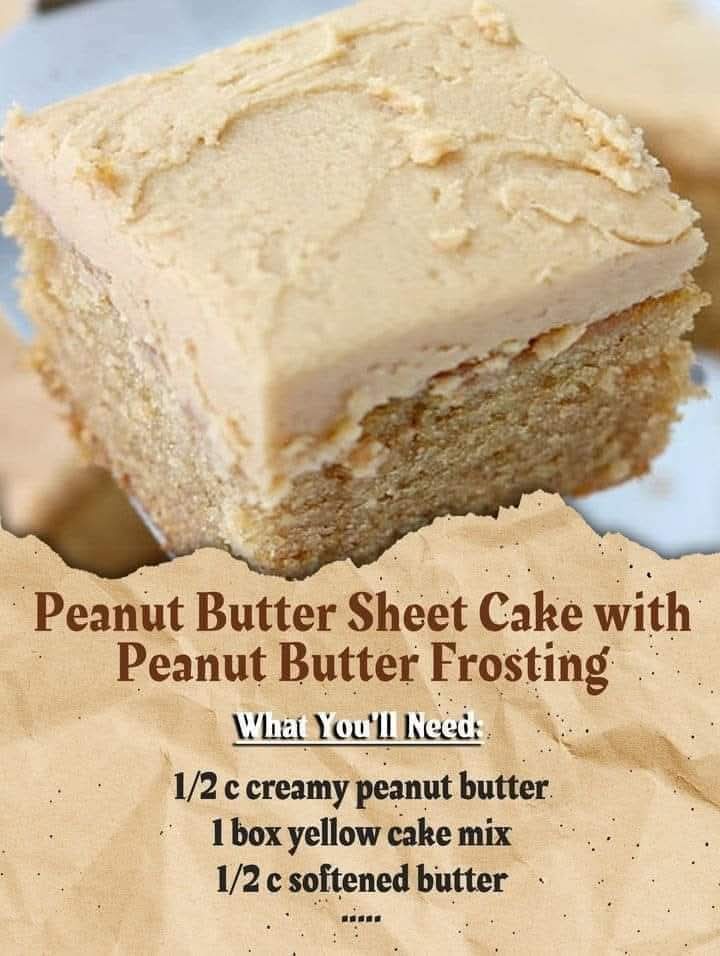
Peanut Butter Sheet Cake with Peanut Butter Frosting 🍰🥜
Introduction
Peanut butter and cake are a match made in heaven, and when combined into a moist, fluffy sheet cake topped with creamy peanut butter frosting, it becomes a celebration of comfort and indulgence. This cake isn’t just for special occasions—it’s the kind of dessert that draws friends and family to the kitchen, filling the air with the irresistible aroma of sweet, nutty bliss. Whether you’re baking for a party, a casual weekend treat, or simply because you love peanut butter, this recipe guarantees smiles with every slice.
Ingredients
For the Cake:
- 1 box yellow cake mix
- 4 large eggs
- 1/2 cup (115 g) softened unsalted butter
- 1/2 cup milk
- 1/4 cup vegetable oil
- 1/2 cup creamy peanut butter
For the Peanut Butter Frosting:
- 1/2 cup (115 g) unsalted butter, softened
- 1 cup creamy peanut butter
- 2–3 cups powdered sugar, sifted
- 1/4 cup milk (more if needed for spreading consistency)
- 1 teaspoon vanilla extract
Optional Garnish:
- Chopped peanuts
- Mini chocolate chips
- Drizzle of melted chocolate
Instructions
1. Preheat and Prep
- Preheat your oven to 350°F (175°C).
- Grease a 9×13-inch baking pan with butter or nonstick spray and lightly flour it, or line it with parchment paper for easy removal.
2. Make the Cake Batter
- In a large mixing bowl, beat together the softened butter and peanut butter until creamy.
- Add the eggs, milk, and vegetable oil, mixing until fully combined.
- Gradually add the yellow cake mix and blend until smooth, scraping down the sides as needed.
3. Bake
- Pour the batter evenly into the prepared pan.
- Bake in the preheated oven for 28–35 minutes, or until a toothpick inserted into the center comes out clean.
- Allow the cake to cool completely in the pan before frosting—this prevents the frosting from melting and sliding.
4. Make the Peanut Butter Frosting
- In a medium bowl, beat the softened butter and peanut butter until smooth and fluffy.
- Gradually add powdered sugar, 1 cup at a time, mixing well.
- Add milk and vanilla extract, and beat until creamy. Adjust the consistency: more milk for a softer spread, more powdered sugar for a thicker frosting.
5. Frost and Decorate
- Spread the frosting evenly over the cooled cake using an offset spatula.
- Sprinkle chopped peanuts, mini chocolate chips, or drizzle melted chocolate for added texture and decadence.
Methods & Techniques
- Creaming Butter and Peanut Butter: Ensures the frosting and batter are light and airy.
- Gradual Mixing: Adding the cake mix slowly prevents lumps and overmixing, keeping the cake tender.
- Cooling Before Frosting: A critical step—frosting warm cake can turn it runny and messy.
- Layering Textures: Optional toppings like chopped peanuts add crunch to the smooth, creamy frosting.
History & Formation
Sheet cakes originated in the early 20th century as a convenient way to serve cake to large groups. Peanut butter, a classic American favorite, gained popularity in desserts in the 1920s and 1930s. The marriage of sheet cake and peanut butter frosting likely emerged in mid-century America as a practical yet indulgent dessert for gatherings. Today, this combination is beloved for its nostalgic comfort and universal appeal.
Conclusion
This Peanut Butter Sheet Cake is more than just dessert—it’s a hug in cake form. Soft, moist layers topped with rich, creamy frosting create a peanut buttery perfection that’s perfect for birthdays, potlucks, or a simple treat for your peanut butter-loving soul. Every slice is a blend of tradition, flavor, and sheer comfort.
For Peanut Butter Lovers
- Substitute half of the milk in the cake with buttermilk for extra tenderness.
- Swirl chocolate ganache lightly into the frosting for a “peanut butter cup” effect.
- Use crunchy peanut butter in the frosting for a textural twist that peanut butter enthusiasts adore.
If you want, I can also make a visual “step-by-step guide” with photos and topping ideas for this cake—perfect for baking enthusiasts who love seeing each stage.
Do you want me to make that version too?