Here is a big, comprehensive recipe and guide to Homemade Banana Pudding with Layers of Love, structured exactly as you requested.
—
Homemade Banana Pudding with Layers of Love 🍌
Introduction: A Hug in a Dessert Dish
Banana pudding is more than just a dessert; it’s a edible memory for many, a nostalgic trip back to family gatherings, church picnics, and comforting Sunday dinners. While quick versions exist, a truly transcendent banana pudding is made with “layers of love”—a rich, from-scratch vanilla pudding, perfectly ripe bananas, and delicate, golden-brown meringue or clouds of sweetened whipped cream. It’s a dessert that speaks the universal language of comfort and care, one spoonful at a time.
The History: From Exotic Fruit to Southern Staple
The story of banana pudding begins in the late 19th century, when bananas became a widely available import in the United States. As the fruit grew in popularity, so did recipes featuring it. The dessert as we know it today is a descendant of the classic English “tipsy pudding” or “trifle,” which layered fruit, custard, and cake. In the late 1800s and early 1900s, American cookbooks began featuring “banana custard” recipes. The real game-changer came in the 1920s with the invention of vanilla wafers by companies like Nabisco. This crisp, convenient cookie was the perfect textural foil to the soft pudding and fruit, solidifying the iconic trifecta of banana, vanilla wafer, and custard that defines the Southern classic we adore today.
The Benefits: More Than Just a Sweet Treat
While we primarily eat banana pudding for joy, it does offer a few surprising benefits (if we want to justify that second helping!).
· Source of Potassium: Bananas are famously rich in potassium, an essential mineral for heart health, muscle function, and regulating blood pressure.
· Bone Health: Milk and eggs, the base of a classic pudding, are excellent sources of calcium and vitamin D, which are crucial for strong bones and teeth.
· Energy Boost: The natural sugars from the bananas and the carbohydrates in the pudding and wafers provide a quick source of energy.
· Mood Booster: Let’s not underestimate the psychological benefit! A comforting, nostalgic dessert can be a genuine mood-lifter, evoking feelings of happiness and security.
The Formation: The Art of the Layer
The beauty of banana pudding lies in its formation. It’s not just about tossing ingredients in a bowl; it’s about building a harmonious structure.
1. The Foundation: A thin layer of pudding on the bottom of the dish prevents the first layer of wafers from sliding around.
2. The Wafer Layer: A single, snug layer of vanilla wafers.
3. The Banana Layer: A layer of perfectly ripe banana slices. They should be covered by pudding quickly to prevent browning.
4. The Pudding Layer: A generous pour of warm (or cooled) vanilla pudding that seeps down and begins to soften the wafers just enough.
5. The Repeat: The process is repeated, creating beautiful strata.
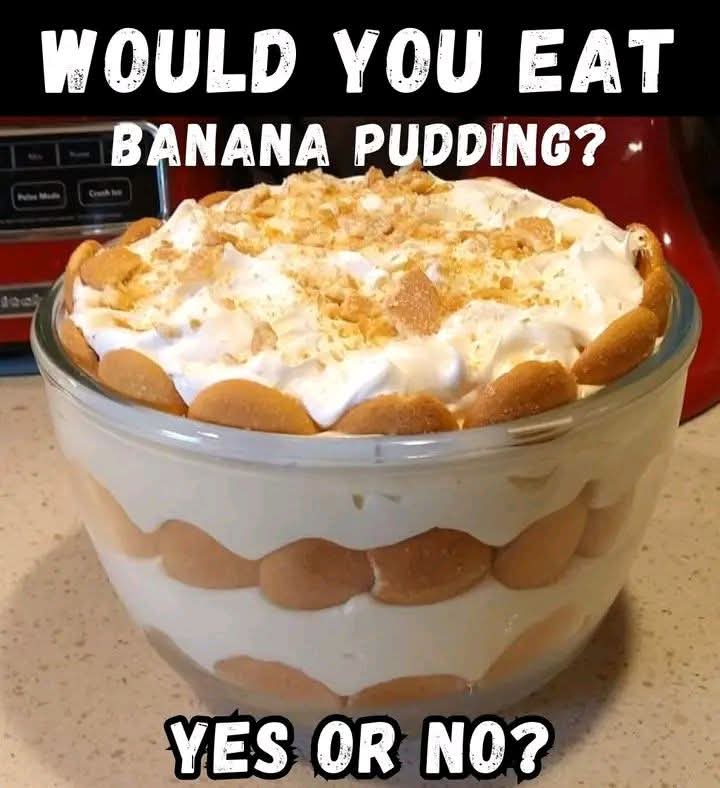
6. The Crown: The final topping—either a lofty, toasted meringue or a layer of sweetened whipped cream—provides a stunning visual and textural finish.
Lovers of Banana Pudding
Banana pudding has universal appeal. It is beloved by:
· Southerners: For whom it is a non-negotiable part of the culinary canon.
· Children: Who love the sweet, creamy flavor and soft textures.
· Nostalgics: Anyone who associates it with fond childhood memories and family.
· Textural Eaters: People who adore the contrast between the soft custard, the tender bananas, and the slightly softened wafers.
· Home Cooks: Because a homemade version is an impressive yet approachable way to show you care.
—
The BIG Recipe
Yield: 12-15 servings
Prep time: 45 minutes
Chill time: At least 4 hours, preferably overnight
Ingredients
For the Homemade Vanilla Pudding:
· 2 cups whole milk
· 1 ½ cups heavy cream
· ¾ cup granulated sugar
· ⅓ cup cornstarch
· ½ teaspoon salt
· 6 large egg yolks
· 2 teaspoons pure vanilla extract
· 2 tablespoons unsalted butter, cut into small pieces
For the Layers & Assembly:
· 1 (11-12 ounce) box of high-quality vanilla wafers (like Nilla Wafers or a bakery brand)
· 4-5 ripe but firm bananas (not too green, not too spotty)
For the Meringue Topping (Option 1 – Classic):
· 4 large egg whites, at room temperature
· ¼ teaspoon cream of tartar
· ½ cup granulated sugar
· ½ teaspoon vanilla extract
For the Whipped Cream Topping (Option 2 – No-Bake Style):
· 1 ½ cups heavy whipping cream, very cold
· ¼ cup powdered sugar
· 1 teaspoon vanilla extract
—
Methods & Instructions
Step 1: Make the Pudding
1. Prepare: In a medium bowl, whisk the egg yolks and set them near the stove. In a large, heavy-bottomed saucepan, combine the sugar, cornstarch, and salt. Whisk to combine.
2. Temper the Eggs: Slowly pour about 1 cup of the milk into the dry ingredients while whisking constantly to form a smooth paste. Then, whisk in the remaining milk and the heavy cream until smooth.
3. Cook: Place the saucepan over medium heat. Cook, stirring constantly with a whisk or a heatproof spatula, until the mixture thickens and just comes to a gentle boil. This will take about 10-15 minutes. You’ll feel it getting thicker. Once it bubbles, cook for 1 more minute to ensure the cornstarch is cooked.
4. Temper the Yolks: Slowly pour about 1 cup of the hot milk mixture into the bowl with the egg yolks, whisking constantly. This warms the yolks gently so they don’t scramble.
5. Combine & Finish: Pour the yolk mixture back into the saucepan with the remaining pudding. Return to a gentle boil over medium heat, whisking constantly, for another 1-2 minutes until it’s very thick.
6. Final Touch: Remove from heat. Whisk in the vanilla extract and the butter pieces until the butter is fully melted and incorporated.
7. Cool: Pour the pudding through a fine-mesh sieve into a large bowl to ensure it’s perfectly smooth. Press a piece of plastic wrap directly onto the surface of the pudding to prevent a skin from forming. Let it cool slightly while you prepare your dish and bananas.
Step 2: Assemble the Layers
1. First Layer: Choose a large trifle dish or a 9×13-inch baking dish. Spread a thin layer of the warm pudding (about ½ cup) on the bottom.
2. Wafers: Arrange a single layer of vanilla wafers over the pudding, covering the bottom completely.
3. Bananas: Slice the bananas into ¼-inch rounds. Arrange a layer of banana slices over the wafers.
4. Pudding: Pour about one-third to one-half of the remaining warm pudding over the bananas, spreading gently to cover.
5. Repeat: Create a second layer of wafers, then bananas, then pudding. You may have enough for a third partial layer. End with a final layer of pudding on top.
Step 3: The Topping
· If Using Meringue:
1. Preheat Oven: Preheat your oven to 350°F (175°C).
2. Make Meringue: In a clean, dry bowl of a stand mixer with the whisk attachment (or with a hand mixer), beat the egg whites and cream of tartar on medium speed until soft peaks form. Gradually add the sugar, a tablespoon at a time, and increase speed to high. Beat until stiff, glossy peaks form. Beat in the vanilla.
3. Top & Bake: Spoon the meringue over the top of the assembled pudding, making sure it touches the edges of the dish to seal it completely. Use the back of a spoon to create decorative peaks. Bake for 10-15 minutes, or until the meringue is golden brown. Let cool completely, then chill for at least 4 hours.
· If Using Whipped Cream:
1. Whip the Cream: In a large chilled bowl, combine the heavy cream, powdered sugar, and vanilla. Beat with an electric mixer on medium-high speed until stiff peaks form.
2. Top & Garnish: Spread the whipped cream over the top layer of pudding. For a classic touch, crush a few extra vanilla wafers and sprinkle them over the cream, and arrange a few whole wafers around the edge. Cover and refrigerate for at least 4 hours, or preferably overnight.
Nutrition (Approximate, per serving, with meringue)
· Calories: 350-400
· Fat: 18-22g
· Carbohydrates: 45-50g
· Protein: 6-8g
· Sugar: 30-35g
(Note: This is an estimate and will vary based on specific ingredients and serving size.)
Conclusion
Making homemade banana pudding from scratch is an act of love. It requires a little time and patience, but the result is exponentially more rewarding than anything from a box. It’s a dessert that fills your home with the warm scent of vanilla and your heart with the promise of smiles around the table. The layers of creamy pudding, sweet bananas, and tender wafers create a symphony of flavor and texture that is simply unforgettable. It’s a classic for a reason.
A Final Note for Lovers
To the one making this pudding: You are creating more than a dessert. You are creating a moment. You are building a memory. When you see the faces of those you love light up with that first bite, you’ll know that every stir of the pot, every careful slice of banana, and every layer you built was worth it. This is the kind of love you can taste. Enjoy every single bite. 🍌🤍