Here is a comprehensive guide to Easter Dirt Cake Casserole, structured as you requested, from its history to its nutritional information.
—
Introduction
If there is one dessert that perfectly encapsulates the playful spirit of Easter, it is the Easter Dirt Cake Casserole. This no-bake dessert is a nostalgic trip back to childhood, transforming a simple combination of creamy pudding and crumbled cookies into a whimsical treat that looks just like a pot of soil—ready for the Easter Bunny to plant his goodies.
Presented in a large casserole dish, this dessert is the ultimate potluck hero. It features layers of rich, crushed chocolate cookies that mimic dirt, contrasted by a luscious, velvety cream cheese and pudding filling. Topped with a colorful array of candy eggs, Peeps, and spring-themed sprinkles, it becomes a centerpiece that brings joy to both kids and adults. It’s easy to assemble, requires no oven time, and delivers a perfect balance of creamy texture and crunchy chocolate in every bite.
—
History & Origin
The “Dirt Cake” is a beloved American dessert that rose to popularity in the 1980s and 1990s. Its exact origins are a bit murky, as it emerged from the heyday of “no-bake” recipes found on the backs of pudding boxes and in community cookbooks. The concept was simple and brilliant: mimic the look of a flower pot filled with dirt to delight children.
The classic recipe typically called for chocolate pudding, cream cheese, whipped topping, and crushed chocolate sandwich cookies (like Oreos). It was traditionally served in a terracotta flower pot with a artificial flower and a shovel for a spoon to complete the illusion.
The “Casserole” version adapts this idea for larger gatherings. By spreading the dessert in a 9×13-inch dish, it becomes easier to serve to a crowd, making it the perfect dessert for Easter brunch, family dinners, or classroom parties. The Easter theme adds a layer of festivity, replacing the gummy worms of Halloween versions with pastel-colored candy eggs and marshmallow bunnies.
—
Ingredients
For the “Dirt” Layer:
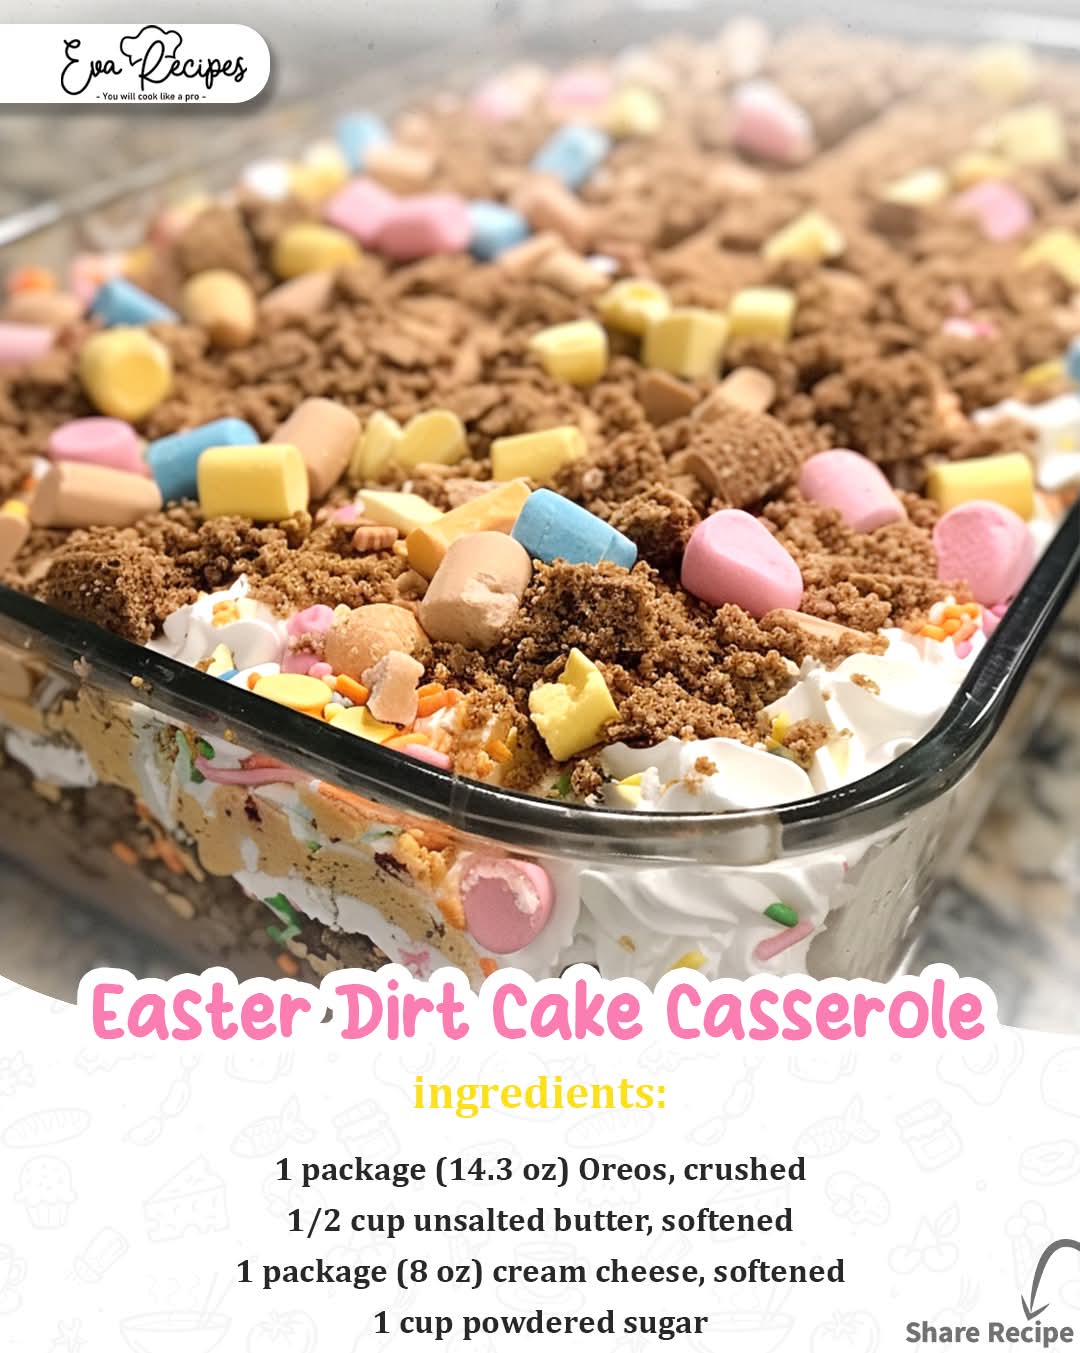
· 1 standard package (14.3 oz / 405 g) Oreo cookies (regular, not Double Stuf)
For the Creamy Filling:
· 1/2 cup (1 stick / 113 g) unsalted butter, softened to room temperature
· 1 package (8 oz / 226 g) cream cheese, softened to room temperature
· 1 cup (120 g) powdered sugar
· 2 packages (3.4 oz each / 96 g each) instant vanilla or cheesecake-flavored pudding mix
· 3 cups (720 ml) cold whole milk (2% or skim will work, but whole milk provides the creamiest texture)
· 1 tub (8 oz / 226 g) frozen whipped topping (like Cool Whip), thawed
For the Easter Decoration:
· 1½ cups assorted Easter candy (e.g., Cadbury Mini Eggs, robin’s eggs, pastel M&M’s)
· Optional: Marshmallow Peeps (bunnies or chicks), jelly beans, pastel sprinkles, or a nest made of shredded coconut dyed green.
—
Methods / Instructions
Step 1: Prepare the “Dirt”
Place the entire package of Oreos (filling included) into a large ziplock bag. Seal the bag, removing as much air as possible. Using a rolling pin or the bottom of a heavy pan, crush the cookies until they resemble fine soil with some small pebbly pieces for texture. Alternatively, you can pulse them in a food processor, being careful not to turn them into dust. Set aside.
Step 2: Make the Cream Cheese Base
In a large bowl using a hand mixer or in the bowl of a stand mixer with the paddle attachment, beat the softened butter and cream cheese together until smooth, light, and fluffy (about 2-3 minutes). Gradually add the powdered sugar and continue beating until well combined and no lumps remain. Scrape down the sides of the bowl as needed.
Step 3: Prepare the Pudding
In a separate medium bowl, whisk together the instant pudding mix and the cold milk. Whisk vigorously for about 2 minutes until the pudding begins to thicken. Let it sit for 5 minutes to soft-set.
Step 4: Combine the Filling
Pour the thickened pudding into the bowl with the cream cheese mixture. Mix on low speed until everything is fully incorporated and smooth. Gently fold in the thawed whipped topping with a rubber spatula until the mixture is uniform and airy.
Step 5: Assemble the Casserole
You will be creating two layers each of filling and “dirt.”
1. Sprinkle about one-third of the crushed Oreos evenly over the bottom of a 9×13-inch casserole dish.
2. Carefully spread half of the creamy filling over the Oreo layer.
3. Sprinkle another third of the Oreos over the filling.
4. Top with the remaining half of the creamy filling, spreading it gently to the edges.
5. Finish by sprinkling the final third of the crushed Oreos over the top, creating a nice, even “dirt” cap.
Step 6: Decorate and Chill
Gently press your chosen Easter candies into the top “dirt” layer. You can arrange them in patterns, spell out “Hoppy Easter,” or just scatter them generously. Cover the dish with plastic wrap or foil and refrigerate for at least 4 hours, but preferably overnight. This chilling time is crucial for the dessert to set properly, allowing the flavors to meld and the cookies to soften slightly, creating a cake-like texture.
—
Formation & Texture
The magic of Dirt Cake lies in the contrast of its formations. When properly assembled and chilled, the dessert forms distinct yet harmonious layers.
· The Base: The bottom layer of Oreos provides a stable, crunchy foundation, much like a traditional pie crust.
· The Filling: The cream cheese and pudding mixture sets into a dense, yet silky, mousse-like formation. It’s rich enough to feel indulgent but light enough that you can go back for seconds.
· The Top: The final layer of crushed Oreos forms a perfect “soil” crust. As it sits in the refrigerator, it absorbs a touch of moisture from the filling below, softening slightly to create a texture that is part crumbly, part fudge-like.
· The Accents: The hard-shelled candy eggs provide a delightful snap and pop of sweetness against the creamy and crumbly textures.
—
Benefits
While this is undeniably a decadent treat, it does offer some benefits beyond its delicious taste:
1. No-Bake Convenience: The most significant benefit is that it requires no oven. This keeps your kitchen cool and frees up oven space for main dishes, like a baked ham or casseroles.
2. Make-Ahead Magic: Dirt Cake actually tastes better the next day. This makes it the perfect stress-free dessert for holiday entertaining. You can prepare it entirely the night before.
3. Kid-Friendly Activity: This is a wonderful recipe to make with children. They love crushing the cookies (a great way to release energy!) and decorating the top with candies.
4. Customizable: The base recipe is a blank canvas. You can easily switch up the pudding flavor (chocolate or pistachio are great alternatives) and the theme of the candies to suit any holiday or occasion.
5. Feeds a Crowd: A 9×13-inch casserole dish provides ample servings for large family gatherings, potlucks, and parties.
—
Nutrition (Approximate)
Please note that this is an estimate, as the exact values depend on the specific brands of ingredients used and the amount of candy for decoration. Values are based on 12-15 servings.
Nutrient Approximate Value (per serving)
Calories 450-550 kcal
Fat 25-30 g
– Saturated Fat 14-18 g
Carbohydrates 55-65 g
– Sugar 40-50 g
Protein 6-8 g
Sodium 350-450 mg
Allergen Information: This recipe contains common allergens: Wheat (in Oreos), Dairy (butter, cream cheese, milk, whipped topping), and Soy (in Oreos and some candies). Be sure to check the labels on your specific candies, as many are processed in facilities that handle nuts.
—
Why Lovers Love It
This dessert inspires a special kind of devotion. Here’s why people love it:
· Nostalgia: For many, Dirt Cake is a taste of childhood, bringing back fond memories of school parties and family gatherings. It’s a comforting, familiar flavor profile.
· The Fun Factor: Let’s be honest—eating something that looks like dirt is just plain fun. It’s a conversation starter and a guaranteed smile-maker. The element of surprise (it’s cake, not dirt!) delights everyone.
· Textural Heaven: The combination of the crunchy cookie crumbs and the incredibly smooth, rich, and creamy filling is texturally addictive.
· Visual Appeal: It is a stunning dessert. When decorated with bright, pastel Easter candies, it becomes a vibrant centerpiece that signals celebration and springtime.
—
Conclusion
The Easter Dirt Cake Casserole is more than just a dessert; it’s an experience. It combines the rich, nostalgic flavors of a classic American treat with the festive joy of Easter. Its simple, no-bake assembly and make-ahead convenience make it a practical choice for busy hosts, while its playful presentation and delicious taste make it a guaranteed hit with guests of all ages.
Whether you’re looking to create a new family tradition or simply want a foolproof, decadent dessert for your holiday table, this Dirt Cake Casserole is the perfect recipe. It’s a delicious reminder that the best treats in life are often the ones we have the most fun making and sharing. So, grab your ingredients, crush some cookies, and get ready to serve up a heaping dish of happiness this Easter.