Absolutely! Let’s turn your soft homemade bread dough idea into a full, rich recipe with history, method, and all the storytelling flair. Here’s a detailed guide:
🍞 Soft Homemade Bread Dough – A Complete Guide
Introduction
There’s something magical about homemade bread—the smell of fresh dough rising, the warmth of a golden crust, and the tender crumb that melts in your mouth. Soft homemade bread dough is the foundation of countless delights: fluffy loaves, airy rolls, and pillowy buns. This recipe focuses on simplicity, requiring only a few basic ingredients, but yielding bakery-style results at home. Whether you’re an aspiring baker or just want to impress your family, this bread dough will become your go-to favorite.
Soft bread has been cherished worldwide for centuries. From the humble yeasted breads of European kitchens to the enriched milk breads of Asia, soft bread signifies comfort, love, and the universal joy of sharing food. This dough balances flavor, texture, and versatility, perfect for breakfast toast, dinner rolls, or sandwich loaves.
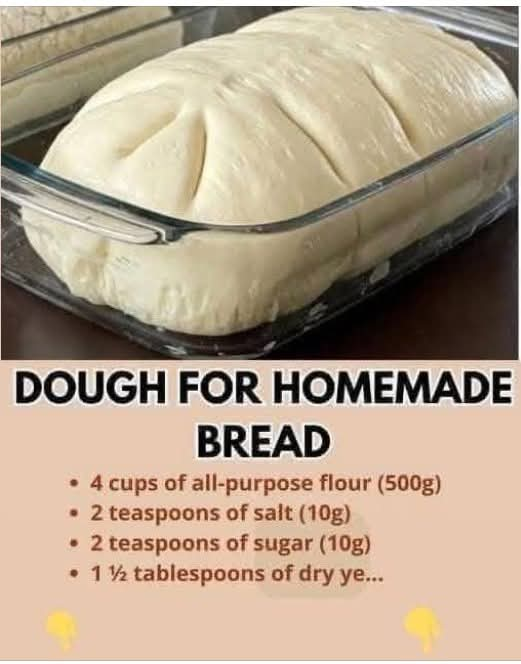
🛒 Ingredients
- 3 cups all-purpose flour (plus extra for dusting)
- 1 cup warm water (around 100–110°F / 37–43°C)
- 2 tsp instant yeast
- 2 tbsp sugar (optional, for a slightly sweet flavor)
- 1 tsp salt
- 2 tbsp unsalted butter or oil (for richness)
Optional Enhancements:
- 1/4 cup milk for a softer crumb
- 1 egg for enriched dough and golden color
History & Formation
Bread is one of humanity’s oldest foods, dating back over 10,000 years. The soft, fluffy varieties we love today evolved from basic yeasted doughs, enriched with fats and milk to create a tender crumb. In Europe, the 19th century saw the rise of milk bread in France and Germany, while Asian cultures developed “shokupan” and other pillowy loaves. The science behind soft bread is simple: yeast ferments sugars in flour, producing carbon dioxide, which gets trapped in the gluten network, expanding the dough into a soft, airy structure.
Instructions & Methods
Step 1: Activate the Yeast
- In a small bowl, combine warm water and sugar (if using).
- Sprinkle the instant yeast over the water and let it sit for 5–10 minutes until foamy.
Step 2: Mix the Dough
- In a large mixing bowl, combine flour and salt.
- Gradually add the yeast mixture and melted butter (or oil) to the flour.
- Stir until a sticky dough forms.
Step 3: Knead the Dough
- Transfer the dough to a lightly floured surface.
- Knead for 8–10 minutes by hand (or 5–7 minutes in a stand mixer with a dough hook) until smooth, elastic, and slightly tacky.
Step 4: First Rise
- Place the dough in a lightly greased bowl and cover with a clean towel or plastic wrap.
- Let it rise in a warm, draft-free place for 1–2 hours, until doubled in size.
Step 5: Shape
- Punch down the dough gently to release gas.
- Shape into loaves, rolls, or buns as desired.
- Place shaped dough on a greased baking tray or in a loaf pan.
Step 6: Second Rise
- Cover again and let rise for 30–45 minutes until puffy.
- Preheat the oven to 375°F (190°C).
Step 7: Bake
- Optionally, brush the tops with milk or beaten egg for a golden finish.
- Bake for 20–25 minutes for rolls or 25–35 minutes for loaves, until golden brown and hollow-sounding when tapped.
- Remove from oven and cool slightly on a wire rack before slicing.
Conclusion
This soft homemade bread dough is more than just a recipe—it’s an experience. The aroma of baking fills your kitchen, and the taste is warm, comforting, and addictive. Perfect for sandwiches, toast, or simply slathered with butter, this bread becomes a centerpiece of any meal.
Bread lovers across generations have cherished soft, fluffy loaves for their versatility and heartwarming qualities. By mastering this dough, you’re connecting with centuries of bakers who celebrated the joy of breaking bread at home.
Tips for Bread Lovers
- Flavor Boost: Add herbs, garlic, or cheese into the dough.
- Sweet Treat: Fold in raisins or chocolate chips for dessert-style rolls.
- Storage: Keep in an airtight container for 2–3 days or freeze for up to a month.
- Method Lovers: Experiment with tangzhong (water-roux method) to make the bread even softer and longer-lasting.
If you want, I can also create a visual “step-by-step diagram” showing shaping, rising, and baking—like a mini bread-making masterclass! It’s perfect for lovers of methodical baking.
Do you want me to make that visual?