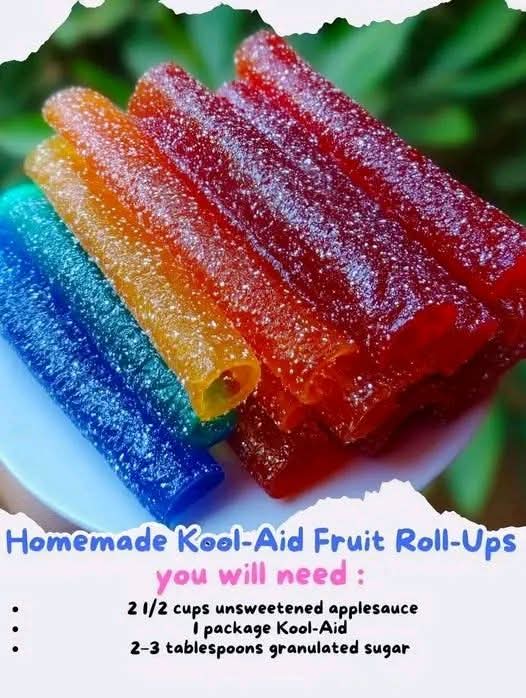
Homemade Kool-Aid Fruit Roll-Ups 🍓🍒
Homemade Kool-Aid Fruit Roll-Ups are a fun, colorful, and delicious snack that both kids and adults love. These sweet, chewy fruit sheets are inspired by the classic store-bought fruit roll-ups but made easily at home with simple ingredients. By using flavored drink mix and applesauce, you can create vibrant fruit snacks that are packed with flavor and perfect for lunchboxes, desserts, or quick treats.
Making fruit roll-ups at home also lets you control the sweetness and ingredients, making them fresher and often tastier than packaged versions. With a little patience while they dry, you can roll up bright sheets of fruity goodness that look beautiful and taste amazing.
🍬 Ingredients
- 1 cup Kool-Aid powder (any flavor you like)
- 1 cup water
- 2 tablespoons corn syrup
- 1 cup applesauce
Optional additions
- 2–3 tablespoons sugar (for extra sweetness)
- 1 teaspoon lemon juice (adds brightness and balances flavor)
- Powdered sugar or cornstarch (for dusting so they don’t stick)
🍓 Equipment Needed
- Saucepan
- Blender or whisk
- Baking sheet
- Parchment paper or silicone baking mat
- Spatula
- Oven or dehydrator
🍭 Instructions
Step 1: Prepare the Mixture
In a saucepan, combine the Kool-Aid powder, water, corn syrup, and applesauce. Stir well until everything is fully blended.
Step 2: Heat the Mixture
Place the saucepan over medium heat. Stir constantly so the mixture does not burn. Heat for about 5–7 minutes until the mixture becomes smooth and slightly thick.
Step 3: Blend for Smoothness
For an extra smooth fruit roll-up texture, blend the mixture using a blender or immersion blender. This step removes any lumps.
Step 4: Prepare the Baking Tray
Line a baking sheet with parchment paper or a silicone mat. Lightly spray with cooking spray to prevent sticking.
Step 5: Spread the Mixture
Pour the fruit mixture onto the prepared baking sheet. Use a spatula to spread it into a thin, even layer (about 1/8 inch thick).
Step 6: Dry the Fruit Sheet
Place the tray in an oven set to 170°F (75°C) or the lowest temperature available. Let it dry slowly for 4–6 hours, or until the surface is dry but still slightly flexible.
Step 7: Cool and Peel
Remove the tray from the oven and allow it to cool completely. Carefully peel the fruit sheet off the parchment paper.
Step 8: Cut and Roll
Cut the sheet into long strips using scissors or a pizza cutter. Roll each strip into classic fruit roll-up spirals.
🍉 Preparation Methods
1️⃣ Oven Method
The oven method is the most common. A very low temperature slowly removes moisture while keeping the fruit sheet chewy and flexible.
2️⃣ Dehydrator Method
If you own a dehydrator, spread the mixture on dehydrator trays lined with parchment and dry at 135°F (57°C) for 6–8 hours.
3️⃣ Sun-Dry Method (Traditional)
In warm climates, fruit mixtures can be spread thinly and dried in the sun under mesh covers to keep insects away.
📜 History of Fruit Roll-Ups
Fruit leather and fruit roll-ups have existed for centuries. Ancient cultures in the Middle East and Central Asia made fruit leather by drying pureed fruits in the sun. These chewy sheets were a way to preserve fruit for long periods.
In the United States, fruit roll-ups became popular in the 1980s when companies began producing colorful packaged versions. Homemade versions became popular later because they allow people to use natural fruit, creative flavors, and less processed ingredients.
Using Kool-Aid in fruit roll-ups is a modern twist that adds bright colors and bold fruity flavors.
🍓 Formation and Texture
The formation of fruit roll-ups happens through moisture evaporation.
As the mixture slowly dries:
- Water evaporates
- Natural fruit sugars concentrate
- The mixture becomes flexible and chewy
This creates the classic fruit leather texture that can be rolled without breaking.
A thin layer ensures the roll-ups dry evenly and remain soft instead of brittle.
❤️ Why People Love Homemade Fruit Roll-Ups
Many snack lovers enjoy homemade fruit roll-ups because they are:
- Colorful and fun
- Chewy and sweet
- Easy to customize with different flavors
- A nostalgic childhood snack
- Perfect for lunchboxes and quick treats
Kids especially love helping spread the mixture and rolling the finished fruit sheets.
🍒 Flavor Ideas
You can make many delicious versions:
- Cherry Kool-Aid roll-ups
- Strawberry fruit roll-ups
- Tropical punch flavor
- Blue raspberry sheets
- Mixed berry combinations
You can even swirl two flavors together for a marbled fruit roll-up design.
🍭 Tips for the Best Fruit Roll-Ups
- Spread the mixture thin and evenly for proper drying.
- Use parchment paper to prevent sticking.
- Do not rush the drying process—low heat is key.
- Store roll-ups in an airtight container for freshness.
🎉 Conclusion
Homemade Kool-Aid Fruit Roll-Ups are a playful, colorful snack that combines fruity flavor with chewy texture. They are simple to prepare, fun to customize, and perfect for anyone who loves sweet treats. Whether you make them for kids, family snacks, or nostalgic fun, these fruit roll-ups are sure to bring smiles.
Once you try making them at home, you may never want store-bought fruit roll-ups again! 🍓🍬