Here is a comprehensive, detailed guide to Orange Dreamsicle Salad, formatted as you requested. It includes everything from its nostalgic history to a complete step-by-step method, nutritional information, and why it remains a beloved classic.
—
The Nostalgia of Orange Dreamsicle Salad
There are some desserts that don’t just taste good; they taste like memory. Orange Dreamsicle Salad is one of them. This no-bake dessert is a staple of potlucks, family reunions, and church suppers across the American Midwest and South. It perfectly captures the flavor of the classic frozen Creamsicle treat—that delightful combination of tart orange and creamy vanilla—but transforms it into a fluffy, spoonable salad (or dessert).
What makes this dish so enduring is its simplicity. With just a handful of ingredients and minimal effort, you can create a dessert that feels both retro and refreshing. It’s a dish that sparks joy and nostalgia, reminding many of grandmother’s kitchen tables and summer gatherings. Whether you call it a salad, a fluff, or a mousse, this Orange Dreamsicle creation is a testament to the magic of mid-century comfort food.
—
The Recipe: Orange Dreamsicle Salad
This recipe is designed to serve a crowd, making it perfect for large family gatherings, barbecues, or holiday dinners.
Introduction
Welcome to the ultimate guide for making the fluffiest, most flavorful Orange Dreamsicle Salad. This recipe takes the classic combination of orange and vanilla and transforms it into a cloud-like dessert that is impossible to resist. It’s a no-fuss, no-bake dish that comes together in minutes, requiring only a little patience as it chills to perfection. Get ready to bring a timeless classic to your table.
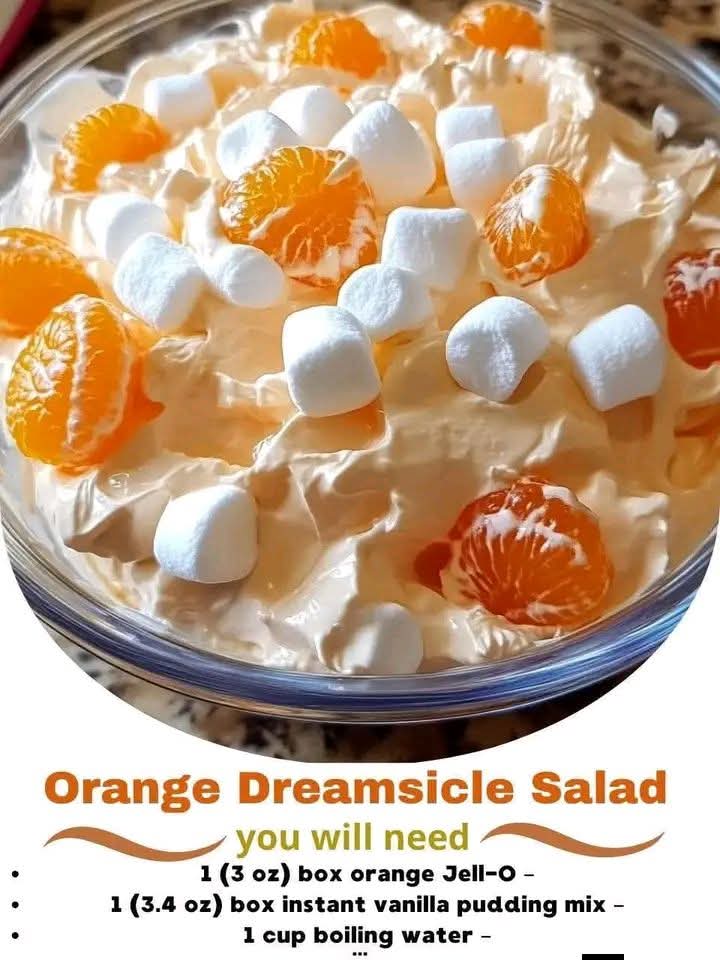
Ingredients
· 1 (6 oz) box of orange Jell-O (or two 3 oz boxes) – This provides the intense orange flavor and that iconic bright color.
· 1 (5.1 oz) box of instant vanilla pudding mix (or two 3.4 oz boxes) – This is the secret to the creamy, thick, and stable texture. Be sure to use instant pudding, not cook-and-serve.
· 2 cups boiling water – Necessary to fully dissolve the powdered gelatin.
· 2 cups cold water – Used to cool the mixture down and incorporate the pudding mix correctly.
· 1 (20 oz) can of crushed pineapple, undrained – Adds sweetness, a slight tang, and a pleasant texture. The juice is a key part of the liquid.
· 1 (8 oz) tub of frozen whipped topping (like Cool Whip), thawed – This is what gives the salad its light, airy, “fluffy” texture. It also adds a final layer of creamy sweetness.
· (Optional) 1 cup miniature marshmallows – For an extra layer of sweetness and a soft, chewy texture.
· (Optional) Mandarin orange segments, drained and patted dry – For garnish and an extra burst of fresh orange flavor.
—
Formation: Step-by-Step Instructions & Methods
Follow these steps carefully to ensure your Dreamsicle Salad sets up perfectly.
Step 1: Dissolve the Gelatin
In a very large mixing bowl, combine the orange Jell-O powder and the instant vanilla pudding mix. Whisk them together to combine. Pour in the 2 cups of boiling water. Whisk continuously for about 2 minutes, or until both powders are completely dissolved. There should be no granules remaining.
Step 2: Add the Pineapple and Cool the Mixture
Stir in the undrained crushed pineapple (including all the juice). Then, add the 2 cups of cold water and stir to combine. The cold water and pineapple juice will help cool the mixture down rapidly. Let the mixture sit at room temperature for about 20-30 minutes. It should cool significantly but not yet be set. You want it to be the consistency of raw egg whites.
Step 3: The “Setting Up” Phase (Crucial Step)
This is the most important part for a non-runny salad. Place the bowl in the refrigerator for about 1 to 1.5 hours. You want the mixture to be chilled and starting to thicken around the edges. It should be the consistency of a very thick, unbeaten egg white or a loose jelly. Do not let it fully set into a firm gelatin.
Step 4: Fold in the Fluff
Remove the semi-set mixture from the fridge. Take your thawed whipped topping and gently fold it into the orange mixture. Use a spatula and a gentle, turning motion to combine them. Fold until the color is uniform and no white streaks remain. Be careful not to stir vigorously, as this will deflate the whipped topping and result in a denser salad.
· If using: This is the time to fold in the miniature marshmallows as well.
Step 5: The Final Chill
Pour the combined mixture into a 9×13 inch serving dish or a large decorative glass bowl. Smooth the top with your spatula. Cover and return to the refrigerator to chill for at least 4-6 hours, but preferably overnight. This allows the dessert to set completely and the flavors to meld beautifully.
Step 6: Garnish and Serve
Just before serving, if desired, garnish with mandarin orange segments arranged on top. Scoop and serve cold.
—
The History of the “Salad”
To understand Orange Dreamsicle Salad, you have to understand the American culinary landscape of the mid-20th century. The 1950s and 60s were an era of convenience foods. Companies like Jell-O and Kraft heavily marketed their products as modern, time-saving miracles. “Salad” was a much broader term then, often referring to any molded dish served on a plate, whether it contained vegetables, fruit, or was entirely sweet.
Recipes like this one, often called “Orange Fluff,” “Pineapple Delight,” or “Sunshine Salad,” were born from this movement. They were a way for home cooks to create something impressive and crowd-pleasing with minimal effort. The combination of orange and vanilla directly mimics the popular Dreamsicle ice cream treat, which was patented in the 1940s. By merging these two convenience products (Jell-O and pudding mix), cooks created a new, beloved classic that has stood the test of time.
—
Benefits (Why You Should Make This)
· Incredibly Easy: This is a perfect recipe for beginner cooks. There’s no baking, no complicated techniques, and very little cleanup.
· Make-Ahead Magic: It requires hours to set, which makes it the ultimate make-ahead dish. Prepare it the night before your event and forget about it until it’s time to serve.
· Crowd-Pleaser: The familiar, sweet flavor of orange and vanilla is universally loved by both children and adults.
· Versatile: It can be served as a dessert, a sweet side dish at a barbecue, or a colorful addition to a holiday brunch buffet.
· Budget-Friendly: The ingredients are inexpensive and readily available at any grocery store.
—
Nutrition Information (Approximate)
Please note: This is an estimate and will vary based on specific brands and optional ingredients. This calculation is for the entire recipe, divided into 12 servings.
· Serving Size: ~1 cup
· Calories: ~210-250
· Fat: ~6-8g (mostly from whipped topping)
· Carbohydrates: ~38-45g (primarily from sugar and pineapple)
· Protein: ~2g
· Sugar: ~30-35g
(This dessert is a sweet treat meant for enjoyment, not a low-calorie health food. Its “benefit” is in its joy, simplicity, and nostalgia!)
—
Lovers of the Orange Dreamsicle Salad
Who is this salad for? Everyone.
· The Nostalgic: It reminds them of their childhood and family potlucks of the past.
· The Busy Cook: They appreciate a dish that looks like it took hours but actually came together in 15 minutes.
· The Potluck Pro: They know this dish travels well, serves a crowd, and will be one of the first bowls to be emptied.
· The Kid (and Kid at Heart): They love the sweet, creamy, fluffy texture and the fun, bright orange color.
· The Dessert Lover: It satisfies a sweet tooth in a light, refreshing way that isn’t as heavy as cake or pie.
Conclusion
Orange Dreamsicle Salad is more than just a recipe; it’s a piece of culinary history and a vessel for happy memories. It proves that simple ingredients, thoughtfully combined, can create something truly special and enduring. Whether you’re making it to evoke a sense of nostalgia or trying it for the very first time, this creamy, citrusy, fluffy salad is sure to bring a smile to your face and a taste of sunshine to your table. It’s a classic for a reason, and it’s waiting to become a favorite in your home, too.