Here is a big, comprehensive guide to the legendary Creamy Coconut Cake, also famously known as Better Than Sex Cake (or its coconut variation). This recipe is a staple of Southern American potlucks and family gatherings, known for its incredibly moist texture and rich, sweet flavor.
Below is a complete breakdown, from a heartfelt introduction to the nutritional facts.
—
Introduction: The Legendary Coconut Dream
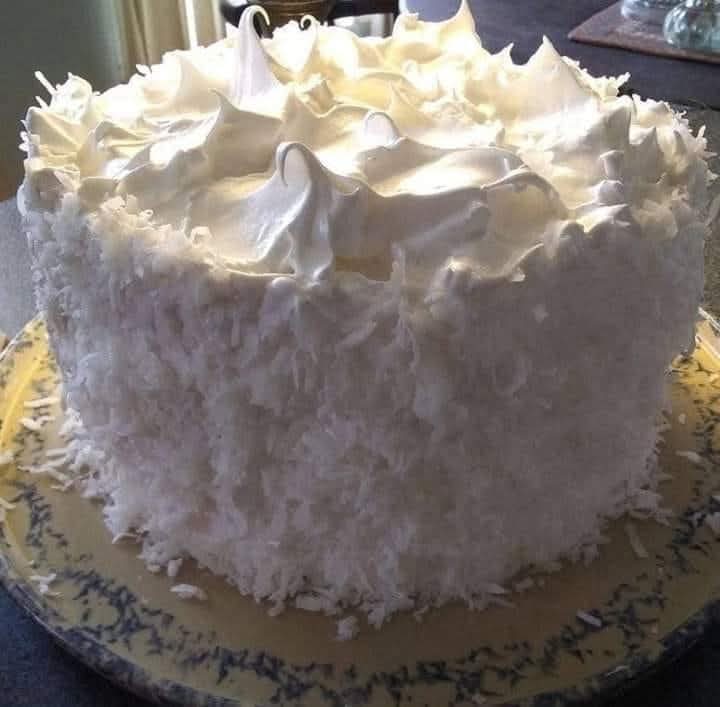
If you are looking for a dessert that is ridiculously easy to make yet tastes like you spent hours in the kitchen, look no further than the Creamy Coconut Cake. This dessert isn’t just a cake; it’s an experience. It starts with a simple boxed cake mix, but the magic happens after it leaves the oven. While still warm, the cake is pierced and drenched in a sweet, tropical bath of cream of coconut and sweetened condensed milk. This transforms the humble sponge into a dense, moist, almost pudding-like confection. Topped with a billowy layer of whipped topping and a blanket of toasted coconut flakes, every bite is a textural and flavorful symphony. It’s a guaranteed crowd-pleaser that has earned its place in dessert lore.
History: From the Back of the Box to Potluck Fame
The origins of this cake are a true American culinary story. It rose to prominence in the 1970s and 80s, an era that celebrated convenience and creativity in equal measure. While the most famous version is the “Better Than Sex Cake” (usually chocolate with caramel and toffee), this coconut variation became a powerhouse in its own right.
It’s a prime example of a “dump cake” or a “poke cake”—a style of baking that utilizes simple, processed ingredients to create something spectacularly indulgent. The recipe likely originated on the back of a can of cream of coconut (often used in Piña Coladas) or a can of sweetened condensed milk, two ingredients that became pantry staples in the mid-20th century. Its popularity exploded because it required no fancy techniques, used affordable ingredients, and always delivered a moist, flavorful result that was perfect for feeding a crowd.
Benefits (The “Why You Should Make It”)
· Incredibly Moist: The combination of two liquid sweeteners guarantees a cake that stays moist for days (if it lasts that long).
· Deceptively Simple: It uses a boxed cake mix as its base, making it nearly foolproof for bakers of any skill level.
· Perfect for Sharing: This recipe makes a generous 9×13-inch cake, ideal for parties, BBQs, holidays, and family dinners.
· Make-Ahead Magic: It tastes even better the next day after the flavors have had time to meld, making it a perfect dessert to prepare in advance.
· Customizable: You can easily adapt it with different types of milk, toppings, or cake flavors.
—
The Big Recipe: Creamy Coconut Cake
Ingredients
· For the Cake:
· 1 (15.25 ounce) package white cake mix (or yellow cake mix)
· Ingredients listed on the cake mix box (typically eggs, oil, and water)
· For the Filling/Soak:
· 1 (14 ounce) can cream of coconut (such as Coco López—do not confuse with coconut milk)
· 1 (14 ounce) can sweetened condensed milk
· For the Topping:
· 1 (16 ounce) container frozen whipped topping (like Cool Whip), thawed
· 2 cups sweetened shredded coconut flakes
· (Optional) Maraschino cherries for garnish
Equipment
· 9×13 inch baking dish
· Mixing bowls
· Electric hand mixer or stand mixer
· Wooden spoon or the end of a spatula (for poking holes)
· Small skillet (for toasting coconut)
—
Instructions & Methods: Step-by-Step
Step 1: Prepare and Bake the Cake
Preheat your oven according to the instructions on the cake mix box (usually 350°F or 175°C). Grease and flour your 9×13-inch baking dish. Prepare the white cake batter according to the package directions. Pour the batter into the prepared pan and bake according to the package directions, or until a toothpick inserted into the center comes out clean.
Step 2: The “Poke” Method
Once the cake is done, remove it from the oven and place it on a wire rack. Let it cool for about 10-15 minutes. This is crucial—if it’s too hot, the milk mixture will cook and curdle; if it’s too cool, it won’t absorb properly. While it’s still warm, use the handle of a wooden spoon or a skewer to poke holes all over the cake. Poke them all the way to the bottom of the pan, spacing them about 1 inch apart.
Step 3: Create the Soaking Liquid
In a medium bowl or large measuring cup, whisk together the can of cream of coconut and the can of sweetened condensed milk until they are completely combined and smooth.
Step 4: The Drench
Slowly and evenly pour the cream of coconut mixture over the warm cake, making sure to fill all the holes. You may need to go slowly to allow the liquid to absorb. Don’t worry if it looks like a soupy mess at the bottom of the pan—the cake will absorb it as it cools.
Step 5: Cool and Chill
Cover the cake loosely with plastic wrap or aluminum foil and refrigerate for at least 2-3 hours, but preferably overnight. This chilling time is non-negotiable; it allows the cake to fully absorb the liquid and become perfectly dense and moist.
Step 6: Toast the Coconut (The Final Touch)
While the cake chills, spread the 2 cups of shredded coconut on a baking sheet. Toast in a preheated 350°F (175°C) oven for 5-10 minutes, stirring every couple of minutes, until it is golden brown and fragrant. Keep a close eye on it, as it can burn quickly. Let it cool completely.
Step 7: Frost and Garnish
Once the cake is thoroughly chilled, spread the thawed whipped topping evenly over the top. Sprinkle the toasted coconut flakes generously over the whipped topping. For a classic retro look, you can place a few maraschino cherries on top. Slice, serve, and prepare for the compliments!
—
Formation & Science: Why This Recipe Works
This recipe is a beautiful example of food science in action.
· The Pores: Poking holes in the warm cake creates channels for the liquid to penetrate deep into the structure, ensuring every single bite is moist, not just the top.
· The Liquid Duo: The cream of coconut provides a concentrated, tropical sweetness and flavor. The sweetened condensed milk adds an incredible creaminess and density. Together, they create a syrup that is absorbed by the crumb, transforming its texture from light and airy to rich and decadent.
· Chilling is Key: As the cake cools in the refrigerator, the absorbed liquid firms up slightly, creating a cohesive, almost fudge-like texture. The fats in the milk solidify just enough to give the cake its signature dense bite.
· Texture Contrast: The light and airy whipped topping provides a cool, fluffy contrast to the dense, moist cake. The toasted coconut adds a crucial element of crunch and a deeper, nuttier flavor that balances the sweetness.
Nutrition (Approximate, per serving, based on 15 servings)
Please note this is an estimate and can vary based on specific brands used. This is a rich dessert!
· Calories: ~450-550
· Fat: ~20-25g
· Carbohydrates: ~65-75g
· Protein: ~5-7g
· Sugar: ~50-60g
Conclusion: Smash or Pass?
Verdict: ABSOLUTE SMASH! 🏆🔥
This Creamy Coconut Cake is a classic for a reason. It’s a nostalgic, indulgent, and utterly delicious dessert that delivers on its promise of incredible texture and flavor. While it’s a “sometimes” treat due to its richness, it is the perfect dessert for any celebration where you want to impress with minimal effort.
Lovers of This Cake Say…
· “This is the only cake my husband asks for on his birthday.”
· “I brought this to a work potluck and it was gone in 10 minutes. People were standing over the pan!”
· “So moist and coconutty! It’s pure comfort food.”
· “Better than any bakery cake. So easy a beginner can make it perfectly.”