Here is a comprehensive guide to creating that incredible no-oven bread, complete with all the details you requested. This recipe is a staple for a reason—it’s forgiving, delicious, and produces the most wonderful aroma in your kitchen.
The Magic of Stovetop Bread: A 20-Year Legacy
Introduction
Forget everything you think you know about baking bread. For twenty years, this simple, foolproof recipe has been my secret weapon, a comforting ritual that has never, ever disappointed. It proves that you don’t need a fancy oven or professional skills to create bread that is crusty on the outside, pillow-soft on the inside, and bursting with homely flavor. This isn’t just a recipe; it’s an invitation to slow down, get your hands a little floury, and fill your home with the most irresistible scent. Perfect for a leisurely weekend breakfast or a quick weekday treat, this stovetop bread will redefine your morning routine. It’s the bread that lovers of simple, honest food have been making for decades.
The Foolproof Recipe
Ingredients:
· 1 cup warm water (200 ml): Not hot, but comfortably warm to the touch (like bathwater). This is crucial to activate the yeast without killing it.
· 1 tbsp active dry yeast (10 grams): The magic ingredient that makes our bread rise and gives it that wonderful airy texture.
· 4 tsp sugar: Feeds the yeast, helping it activate and also adds a touch of sweetness and helps with browning.
· 1/3 cup vegetable oil (60 ml): Adds moisture, tenderness, and richness to the crumb. You can use any neutral oil like canola or sunflower.
· 1 tsp salt: Essential for flavor; it doesn’t just make it salty but enhances all the other flavors.
· 2.5 – 3 cups all-purpose flour (approx. 350-400 grams): The structure of our bread. We’ll add it gradually to achieve the perfect dough consistency.
Instructions & Methods: A Step-by-Step Guide
1. The Activation: In a large mixing bowl, combine the warm water, yeast, and sugar. Give it a gentle stir and let it sit for about 5-10 minutes. You’ll know it’s ready when the mixture becomes frothy and bubbly on top. This is your sign that the yeast is alive and happy!
2. Building the Dough: Pour in the vegetable oil and add the salt to the yeast mixture. Now, start adding the flour, one cup at a time. Mix with a spoon or your hand after each addition. After adding about 2 cups, the dough will start to come together.
3. The Knead (The Most Important Part): Turn the dough out onto a lightly floured surface. Knead for 8-10 minutes, adding the remaining flour a little at a time only if the dough is too sticky. The dough should be smooth, soft, and elastic—it should spring back when you poke it. This process develops the gluten, which gives the bread its structure and chewy texture.
4. First Rise: Lightly oil the same bowl (or a new one). Place the dough ball in the bowl, turning it to coat all sides with oil. Cover the bowl with a clean kitchen towel or plastic wrap. Let it rest in a warm, draft-free spot for about 1 hour, or until it has doubled in size.
5. Shaping the Loaf: Punch the risen dough down gently to release the air. Turn it out onto a floured surface again. Briefly knead it for a minute, then shape it into a round or oval loaf, about 1-1.5 inches thick.
6. Second Rise (The Puff-Up): Place the shaped loaf onto a piece of parchment paper. Cover it gently with the towel and let it rest for another 20-30 minutes. It will puff up nicely.
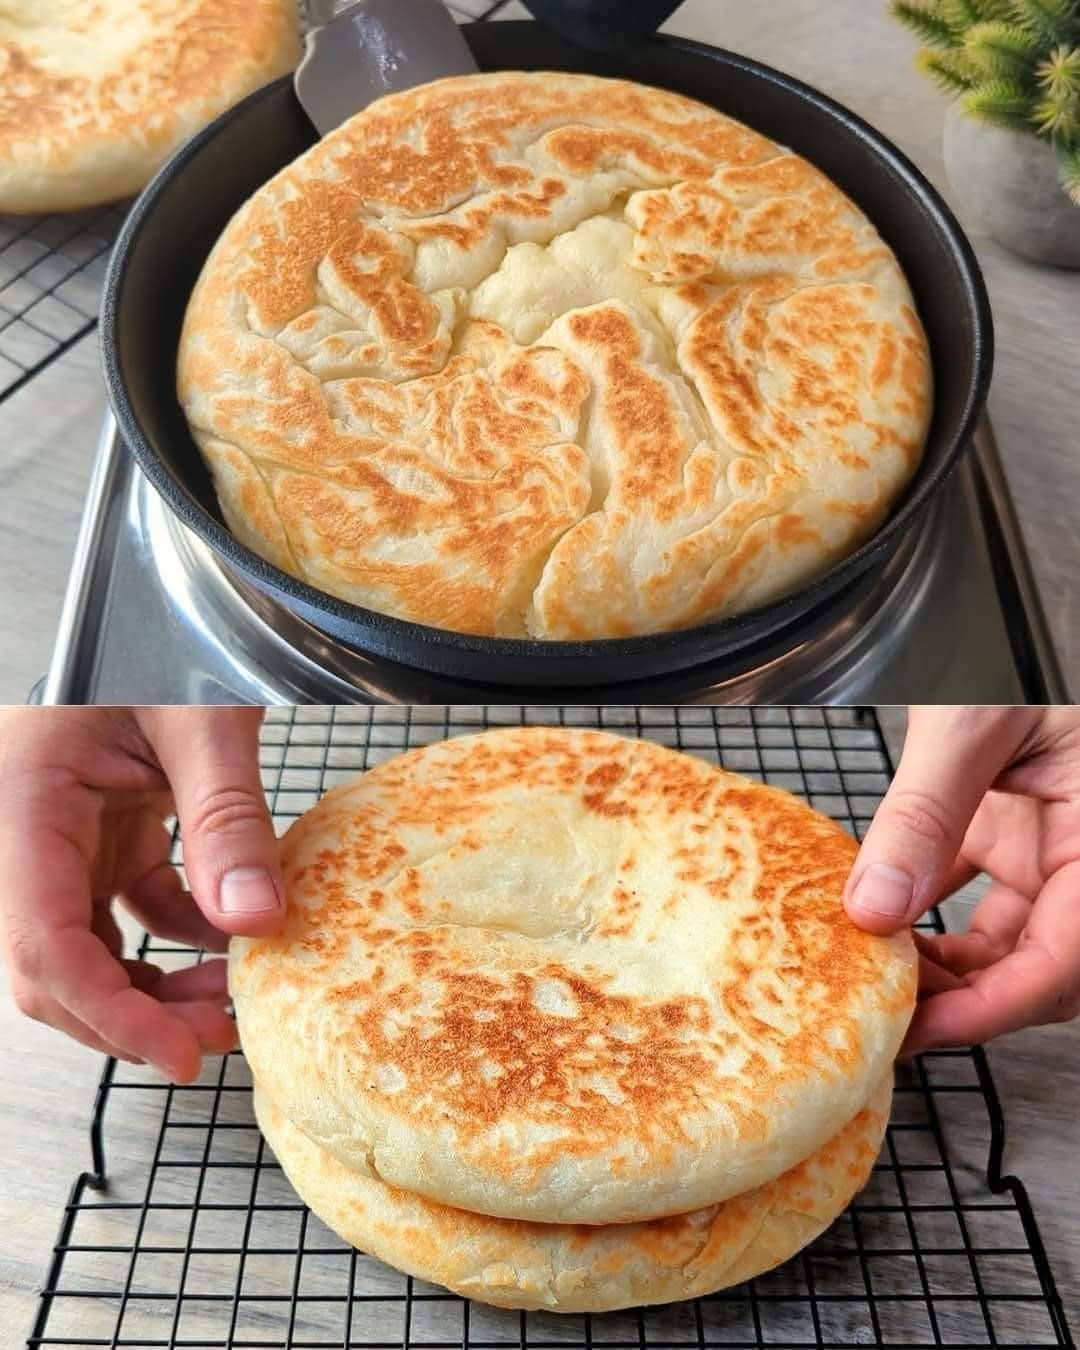
7. The Stovetop Bake: Place a large, heavy-bottomed pan or skillet with a tight-fitting lid (like a Dutch oven or a deep non-stick pan) over the lowest possible heat. Let it preheat for 5 minutes. Carefully lift the parchment paper with the risen dough and lower it into the cold (but now preheated) pan. Put the lid on immediately.
8. Cooking: Cook on the lowest heat for 25-30 minutes. Do not lift the lid! The steam trapped inside is what bakes the bread and creates a soft crumb. After 30 minutes, carefully remove the lid. The bread should be golden brown. Flip it over and cook for another 5-10 minutes without the lid to brown the bottom.
9. The Cool Down: Transfer the bread to a wire rack to cool completely before slicing. This is the hardest part, but it’s essential! Slicing it while it’s hot can make the inside gummy.
A Humble History
While this exact recipe is a modern home-kitchen classic, its roots lie in the traditional ways of cooking bread before modern ovens were common. All around the world, from the Irish soda bread cooked on a griddle to the Indian flatbreads cooked in a tawa and the dampers cooked in the coals of a fire, the principle is the same: bread is for everyone, and where there’s heat, there’s a way. This recipe is a beautiful descendant of those global traditions—a simple, egalitarian loaf that prioritizes taste and texture, proving that great food doesn’t require complicated technology.
The Benefits of This Bread
· No Oven Required: Perfect for small kitchens, hot climates where you don’t want to turn on the oven, or for anyone who doesn’t own one.
· Incredibly Fast: From start to finish, you can have fresh bread in under 2 hours, with very little active work.
· Foolproof: This dough is very forgiving and hard to mess up. It’s an excellent recipe for beginners.
· Deliciously Soft: Cooking it in a covered pot traps steam, creating an incredibly soft and tender interior, perfect for breakfast.
· Versatile: You can add herbs, garlic, cheese, or seeds to the dough to create endless variations.
Formation of the Perfect Crumb
The perfect crumb (the inside texture of the bread) is achieved through a few key steps. First, the kneading process forms the gluten network, which traps the gas produced by the yeast. Second, the long, slow first rise allows the yeast to multiply and fill those gluten pockets with air. Finally, the covered baking method steams the bread, allowing the gluten to set and the crumb to become soft and airy before the crust has a chance to harden. The result is a beautiful, tender texture with small, even holes—the hallmark of a well-made loaf.
Lovers of This Bread
This bread is for the lovers of simple pleasures. It’s for the lover who wants to wake up and make a special breakfast for their partner. It’s for the lover of tradition, who appreciates a recipe passed down through years of happy meals. It’s for the lover of their own home, who finds joy in filling it with the warm, comforting scent of baking bread. And most of all, it’s for the lover of good food, who knows that the most delicious things are often the most simple.
Nutrition (Approximate per slice, based on 10 slices)
· Calories: ~180-200
· Fat: ~7g
· Carbohydrates: ~26g
· Protein: ~4g
Note: This is an estimate and will vary based on the exact ingredients and flour used.
Conclusion
This no-oven bread is more than just a recipe; it’s a testament to the fact that you can create magic with the simplest of ingredients and tools. For two decades, it has been a faithful companion in my kitchen, a reliable source of comfort and delight. It’s fast, it’s tasty, and it’s guaranteed to impress. I urge you to try it. Feel the dough come to life in your hands, watch it rise with patience, and savor the incredible flavor of bread you made yourself, all without ever turning on an oven. It’s a tradition that is sure to become a beloved part of your own story. Happy baking, lovers of good food!