Here is a big, comprehensive recipe for Homemade Sweet Bread, complete with all the sections you requested.
The Heartwarming History of Sweet Bread
The story of sweet bread is as old as agriculture itself, evolving alongside our discovery of leavening and our love for sugar. While early breads were coarse, flat, and utilitarian, the dream of a softer, richer loaf has always existed. The journey from simple sustenance to sweet indulgence began in earnest in the 19th century. Before then, sugar was a luxury, a precious spice reserved for the wealthy. Bakers would add honey, dried fruits, or expensive spices to dough for special celebrations and feast days.
The true transformation of sweet bread came with the Industrial Revolution. As sugar became more affordable and refined flour more accessible, the ability to create a tender, enriched dough—one containing fat (butter or oil), eggs, and sugar—was no longer just for the elite. This new kind of dough, known in French as pâte levée enrichie (enriched leavened dough), became the foundation for countless regional specialties. From the buttery brioche of France to the pan dulce of Mexico and the challah of Jewish tradition, every culture developed its own version of sweet bread. It became a symbol of comfort, celebration, and home. This recipe is a tribute to that global tradition—a simple, versatile loaf that fills your kitchen with the unmatched aroma of warmth and love.
—
The Benefits of Baking Your Own Sweet Bread
Beyond the sheer pleasure of eating it, baking your own sweet bread at home offers a wealth of benefits:
· Pure, Wholesome Ingredients: You are in complete control. No preservatives, dough conditioners, or high-fructose corn syrup found in commercial loaves. You know exactly what’s going into your food.
· Customizable Sweetness: You can adjust the sugar to your taste, or experiment with natural sweeteners like honey or maple syrup.
· Aromatherapy for the Soul: The scent of yeast, butter, and sugar baking is one of the most comforting and stress-relieving smells, creating a warm and inviting home.
· A Creative Outlet: From shaping simple loaves to creating intricate braids, baking is a hands-on, meditative, and rewarding creative process.
· The Joy of Sharing: Breaking bread with loved ones is a fundamental human connection. A homemade loaf is a gift of time, effort, and love.
—
The Formation of the Perfect Loaf: A Baker’s Overview
Creating a perfect sweet bread is a journey of transformation. It begins with the autolyse, where flour and liquid are combined, allowing the flour to hydrate and gluten development to begin. The addition of yeast and sugar then initiates fermentation, where the yeast consumes sugars and releases carbon dioxide, causing the dough to rise. The eggs and butter enrich the dough, tenderizing the gluten network with fats and adding richness. The first proof allows the dough to develop flavor and structure. After shaping, the second proof gives the loaf its final volume and airy crumb. Finally, the oven spring in a hot oven creates a final burst of rise, setting the structure and creating a beautiful, golden-brown crust. This recipe guides you through each of these magical steps.
—
🥣 Homemade Sweet Bread Recipe 🥣
This recipe yields one beautifully soft, slightly sweet loaf, perfect for breakfast, French toast, or enjoying with a pat of butter.
Preparation Time: 20 minutes
Rising Time: 1 hour 30 minutes – 2 hours
Bake Time: 25-30 minutes
Total Time: Approximately 2 hours 45 minutes
Ingredients
For the Dough:
· 300g all-purpose flour (about 2 ½ cups, spooned and leveled)
· 40g granulated sugar (about 3 tablespoons)
· 2g salt (about ⅓ teaspoon)
· 7g dry active yeast (about 2 ¼ teaspoons, or one standard packet)
· 1 large egg, at room temperature
· 120ml warm milk (about ½ cup, around 110°F / 43°C)
· 60g unsalted butter, very soft (about 4 tablespoons)
For the Egg Wash (optional, for a shiny crust):
· 1 large egg, beaten with 1 tablespoon of milk or water.
Instructions & Methods
Step 1: Activate the Yeast
In a small bowl or measuring jug, combine the warm milk and 1 teaspoon of the measured sugar. Sprinkle the yeast over the top and give it a gentle stir. Let it sit for 5-10 minutes until it becomes frothy. This “proofs” the yeast, ensuring it’s alive and active.
Step 2: Combine Dry Ingredients
In a large mixing bowl or the bowl of a stand mixer, whisk together the flour, the remaining sugar, and the salt. Be sure the salt and yeast don’t come into direct contact at this stage, as salt can kill the yeast.
Step 3: Form the Dough
Make a well in the center of the flour mixture. Add the frothy yeast mixture and the beaten egg. If using a stand mixer, use the dough hook attachment. If mixing by hand, use a wooden spoon. Mix until the ingredients come together into a shaggy dough.
Step 4: Incorporate the Butter
This is the key to tender sweet bread. With the mixer on low (or by hand), add the softened butter a tablespoon at a time, waiting for each addition to be mostly incorporated before adding the next. The dough will look messy at first, but keep mixing. Continue kneading for about 8-10 minutes with a mixer (or 10-12 minutes by hand on a lightly floured surface) until the dough is smooth, elastic, and slightly tacky but not sticky.
Step 5: First Rise (Bulk Fermentation)
Form the dough into a smooth ball. Place it in a lightly greased bowl, turning once to coat all sides. Cover the bowl with plastic wrap or a clean kitchen towel. Let it rise in a warm, draft-free place for about 1 to 1.5 hours, or until it has doubled in size.
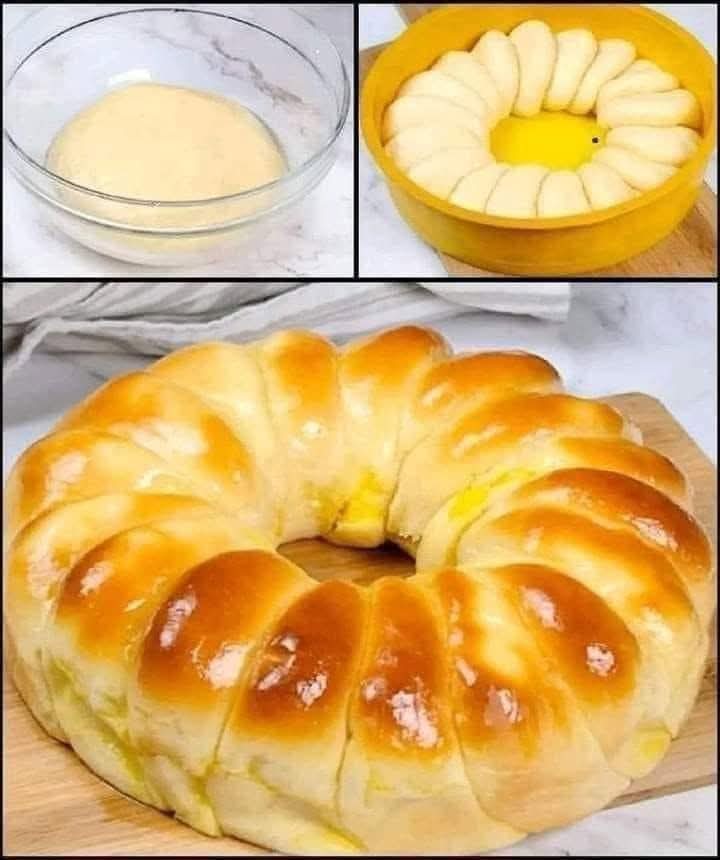
Step 6: Shape the Loaf
Gently punch down the dough to release the air. Turn it out onto a lightly floured surface. Shape it into a loaf by pressing it into a rectangle (about 8×6 inches), then rolling it up tightly from the short end, pinching the seam to seal. Tuck the ends under.
Step 7: Second Rise (Proofing)
Place the shaped loaf, seam-side down, into a greased 9×5-inch loaf pan. Cover loosely with the towel. Let it rise again for about 30-45 minutes, or until the dough has risen just above the rim of the pan.
Step 8: Preheat and Prepare
About 20 minutes into the second rise, preheat your oven to 180°C (350°F). If using, gently brush the top of the risen loaf with the egg wash for a beautiful, glossy crust.
Step 9: Bake
Place the pan in the preheated oven and bake for 25-30 minutes. The bread is done when it is golden brown on top and sounds hollow when tapped on the bottom. If you have an instant-read thermometer, the internal temperature should be around 90°C (190°F).
Step 10: Cool
Let the bread cool in the pan for about 10 minutes, then carefully turn it out onto a wire rack to cool completely. This is crucial; slicing into it while hot can result in a gummy texture.
—
Nutritional Information (Per Slice, based on 12 slices)
· Calories: Approximately 180-200
· Fat: 6g
· Carbohydrates: 28g
· Protein: 5g
(Note: This is an estimate and will vary based on specific ingredients used.)
For the Lovers of Bread… 💕
This bread is for the lovers. The lovers of a quiet morning with a slice of toast and jam. The lovers of a late-night snack, torn warm from the loaf. The lovers of tradition, who find comfort in the simple, timeless act of baking. It’s for those who understand that food made with patience and care is the ultimate expression of love. So preheat your oven, dust your counter with flour, and create something beautiful. Enjoy every bite! 🥰🍞