Here is a comprehensive, large-format recipe and guide for Homemade Butter, along with its creamy byproduct, Buttermilk, and instructions on how to turn that into Cream Cheese.
This guide covers everything from the history of churning to the nutritional benefits, ensuring you become a true dairy craftsperson.
—
The Art of Churning: A Complete Guide to Homemade Butter and Cream Cheese
Introduction: The Magic of Fresh Dairy
There is a certain kind of kitchen alchemy that transforms a single ingredient into something entirely new. Pouring a carton of heavy cream into a jar, shaking it with intention, and watching it separate into golden, creamy butter and fresh, tangy buttermilk is a deeply satisfying experience. It connects us to a centuries-old tradition, long before grocery store shelves were stocked with foil-wrapped sticks.
This guide is more than just a recipe; it’s an invitation to rediscover the pure, unadulterated flavor of homemade dairy. By making your own butter and cream cheese, you control the ingredients, avoid preservatives, and create a product that is bursting with freshness. Whether you’re a seasoned baker, a curious home cook, or simply someone who appreciates the finer things in life, this journey from cream to compound is one you’ll want to take again and again.
A Brief History of Butter
The origins of butter are lost in antiquity. A happy accident is the most likely scenario: a traveler on a long journey across the arid plains of Africa or Asia used a skin bag to carry milk. The constant rhythmic motion of the animal—and later, the sloshing on the back of a horse or camel—churned the milk, separating it into butter.
By 2000 BCE, butter was a familiar substance. The ancient Israelites prized it, the Greeks and Romans viewed it as a medicinal ointment for barbarians (preferring olive oil for cooking), and in India, it evolved into the sacred and clarified ghee. During the Middle Ages in Northern Europe, butter became a staple, traded and valued. The invention of the mechanical butter churn revolutionized production, turning a tedious chore into a manageable household task. Today, while mass production is the norm, the art of hand-churning survives as a cherished tradition, a way to reclaim a small piece of our culinary heritage.
The Science of Formation: How Cream Becomes Butter
The magic of butter is a fascinating lesson in food science. Heavy cream is an emulsion—a stable mixture of two things that don’t normally mix: tiny fat globules suspended in water, along with proteins, minerals, and milk sugars (lactose). These fat globules are encased in a thin membrane that prevents them from clumping together.
When you agitate the cream (by shaking, whisking, or churning), you disrupt these membranes. The fat globules, now free, begin to stick together. As you continue, they form clumps, and eventually, the emulsion breaks completely. The fat solids (the butter) separate from the liquid (the buttermilk). The process is a physical transformation, turning a liquid into a solid through the power of motion.
—
Recipe 1: The Big Batch of Homemade Butter
This recipe is designed to yield a generous amount, perfect for a large family gathering, a week of gourmet cooking, or for gifting.
Yields: Approximately 1 lb (450g) of butter and 2 cups of buttermilk.
Prep time: 5 minutes
Active time: 10-20 minutes
Ingredients
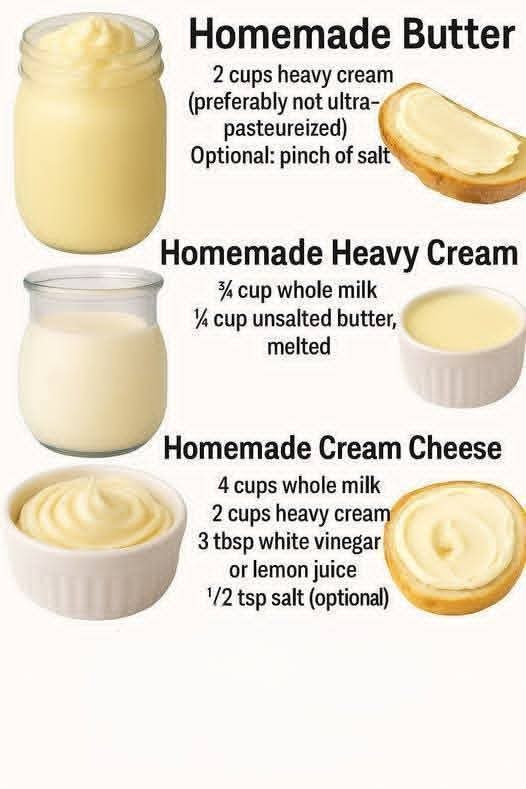
· 4 cups (1 liter) Heavy Cream: The star of the show. For the best flavor and texture, use high-quality, pasteurized (not ultra-pasteurized) cream. Ultra-pasteurized cream is heated to a very high temperature to extend shelf life, which can denature the proteins and make it more difficult to form a solid butter.
· Optional: Salt: Flaky sea salt (like Maldon) or kosher salt, to taste (about ½ to 1 teaspoon for salted butter).
· Optional: Ice Water: Very cold water for washing the butter.
Equipment
· A large glass jar with a tight-fitting lid (a quart-sized mason jar works perfectly for this amount, though you may need to do it in two batches if your jar is smaller).
· A fine-mesh strainer.
· A large bowl.
· A spatula.
· Cold water.
· Butter molds or parchment paper for storage.
Method: The Shaken Jar Technique (No Churn Needed!)
1. The Foundation: Pour the heavy cream into your large jar. Fill it no more than halfway to two-thirds full. The cream needs room to slosh around and form the butter. Screw the lid on tightly.
2. The First Stage: Whipped Cream (5-7 minutes): Begin shaking the jar vigorously. At first, you’ll hear the liquid sloshing. After a few minutes, the sound will change to a dull thud as the cream thickens into whipped cream. You can open the jar to check—it should be fluffy and hold soft peaks. Shake for another minute or two past this stage.
3. The Second Stage: The Break (2-5 more minutes): Keep shaking! The whipped cream will suddenly start to deflate and look grainy. This is the “break.” Continue shaking. You will hear a distinct sloshing sound again as liquid (the buttermilk) is released. The butter will begin to form into a solid, yellow mass.
4. The Separation: Once you have a distinct, solid lump of butter and a pool of milky liquid, you’re done. Place your strainer over the large bowl and pour the contents of the jar into it. The liquid in the bowl is your fresh buttermilk! Reserve it for pancakes, biscuits, or drinking.
5. Washing the Butter (Crucial Step): Transfer the butter lump back into the jar (or a clean bowl). Cover it with ice-cold water. Put the lid back on and shake vigorously for about 30 seconds. This removes any residual buttermilk, which can turn the butter rancid faster. Pour out the cloudy water. Repeat this process with fresh ice water until the water runs almost completely clear. This is key to a long-lasting, sweet butter.
6. Working and Salting: Place the washed butter in a large bowl. Use a spatula or wooden spoon to press and knead it. You’ll see more milky liquid being released; pour it off. If you are making salted butter, now is the time to work in your flaky salt. Knead until it’s evenly distributed and the butter is smooth and uniform.
7. Form and Store: You can press the butter into a mold, shape it into a log using parchment paper, or simply pack it into a ramekin. Refrigerate for at least an hour to firm up completely.
—
Bonus Recipe: Fresh Homemade Cream Cheese
Now, take that fresh buttermilk and transform it! While the butter recipe is quick, this cream cheese requires patience but yields a luscious, tangy spread.
Ingredients
· 4 cups Fresh Buttermilk: This must be the liquid left over from making butter. Store-bought buttermilk is cultured and will not work the same way.
· Salt: A pinch to taste.
· Optional: Fresh herbs, honey, or garlic.
Equipment
· A heavy-bottomed saucepan.
· A candy or deep-fry thermometer.
· A fine-mesh strainer lined with several layers of cheesecloth.
· A large bowl.
Method
1. The Gentle Heat: Pour the fresh buttermilk into the saucepan. Heat it gently over medium-low heat. Do not stir. You are looking for the curds (solids) to separate from the whey (a greenish-yellow liquid).
2. Watch the Temperature: Heat the buttermilk until it reaches about 180°F (82°C). You will see small white curds form and float to the top.
3. The Separation: Remove the pan from the heat and let it sit, undisturbed, for 10-15 minutes. The curds will become more pronounced.
4. Draining: Place the cheesecloth-lined strainer over your large bowl. Gently pour the contents of the pan into the strainer. The whey will drain into the bowl. (You can save the whey for smoothies or cooking grains!)
5. The Rest: Gather the corners of the cheesecloth and tie them into a bundle around a wooden spoon. Hang this bundle over the bowl (or a deep pot) so it can continue to drain. Let it hang at room temperature for 1-2 hours for a soft, spreadable cream cheese, or refrigerate it overnight for a firmer, drier cheese more akin to Greek yogurt cheese.
6. Season and Enjoy: Transfer the cheese from the cheesecloth to a bowl. Stir in a pinch of salt. You can also get creative by adding chopped chives, a drizzle of honey, or roasted garlic. Refrigerate until ready to use.
—
Benefits of Homemade Dairy
· Superior Flavor: The taste is incomparable—clean, rich, and pure. You can truly taste the quality of the cream.
· Ingredient Control: You decide what goes in it. No added preservatives, emulsifiers, or artificial colors. You control the salt level.
· Cost-Effective: High-quality, artisan-style butter and cream cheese can be expensive. Making them at home from good cream is often more economical.
· A Zero-Waste Product: Making butter gives you buttermilk, which can then become cream cheese, leaving you with the whey, which can be used in baking or smoothies. It’s the ultimate in kitchen efficiency.
· A Mindful Practice: The act of making food by hand is therapeutic and grounding. It fosters a deeper appreciation for your ingredients.
Nutrition (Per 1 tbsp of Homemade Butter)
· Calories: ~100
· Fat: ~12g (Saturated Fat: ~7g)
· Cholesterol: ~30mg
· Vitamin A: ~11% of the Daily Value (DV)
(Note: Nutritional content varies based on the cream used. Buttermilk and cream cheese will have lower fat content.)
For the Lovers of Butter
This recipe is for the romantics, the traditionalists, and the epicureans. It is for the baker who believes butter is the soul of their craft, for the parent who wants to share the wonder of cooking with their child, and for the food lover who knows that the simplest things, when made with care, are often the most profound. This butter is an act of love.
Conclusion
Making your own butter and cream cheese is a small act of rebellion against the impersonal nature of modern food production. It’s a simple, almost primal process that rewards you with something far greater than the sum of its parts. It is a lesson in patience, a marvel of science, and a testament to the fact that the best things in life are often worth a little bit of elbow grease. So go ahead, grab a carton of cream, and shake your way to deliciousness. Your warm, crusty bread is waiting.