Absolutely! Let’s turn that into a full, indulgent recipe experience. Here’s your Cherry Cream Cheese Dessert Delight in all its glory:
🍒🧀🤎 Cherry Cream Cheese Dessert Delight
Introduction
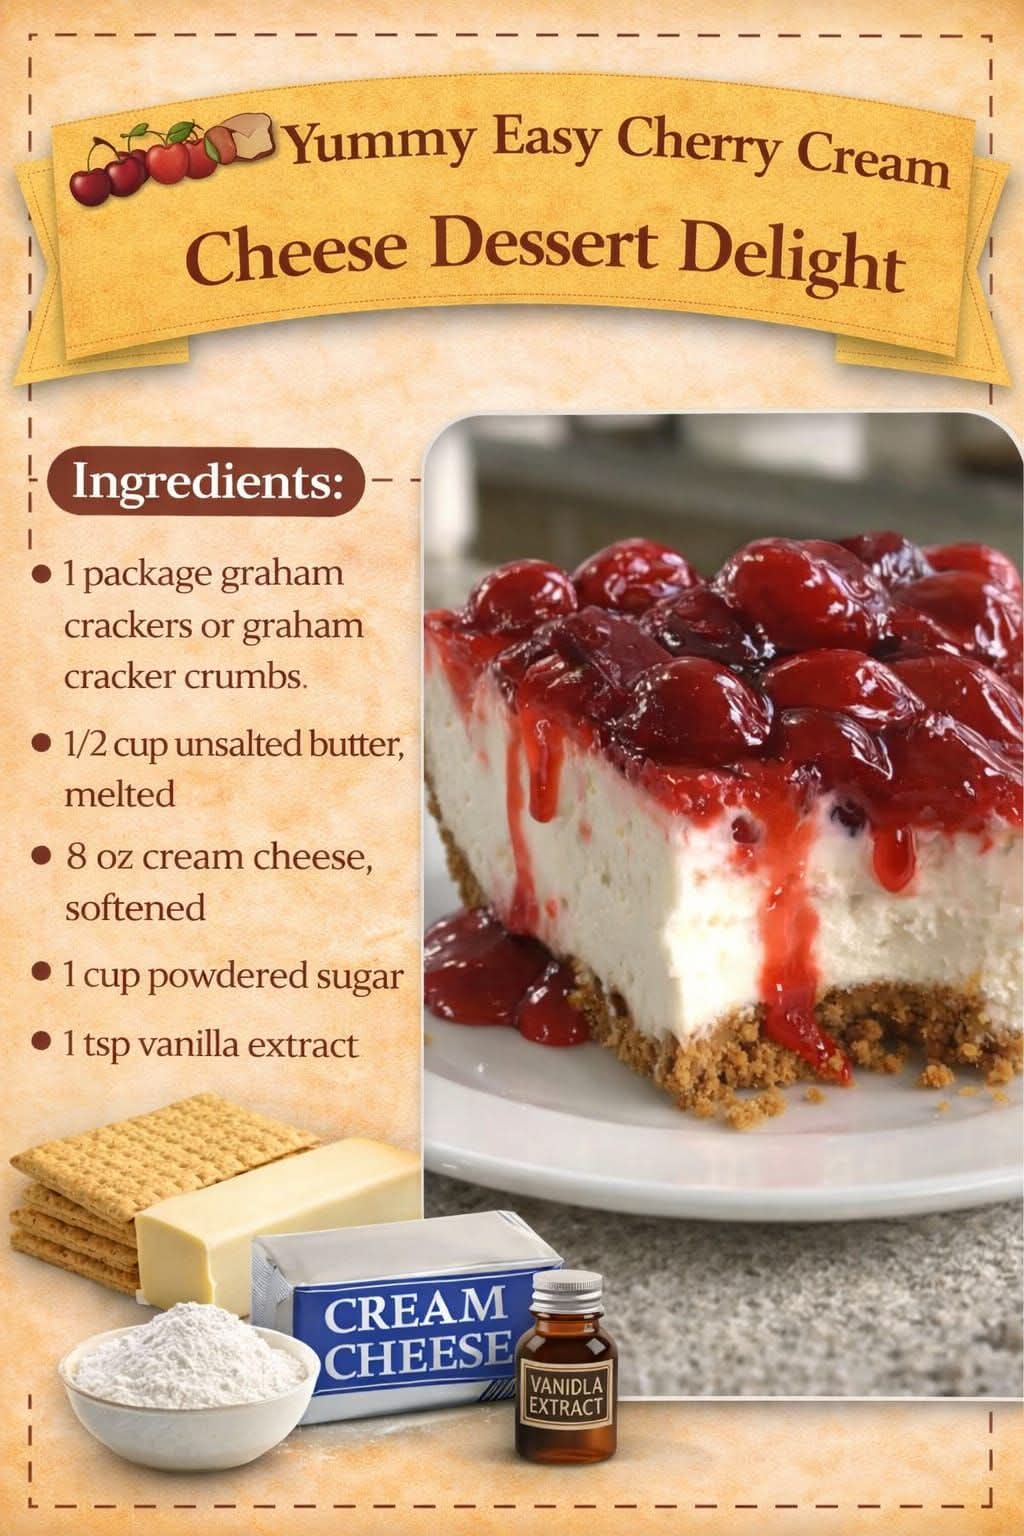
Imagine a dessert that’s creamy, sweet, and just a little tangy, layered perfectly with the crunch of a graham cracker base and the juicy burst of cherries on top. This Cherry Cream Cheese Dessert Delight is a no-bake treat that feels like a slice of heaven on a plate. Perfect for summer gatherings, holiday parties, or an easy weekend indulgence, it’s both stunning and simple to prepare. Even novice bakers can assemble this dessert in under 30 minutes!
The combination of cream cheese and cherries has been a beloved classic in American desserts since the mid-20th century, inspired by cheesecake variations but with a lighter, more approachable twist. The whipped topping keeps it airy, while the graham cracker crust adds texture and richness.
Ingredients
For the crust:
- 1 ½ cups graham cracker crumbs (or whole graham crackers, crushed)
- ½ cup unsalted butter, melted
For the cream cheese layer:
- 8 oz cream cheese, softened
- 1 cup powdered sugar
- 1 tsp vanilla extract
- 1 tub (8 oz) whipped topping (Cool Whip), thawed
For the topping:
- 1 can cherry pie filling (about 21 oz)
Optional garnishes: shaved chocolate, toasted almonds, or fresh cherries
Instructions
Step 1: Prepare the crust
- Preheat your oven to 350°F (175°C) if you prefer a slightly firmer crust (optional—no-bake works too).
- Combine graham cracker crumbs and melted butter in a medium bowl. Mix until the crumbs are evenly coated.
- Press the mixture firmly into the bottom of a 9×13-inch baking dish, forming an even layer.
- Bake for 8–10 minutes (optional) or chill in the fridge for 10–15 minutes to set.
Step 2: Make the cream cheese layer
- In a large bowl, beat softened cream cheese until smooth and creamy.
- Add powdered sugar and vanilla extract, continuing to beat until fully incorporated.
- Gently fold in the whipped topping until light and fluffy.
Step 3: Assemble the dessert
- Spread the cream cheese mixture evenly over the prepared crust.
- Spoon the cherry pie filling over the cream cheese layer, spreading gently so as not to mix the layers.
- Optional: Garnish with chocolate shavings, sliced almonds, or fresh cherries for added texture and visual appeal.
Step 4: Chill and serve
- Refrigerate for at least 2 hours (or overnight) to allow flavors to meld and the layers to firm up.
- Slice into squares or rectangles and serve chilled.
Method Notes
- No-bake option: Skip baking the crust; simply press it into the pan and chill before adding layers.
- Creaminess tip: Ensure the cream cheese is at room temperature for a smooth, lump-free filling.
- Layer precision: Use an offset spatula for even layers; it makes serving prettier.
History & Formation
This dessert is a derivative of the classic American cherry cheesecake, simplified into a layered bar for convenience. While cheesecake traces its roots back to ancient Greece, the modern American version evolved in the 20th century using cream cheese as a base. By using whipped topping instead of heavy cream and skipping the baking process, this dessert became accessible to busy home cooks who still wanted that rich, creamy experience.
Conclusion
The Cherry Cream Cheese Dessert Delight is more than just a dessert—it’s a crowd-pleaser. Sweet, creamy, and a little tangy, it satisfies all cravings without any complicated steps. Perfect for potlucks, birthdays, or simple family treats, it’s a recipe that combines ease with elegance.
Lovers of This Dessert
- Fans of cherry cheesecake 🍒
- Those who love no-bake desserts 🧁
- People who enjoy creamy, fluffy textures with a crunchy base 🍫
- Anyone craving a sweet, quick dessert that looks impressive on a platter
Bonus Tips (Methods with Lovers)
- Layer it in individual cups for personal servings.
- Add a graham cracker crumble on top for extra crunch lovers.
- Mix in a few drops of almond extract into the cream cheese layer for cherry lovers who like a nutty hint.
- Freeze individual squares for a summer-friendly frozen treat.
If you want, I can also create a step-by-step visual guide with tips for each layer so it comes out looking bakery-perfect every time. That would make it almost foolproof.
Do you want me to do that next?