Of course. Here is a comprehensive, “big” recipe for no-bake cheesecake, complete with all the elements you requested.
—
The Ultimate No-Bake Cheesecake: A Slice of Bliss Without the Oven
For generations, cheesecake has reigned as a pinnacle of dessert indulgence. Yet, for many, the prospect of baking—navigating water baths, worrying over cracks, and waiting patiently for it to cool—can feel daunting. This recipe is your liberation. It’s for the curious beginner, the time-pressed host, the heat-averse cook, and everyone who believes that profound love should not be complicated. This no-bake cheesecake delivers all the rich, creamy, tangy satisfaction of its baked counterpart, with a fraction of the effort and no oven required. It’s not just a recipe; it’s a promise of effortless elegance.
A Brief History: From Ancient Nourishment to Modern Delight
The story of cheesecake begins over 4,000 years ago on the Greek island of Samos, where it was served to athletes at the first Olympic Games as a source of energy. Romans adopted the recipe, spreading it across Europe. The modern, creamy cheesecake we know today was born with the invention of cream cheese in New York in the 1870s. The no-bake version emerged as a mid-20th century marvel, leveraging the power of refrigeration and whipped cream or gelatin to set, making a classic dessert accessible to all home cooks.
The Benefits: Why Choose No-Bake?
· Accessibility: No special baking skills or equipment needed.
· Convenience: Make it ahead of time—it actually gets better as it chills.
· Foolproof: No risk of over-baking, cracking, or curdling.
· Texture: It’s incredibly light, creamy, and cloud-like, a different but equally delightful experience compared to dense baked cheesecakes.
· Seasonal Flexibility: Perfect for summer when you don’t want to turn on the oven.
—
The Grand Recipe: No-Bake New York-Style Cheesecake
Yield: One 9-inch cheesecake (10-12 servings)
Prep Time: 25 minutes
Chill Time: 6 hours minimum (overnight best)
Ingredients
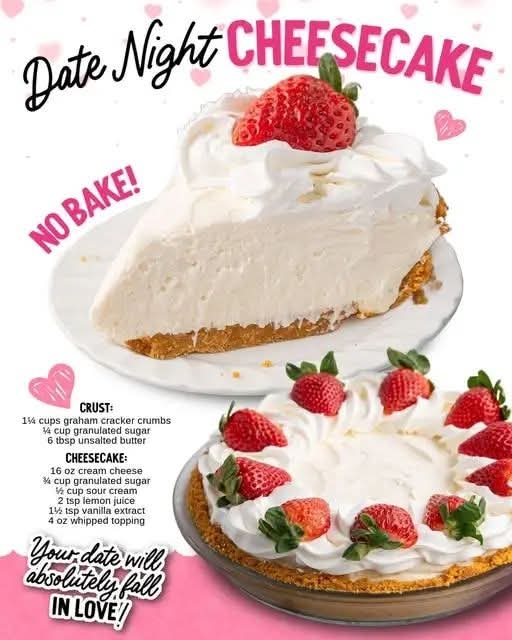
For the Crust:
· 1 ¼ cups (125g) graham cracker crumbs (about 9 full sheets)
· ¼ cup (50g) granulated sugar
· 6 tablespoons (85g) unsalted butter, melted
· A pinch of salt
For the Filling:
· 16 ounces (450g) full-fat cream cheese, softened to room temperature
· 1 cup (120g) powdered sugar, sifted
· 1 tablespoon pure vanilla extract
· 1 teaspoon fresh lemon juice
· ¼ teaspoon fine sea salt
· 1 ¼ cups (300ml) cold heavy whipping cream
For the Topping (Choose Your Adventure):
· Classic Strawberry: 2 cups fresh strawberries, sliced, or ½ cup strawberry jam warmed and brushed over the top.
· Decadent Chocolate: A generous drizzle of chocolate ganache and chocolate shavings.
· Salted Caramel: A lavish swirl of salted caramel sauce, finished with a sprinkle of flaky sea salt.
Equipment
· 9-inch springform pan (preferred) or a deep pie dish
· Electric hand mixer or stand mixer
· Rubber spatula
· Measuring cups and spoons
· Food processor (for crumbs, optional)
—
Method & Instructions
Part 1: Forming the Foundation (The Crust)
1. Prepare the Pan: Lightly grease the bottom and sides of your 9-inch springform pan. For easy removal, you can line the bottom with a round of parchment paper.
2. Combine Dry Ingredients: In a medium bowl, mix the graham cracker crumbs, granulated sugar, and pinch of salt until well combined.
3. Bind with Butter: Pour the melted butter over the crumb mixture. Use a fork to stir until every crumb is evenly moistened and the mixture resembles wet sand.
4. Press and Set: Pour the crumbs into your prepared pan. Using the bottom of a measuring cup or a glass, press the crumbs firmly and evenly into the bottom and about halfway up the sides of the pan. The compactness is key to a crust that holds together.
5. Chill: Place the crust in the refrigerator to firm up while you make the filling.
Part 2: Crafting the Cloud (The Filling)
1. Whip the Cream: In a large, clean bowl, using an electric mixer, beat the cold heavy whipping cream on medium-high speed until stiff peaks form. This takes about 3-4 minutes. Do not over-whip. Set aside.
2. Cream the Base: In another large bowl, beat the softened cream cheese on medium speed until completely smooth, creamy, and free of any lumps, about 2 minutes. Scrape down the sides of the bowl.
3. Sweeten and Flavor: Add the sifted powdered sugar, vanilla extract, lemon juice, and salt to the cream cheese. Beat on low until incorporated, then on medium until smooth and fully combined.
4. Fold and Unify: Using a rubber spatula, gently fold the whipped cream into the cream cheese mixture. This is the crucial step for a light texture. Add the cream in two additions, folding gently but thoroughly until no white streaks remain. The mixture will be thick, smooth, and billowy.
5. Assemble: Remove the chilled crust from the refrigerator. Spoon the filling into the crust, smoothing the top with an offset spatula or the back of a spoon.
Part 3: The Finale (Chilling and Topping)
1. The Long Chill: Cover the pan tightly with plastic wrap. Refrigerate for at least 6 hours, but ideally overnight. This patience is non-negotiable—it allows the cheesecake to set perfectly and the flavors to fully meld.
2. Serve and Adorn: Just before serving, run a thin knife around the edge of the pan, then release the springform clasp. Carefully transfer the cheesecake to a serving plate. Top with your chosen topping—a blanket of fresh strawberries, a glossy cascade of chocolate, or a luxurious river of caramel.
3. Slice and Serve: For clean slices, dip a sharp knife in hot water and wipe it dry between each cut.
—
Nutritional Information (Per Serving, without topping)
· Calories: ~420 kcal
· Carbohydrates: 25g
· Protein: 5g
· Fat: 35g (Saturated Fat: 21g)
· Cholesterol: 105mg
· Sugar: 18g
· Note: This is a rich, indulgent dessert. The high fat content from cream cheese and heavy cream is what creates its sublime texture and mouthfeel. Enjoy as an occasional treat.
For the Cheesecake Lovers: Pro-Tips & Variations
· Crust Adventures: Substitute graham crackers with digestive biscuits, Oreos (remove filling), or vanilla wafers.
· Citrus Zest: Add 1 teaspoon of lemon or orange zest to the filling for a bright note.
· Flavor Infusions: Mix 2 tablespoons of high-quality cocoa powder into the crust or filling for a chocolate version. Swirl in fruit purees or nut butter before chilling.
· The Perfect Slice: For immaculate portions, use dental floss stretched taut to slice through the creamy filling and firm crust.
Conclusion
This no-bake cheesecake is more than a dessert; it’s a testament to the joy of simplicity. It proves that you don’t need complex techniques to create something extraordinary and deeply satisfying. It’s the centerpiece that waits patiently for you, the guaranteed crowd-pleaser, and the personal reward after a long day. It bridges the gap between timeless tradition and modern ease, offering a slice of pure, unadulterated joy to the baker and non-baker alike. So, gather your ingredients, choose your champion topping, and prepare to receive the highest of compliments: “You made this? It’s incredible.”