20-Minute Homemade Bread: Real Bread Doesn’t Need All Day
Introduction
In our fast-paced world, the comforting aroma of freshly baked bread often feels like a luxury reserved for weekends or artisanal bakeries. But what if you could enjoy warm, homemade bread in just 20 minutes? This revolutionary recipe proves that real, satisfying bread doesn’t require hours of rising or complex techniques. Using a simple chemical leavening method instead of traditional yeast, this bread is quick, forgiving, and perfect for beginners or anyone short on time. It’s a game-changer for weeknight dinners, unexpected guests, or simply when the craving for fresh bread strikes.
A Brief History of Quick Breads
The concept of “quick bread” dates back to the mid-19th century with the introduction of baking powder and baking soda as reliable leaveners. Before this, bread relied on yeast fermentation or naturally sourdough starters, which took hours. The innovation of chemical leavening democratized bread-making, making it accessible without strict timelines. This 20-minute version is a modern evolution of that tradition—celebrating convenience while delivering the wholesome essence of homemade bread.
Benefits of 20-Minute Bread
· Time-Efficiency: From bowl to table in 20 minutes.
· No Special Skills Required: No kneading, proofing, or bread-making experience needed.
· Consistent Results: Unlike yeast bread, it’s not sensitive to room temperature or humidity.
· Versatile: Perfect as a side for soups, stews, or simply slathered with butter and jam.
· Yeast-Free: A great option for those who avoid yeast or can’t easily find it.
Formation & Science Behind the Bread
This bread uses baking powder as its leavening agent. Baking powder is a “complete” leavener—it contains both an acid (like cream of tartar) and a base (baking soda). When combined with moisture and heat, it produces carbon dioxide bubbles, causing the dough to rise rapidly during baking. This method bypasses the long fermentation of yeast, creating a tender, cake-like crumb that’s best enjoyed fresh from the oven.
—
The Big Recipe
Ingredients
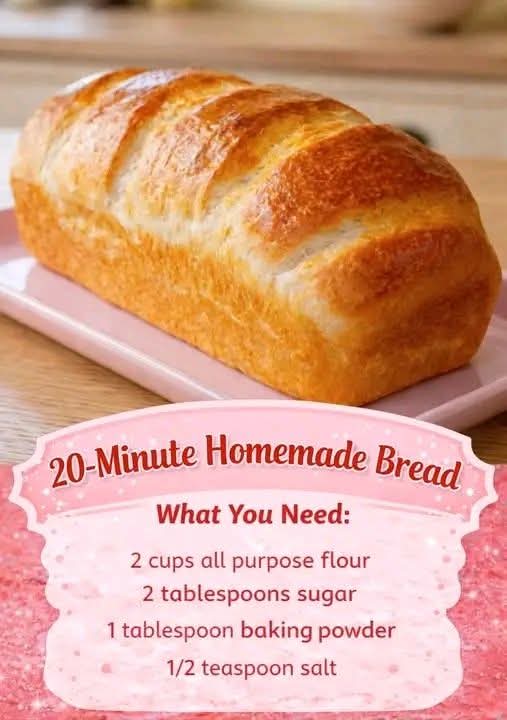
· 2 cups all-purpose flour (spooned and leveled)
· 2 tablespoons granulated sugar
· 1 tablespoon baking powder
· 1 teaspoon salt
· 1 cup milk (or plant-based alternative)
· 1/4 cup melted butter or oil (plus extra for brushing)
Equipment
· 8×4-inch loaf pan
· Mixing bowls
· Whisk
· Spatula
· Cooling rack
Instructions
Method 1: Classic Loaf
1. Prep: Preheat oven to 375°F (190°C). Grease the loaf pan generously.
2. Mix Dry Ingredients: In a large bowl, whisk together flour, sugar, baking powder, and salt until fully combined.
3. Combine Wet & Dry: Make a well in the center. Pour in the milk and melted butter. Stir gently with a spatula until just combined—do not overmix; a few lumps are fine.
4. Bake: Transfer batter to the prepared pan. Smooth the top. Optionally, brush with melted butter for a golden crust. Bake for 18-20 minutes, until golden brown and a toothpick inserted comes out clean.
5. Cool & Serve: Let cool in the pan for 5 minutes, then transfer to a wire rack. Slice while slightly warm.
Method 2: Herbed & Savory Variation
Follow the main recipe, but add to the dry ingredients:
· 1 teaspoon garlic powder
· 1 teaspoon dried rosemary or thyme
· 1/4 cup grated Parmesan cheese
Proceed as directed. Excellent for soups and salads.
Method 3: Sweet Breakfast Bread
Follow the main recipe, but add to the dry ingredients:
· 1 teaspoon cinnamon
· 1/2 cup dried fruit or chocolate chips
After pouring into the pan, sprinkle the top with coarse sugar before baking.
Nutrition Information (Per Slice, 10 slices per loaf)
· Calories: ~150 kcal
· Carbohydrates: 22g
· Protein: 3g
· Fat: 6g
· Fiber: 1g
· Sugars: 4g
· Note: Values are approximate. Using low-fat milk or oil substitutes can alter nutrition.
For the Bread Lovers: Serving & Pairing Ideas
· Comfort Pairing: Serve warm with hearty soups like tomato basil or chicken noodle.
· Sweet Indulgence: Top with whipped honey butter, jam, or Nutella.
· Savory Twist: Use for avocado toast, egg sandwiches, or as a side for cheese boards.
· Next-Day Idea: Stale bread makes excellent French toast or breadcrumbs.
Conclusion
This 20-Minute Homemade Bread is more than a recipe—it’s a reclaiming of the simple joy of baking. It proves that a busy schedule is no barrier to creating something nourishing and delightful from scratch. While it won’t replace the chewy, complex depth of a long-fermented sourdough, it stands proudly in its own right: fast, foolproof, and deeply satisfying. It’s a testament to the ingenuity of home cooking, where practicality and comfort meet.
So, to all the time-crunched dreamers, novice bakers, and bread lovers: keep this recipe in your back pocket. Let it fill your kitchen with warmth any night of the week. Because yes—real, wonderful bread can be on your table in just 20 minutes. Happy baking