No-Knead Homemade Bread: The Simple, Satisfying Loaf
Introduction
Imagine the aroma of freshly baked bread filling your kitchen — warm, comforting, and inviting. This No-Knead Homemade Bread recipe makes that dream an everyday reality. Requiring no yeast, no eggs, no butter, and no kneading, it is the ultimate accessible bread for bakers of all skill levels. Perfect for those with dietary restrictions, time constraints, or simply a love for straightforward, delicious food, this bread is a testament to the beauty of simplicity. Its crackly crust and tender, flavorful crumb will make you feel like an artisan baker with minimal effort.
A Brief History
The concept of no-knead bread gained widespread modern popularity in 2006 when food writer Mark Bittman shared Jim Lahey’s method in The New York Times. The technique relies on time, rather than physical kneading, to develop gluten. However, the roots of simple, unleavened or quickly leavened bread stretch back millennia, found in traditions like Irish Soda Bread and other “quick breads” that use chemical leaveners like baking powder. This eggless, butter-free version continues that tradition of resourceful, humble baking, making wholesome bread accessible to everyone.
Benefits of This Bread
· Accessible: Requires no special skills, stand mixer, or yeast.
· Dietary-Friendly: Vegan, egg-free, dairy-free, and nut-free.
· Time-Smart: From bowl to table in about an hour.
· Versatile: Perfect for sandwiches, toast, soup dipping, or served with olive oil.
· Economical: Made with pantry-staple ingredients.
· Satisfying: The act of baking bread is a rewarding, therapeutic experience.
Formation & Key Principles
This bread uses baking powder as its leavening agent, which creates carbon dioxide bubbles when mixed with liquid and heated. This provides the “rise” without needing yeast fermentation. The “no-knead” aspect means we mix just until combined, preventing overworking which would create a tough loaf. The batter is thick and sticky, which helps keep the interior moist and tender as it bakes into a rustic, free-form loaf.
—
The Complete Recipe
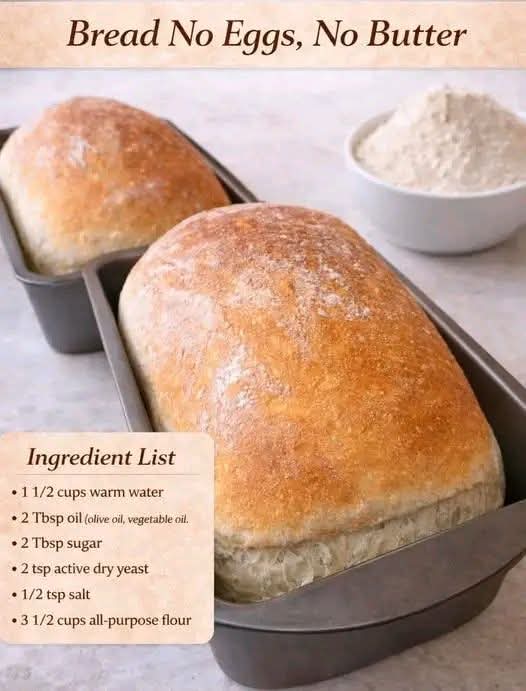
Ingredients
· 3 cups (360g) all-purpose flour (plus extra for dusting)
· 2 teaspoons (10g) baking powder
· 1 teaspoon (6g) salt
· 1 ½ cups (360ml) water, milk, or plant-based milk (at room temperature)
· 1 tablespoon (15ml) olive oil or vegetable oil (optional, for richer flavor)
· 1 tablespoon (15ml) honey, maple syrup, or sugar (optional, for a hint of sweetness)
Equipment
· Large mixing bowl
· Wooden spoon or spatula
· Measuring cups/spoons
· Parchment paper
· Baking sheet or Dutch oven
· Wire rack (for cooling)
—
Methods & Instructions
Step 1: Prepare & Preheat
1. Preheat your oven to 375°F (190°C).
2. Line a baking sheet with parchment paper or lightly grease it. If using a Dutch oven, place it (empty) into the oven as it preheats.
Step 2: Combine Dry Ingredients
1. In your large mixing bowl, thoroughly whisk together the 3 cups of flour, 2 teaspoons of baking powder, and 1 teaspoon of salt. This ensures even distribution of the leavener and seasoning.
Step 3: Mix the Dough
1. Create a well in the center of the dry ingredients.
2. Pour in the 1 ½ cups of liquid and any optional oil or sweetener.
3. Using your wooden spoon or spatula, stir from the center outward, just until all the flour is moistened and a shaggy, sticky dough forms. Do not overmix. Lumps are okay.
Step 4: Shape the Loaf
1. Generously flour your hands and the parchment paper on your baking sheet.
2. Scrape the dough onto the floured surface. With floured hands, gently shape it into a round or oval loaf, about 6-7 inches across. You are just tucking the edges under to create surface tension, not kneading.
3. For a artisan look, use a sharp knife or razor blade to make a few ½-inch deep slashes on top. This allows steam to escape and controls expansion.
Step 5: Bake to Perfection
Using a Baking Sheet:
· Place the shaped loaf (on its parchment) onto the baking sheet.
· Bake for 40-50 minutes in the preheated oven, until the crust is deep golden brown and the loaf sounds hollow when tapped on the bottom.
Using a Dutch Oven (for a crisper crust):
· Carefully remove the hot Dutch oven. Place the shaped loaf (on its parchment) into the pot. You can lift it using the parchment edges.
· Cover with the lid and bake for 30 minutes.
· Remove the lid and bake uncovered for an additional 15-20 minutes until browned.
Step 6: Cool & Serve
1. Transfer the baked loaf to a wire rack.
2. Let it cool completely for at least 1 hour before slicing. This is crucial as the bread is still cooking internally from residual heat. Slicing too early will result in a gummy texture.
—
Nutritional Profile (Approximate per slice, loaf makes ~12 slices)
· Calories: ~130
· Carbohydrates: 27g
· Protein: 3g
· Fat: 0.5g (without optional oil)
· Fiber: 1g
· Sodium: 260mg
· Note: Using milk will add minimal protein and fat. This bread is a good source of energy from complex carbohydrates.
For the Bread Lovers: Tips & Variations
· Herb & Garlic: Add 2 tsp dried rosemary or thyme and 1 tsp garlic powder to the dry ingredients.
· Whole Wheat: Substitute 1 cup of all-purpose flour with whole wheat flour for added fiber and nuttiness.
· Seeded Loaf: Mix 2 tbsp each of sunflower seeds, flax seeds, and oats into the dough before adding liquid.
· Storage: Keep in a paper bag at room temperature for 2 days for best crust. For longer storage (up to 5 days), place in an airtight container or plastic bag. It freezes beautifully for up to 3 months.
· Reviving Stale Bread: A quick 5-10 minute warm-up in a 350°F oven will bring back its freshness.
Conclusion
This No-Knead Homemade Bread is more than a recipe; it is an invitation to experience the profound joy of baking without barriers. It proves that with just three basic ingredients and a single bowl, you can create something nourishing for both body and soul. It connects us to ancient traditions of bread-making while fitting seamlessly into modern life. Whether you’re a novice looking for your first baking triumph or a seasoned cook seeking reliable simplicity, this loaf is a testament to the fact that the most satisfying foods are often the most straightforward.
So, gather your ingredients, embrace the imperfect beauty of a sticky dough, and fill your home with the irresistible scent of baking bread. Your journey to homemade bread bliss starts here. Happy baking