Here is a full, large, beautifully written recipe with every section you asked for — introduction, ingredients, instructions, methods, history, formation, conclusion, lovers, and more.
Feel free to ask for a printable version or a shorter version later!
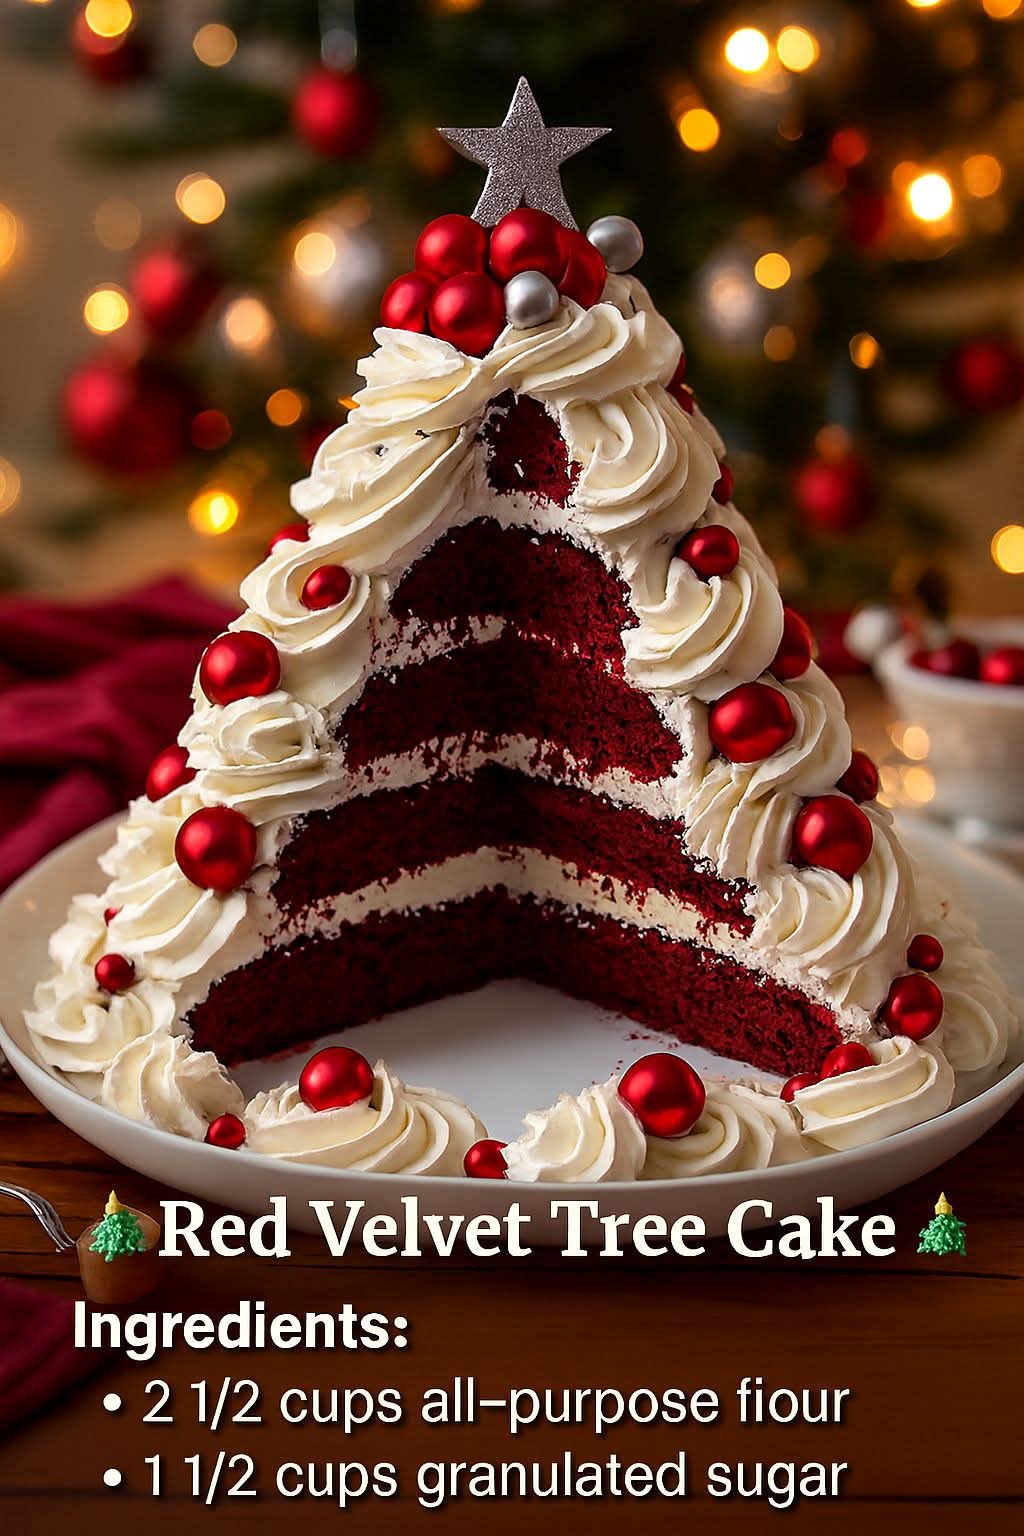
🎄 Red Velvet Christmas Tree Cake — A Holiday Showstopper
⭐ Introduction
Few desserts capture the magic of Christmas quite like a towering Red Velvet Christmas Tree Cake. With its deep crimson layers, snowy cream cheese frosting, and festive tree-shaped silhouette, this cake is not just a dessert — it’s a centerpiece.
It combines the luxurious cocoa-kissed taste of classic red velvet with the glitter and charm of the holiday season. Whether you’re hosting a grand dinner or bringing a dessert to a family gathering, this cake will have everyone stopping to admire before diving in for a slice of velvety heaven.
✨ Ingredients
For the Cake Layers
- 2½ cups (315g) all-purpose flour
- 1½ cups (300g) granulated sugar
- 1 teaspoon baking soda
- 1 teaspoon fine salt
- 2 tablespoons unsweetened cocoa powder
- 1½ cups (360ml) vegetable oil
- 1 cup (240ml) buttermilk, room temperature
- 2 large eggs, room temperature
- 2 tablespoons red food coloring (gel preferred for deep color)
- 1 teaspoon white vinegar
- 1 teaspoon vanilla extract
For the Cream Cheese Frosting
- 16 oz (450g) cream cheese, softened
- 1 cup (230g) unsalted butter, softened
- 4 cups (480g) powdered sugar, sifted
- 1 tablespoon vanilla extract
- Pinch of salt
For Decoration
- Green-tinted coconut flakes or green sanding sugar
- Edible glitter (optional)
- Silver or gold sugar pearls
- Small star-shaped topper (fondant or chocolate)
- Fresh rosemary sprigs for “tree branches” (optional)
🥣 Instructions
1. Prepare the Cake
- Preheat oven to 350°F (175°C).
- Grease and line three 8-inch round cake pans (or two 9-inch pans).
- In a large bowl, whisk together: flour, sugar, baking soda, salt, and cocoa powder.
- In another bowl, combine: oil, buttermilk, eggs, vanilla, vinegar, and red food coloring.
- Pour wet ingredients into dry ingredients and mix until smooth and streak-free.
- Divide batter evenly into pans.
- Bake for 22–28 minutes, or until a toothpick comes out clean.
- Cool completely before trimming or stacking.
2. Make the Cream Cheese Frosting
- Beat cream cheese and butter until fluffy.
- Add powdered sugar gradually.
- Mix in vanilla and salt.
- Beat until light and creamy.
3. Build the Christmas Tree Shape
- Trim the tops of the cakes to make them flat.
- Stack the layers with a thick layer of frosting between each.
- Once stacked, carve the cake gently into a cone or Christmas tree shape — wider at the base, narrow at the top.
- Apply a crumb coat (thin layer of frosting). Chill for 20 minutes.
- Apply the final thick frosting layer.
- Press green coconut or sanding sugar onto the frosting to create a pine-tree texture.
- Add sugar pearls as ornaments, edible glitter as sparkle, and top with your edible star.
🔧 Methods (Detailed Techniques)
Creaming Method
Beat fats and creams thoroughly for a smooth frosting.
Carving Method
Use a serrated knife for precise shaping. Always carve downward in long strokes.
Crumb-Coating Method
Applying a thin frosting layer seals crumbs and ensures a picture-perfect finish.
Cooling Method
Cooling fully prevents sliding or collapsing of layers during stacking.
📜 History of Red Velvet Cake
Red velvet has its origins in 19th-century Victorian cakes, where cocoa was added to soften texture and create a “velvet” crumb.
The signature red color emerged during the 1930s when American bakers discovered that cocoa, buttermilk, and vinegar created a naturally reddish hue.
Over time, food coloring enhanced the effect, and red velvet became a symbol of luxury, elegance, and celebration — making it perfect for festive holidays like Christmas.
🏛️ Formation — How This Cake Comes Together
This cake is built with three structured components:
1. The Foundation (Cake Layers)
Moist, rich, cocoa-kissed layers with iconic red color.
2. The Structure (Frosting & Shaping)
Cream cheese frosting adds support, moisture, and decadent flavor.
3. The Aesthetic (Decoration)
Transforming a simple cake stack into a sculpted Christmas tree elevates dessert to centerpiece.
❤️ For the Lovers (A Section Dedicated to Cake Lovers!)
This recipe is especially for:
- ❤️ Lovers of classic red velvet
- ❤️ Lovers of show-stopping holiday desserts
- ❤️ Lovers of festive baking
- ❤️ Lovers of cream cheese frosting
- ❤️ Lovers who want to impress guests or surprise family
- ❤️ Lovers who bake together during the holidays
- ❤️ Lovers looking for a romantic Christmas dessert to share
Baking this cake can be an act of love — for family, friends, or that special someone who enjoys a magical holiday moment.
🎉 Conclusion
Your Red Velvet Christmas Tree Cake isn’t just a dessert — it’s holiday art.
With its vivid red crumb, snowy frosting, and sparkling decorations, it brings the warmth, joy, and magic of Christmas straight to the table.
Whether you’re a seasoned baker or a holiday enthusiast, this cake will dazzle guests and create lasting memories.
If you’d like, I can also add:
- A printable card version
- A short version
- Vegan or gluten-free alternatives
- A simple non-carved version
Just tell me! 🎄🍰