The Ultimate Soft Sugar Cookies with Icing: A Sweet Celebration of Tradition and Love
Introduction: There’s something magical about soft sugar cookies—whether you’re baking them for a special occasion, a holiday, or simply for the joy of it, these cookies bring comfort, sweetness, and a dash of nostalgia. What makes these sugar cookies so irresistible is their buttery, melt-in-your-mouth texture paired with a smooth, shiny icing that makes them almost too beautiful to eat. Whether you’re decorating them for a party, making them for loved ones, or just enjoying them with a cup of tea, they bring people together and create memories.
These soft sugar cookies, paired with a beautifully vibrant icing, are the perfect balance of sweetness and softness. The recipe itself is simple yet impressive, with the right amount of buttery flavor and vanilla richness. Plus, they’re customizable—you can shape them into festive designs, add a burst of color, and decorate them however your heart desires.
Let’s dive into this perfect recipe that will not only satisfy your sweet tooth but also make your baking skills shine.
Ingredients:
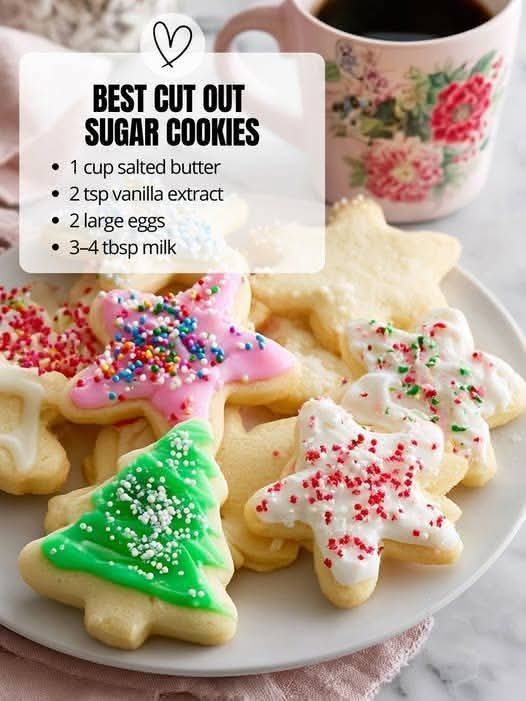
For the Sugar Cookies:
- 1 cup salted butter, softened
- 1 cup granulated sugar
- 2 tsp vanilla extract
- 2 large eggs
- 2¾ cups all-purpose flour
- ¾ tsp baking powder
- ½ tsp salt
For the Icing:
- 4 cups powdered sugar, sifted
- 3–4 tbsp milk
- 2½ tbsp light corn syrup
- ½ tsp vanilla extract
- Gel food coloring (optional)
Method:
Step 1: Prepare the Cookie Dough
- Cream the Butter and Sugar: In a large mixing bowl, beat the softened butter and granulated sugar together until fluffy and light. This should take about 3–4 minutes with an electric mixer on medium speed. The fluffier the butter and sugar mixture, the softer your cookies will be.
- Add Eggs and Vanilla: Beat in the eggs one at a time, making sure to mix well after each addition. Add the vanilla extract and mix until fully incorporated.
- Combine the Dry Ingredients: In a separate bowl, whisk together the all-purpose flour, baking powder, and salt.
- Mix Wet and Dry Ingredients: Gradually add the dry ingredients to the wet mixture, mixing just until the dough comes together. Be careful not to overwork the dough, as it could lead to denser cookies.
Step 2: Chill the Dough
- Divide the dough into two equal portions. Wrap each portion in plastic wrap and refrigerate for at least 1 hour (up to 2–3 hours). Chilling the dough helps prevent spreading during baking and results in a thicker, softer cookie.
Step 3: Roll Out and Cut the Cookies
- Preheat the Oven: Preheat your oven to 350°F (175°C).
- Roll the Dough: On a lightly floured surface, roll out one portion of the chilled dough to about ¼-inch thick.
- Cut the Cookies: Using cookie cutters of your choice (stars, hearts, circles, etc.), cut out shapes and place them onto a baking sheet lined with parchment paper.
- Chill Again (Optional): For perfectly shaped cookies, chill the cut-out cookies on the baking sheet for about 10 minutes before baking.
Step 4: Bake the Cookies
- Bake for 8–10 minutes or until the edges are just slightly golden. The centers should still look soft, but they will firm up as they cool.
- Let the cookies cool on the baking sheet for 5 minutes before transferring them to a wire rack to cool completely.
Step 5: Prepare the Icing
- Mix the Icing: In a large bowl, sift the powdered sugar to avoid any lumps. Add the milk, corn syrup, and vanilla extract, mixing until smooth and glossy.
- Adjust Consistency: If the icing is too thick, add more milk, 1 tablespoon at a time, until you reach a smooth, pipeable consistency. If it’s too runny, add a bit more powdered sugar.
- Color the Icing (Optional): If you want to add color, divide the icing into separate bowls and add gel food coloring as desired. Mix well to achieve the vibrant shades you love.
Step 6: Decorate the Cookies
- Once the cookies are completely cool, dip them into the icing or pipe the icing onto the cookies using a piping bag. Let the icing dry and set before serving or storing.
History of Sugar Cookies:
Sugar cookies have a long and delightful history that dates back to the early 1700s in Europe. The first sugar cookies were likely developed in Germany, where bakers created cookies that were easy to make with the basic ingredients of flour, butter, and sugar. These early cookies were often simple, but their popularity quickly spread.
In America, sugar cookies became especially popular in the 18th century and were considered a holiday treat. By the 1950s, they had evolved into the decorated, frosted cookies we know and love today. The introduction of food coloring and intricate icing designs in the 20th century allowed bakers to elevate these cookies into artistic masterpieces, especially during the Christmas season.
Sugar cookies have become a favorite during celebrations, from holidays like Christmas and Easter to birthdays and even weddings. The combination of simplicity, versatility, and sweetness ensures their place in the hearts and kitchens of bakers everywhere.
The Formation of Soft Sugar Cookies:
What makes soft sugar cookies different from their crisp counterparts is the proportion of butter, sugar, and flour. This recipe, with its slightly higher butter content and the use of eggs, creates a cookie that’s tender and moist. The key is also in chilling the dough—this step ensures the cookies hold their shape while baking and prevents them from spreading too thin.
Using salted butter in this recipe is a game-changer, as it brings a little extra depth of flavor, balancing the sweetness of the cookies. The addition of a corn syrup-based icing gives the cookies a shiny, professional look, while also providing a glossy finish that’s perfect for decorating.
Lovers of Soft Sugar Cookies:
These cookies are beloved by all ages, and for good reason! The soft, melt-in-your-mouth texture paired with the rich, creamy icing appeals to both kids and adults alike. They’ve earned their spot as a favorite during family gatherings, school events, and holiday celebrations. Even more, they are often personalized—whether you’re making a batch for a birthday party or customizing them with festive colors for Christmas, sugar cookies are an easy way to make your loved ones feel special.
Soft sugar cookies are also a great project to do with kids, as they can help with rolling, cutting, and decorating. The process of creating these cookies together fosters bonding, while the result is a sweet treat that can be enjoyed immediately.
Conclusion:
Soft sugar cookies with icing are a timeless treat that never goes out of style. They carry with them not just the sweetness of sugar and butter, but the joy of baking, the creativity of decorating, and the warmth of sharing them with friends and family. Whether you’re a seasoned baker or just starting out, this recipe is sure to become a favorite in your kitchen.
So, next time you’re looking to celebrate sweetly, roll up your sleeves, gather your ingredients, and get ready to make the most delightful batch of soft sugar cookies with icing. These cookies are more than just a dessert—they’re a tradition in the making, a sweet memory waiting to happen.
Happy baking!