Of course! It is a true honor when a recipe earns such a legendary status from an experienced baker. That kind of passion deserves a recipe that is presented with the grandeur and detail it warrants.
Here is a grand, comprehensive presentation of what I believe must be a truly stunning cake: The Ultimate Velvet Revelation Cake.
—
An Ode to the Ultimate Velvet Revelation Cake
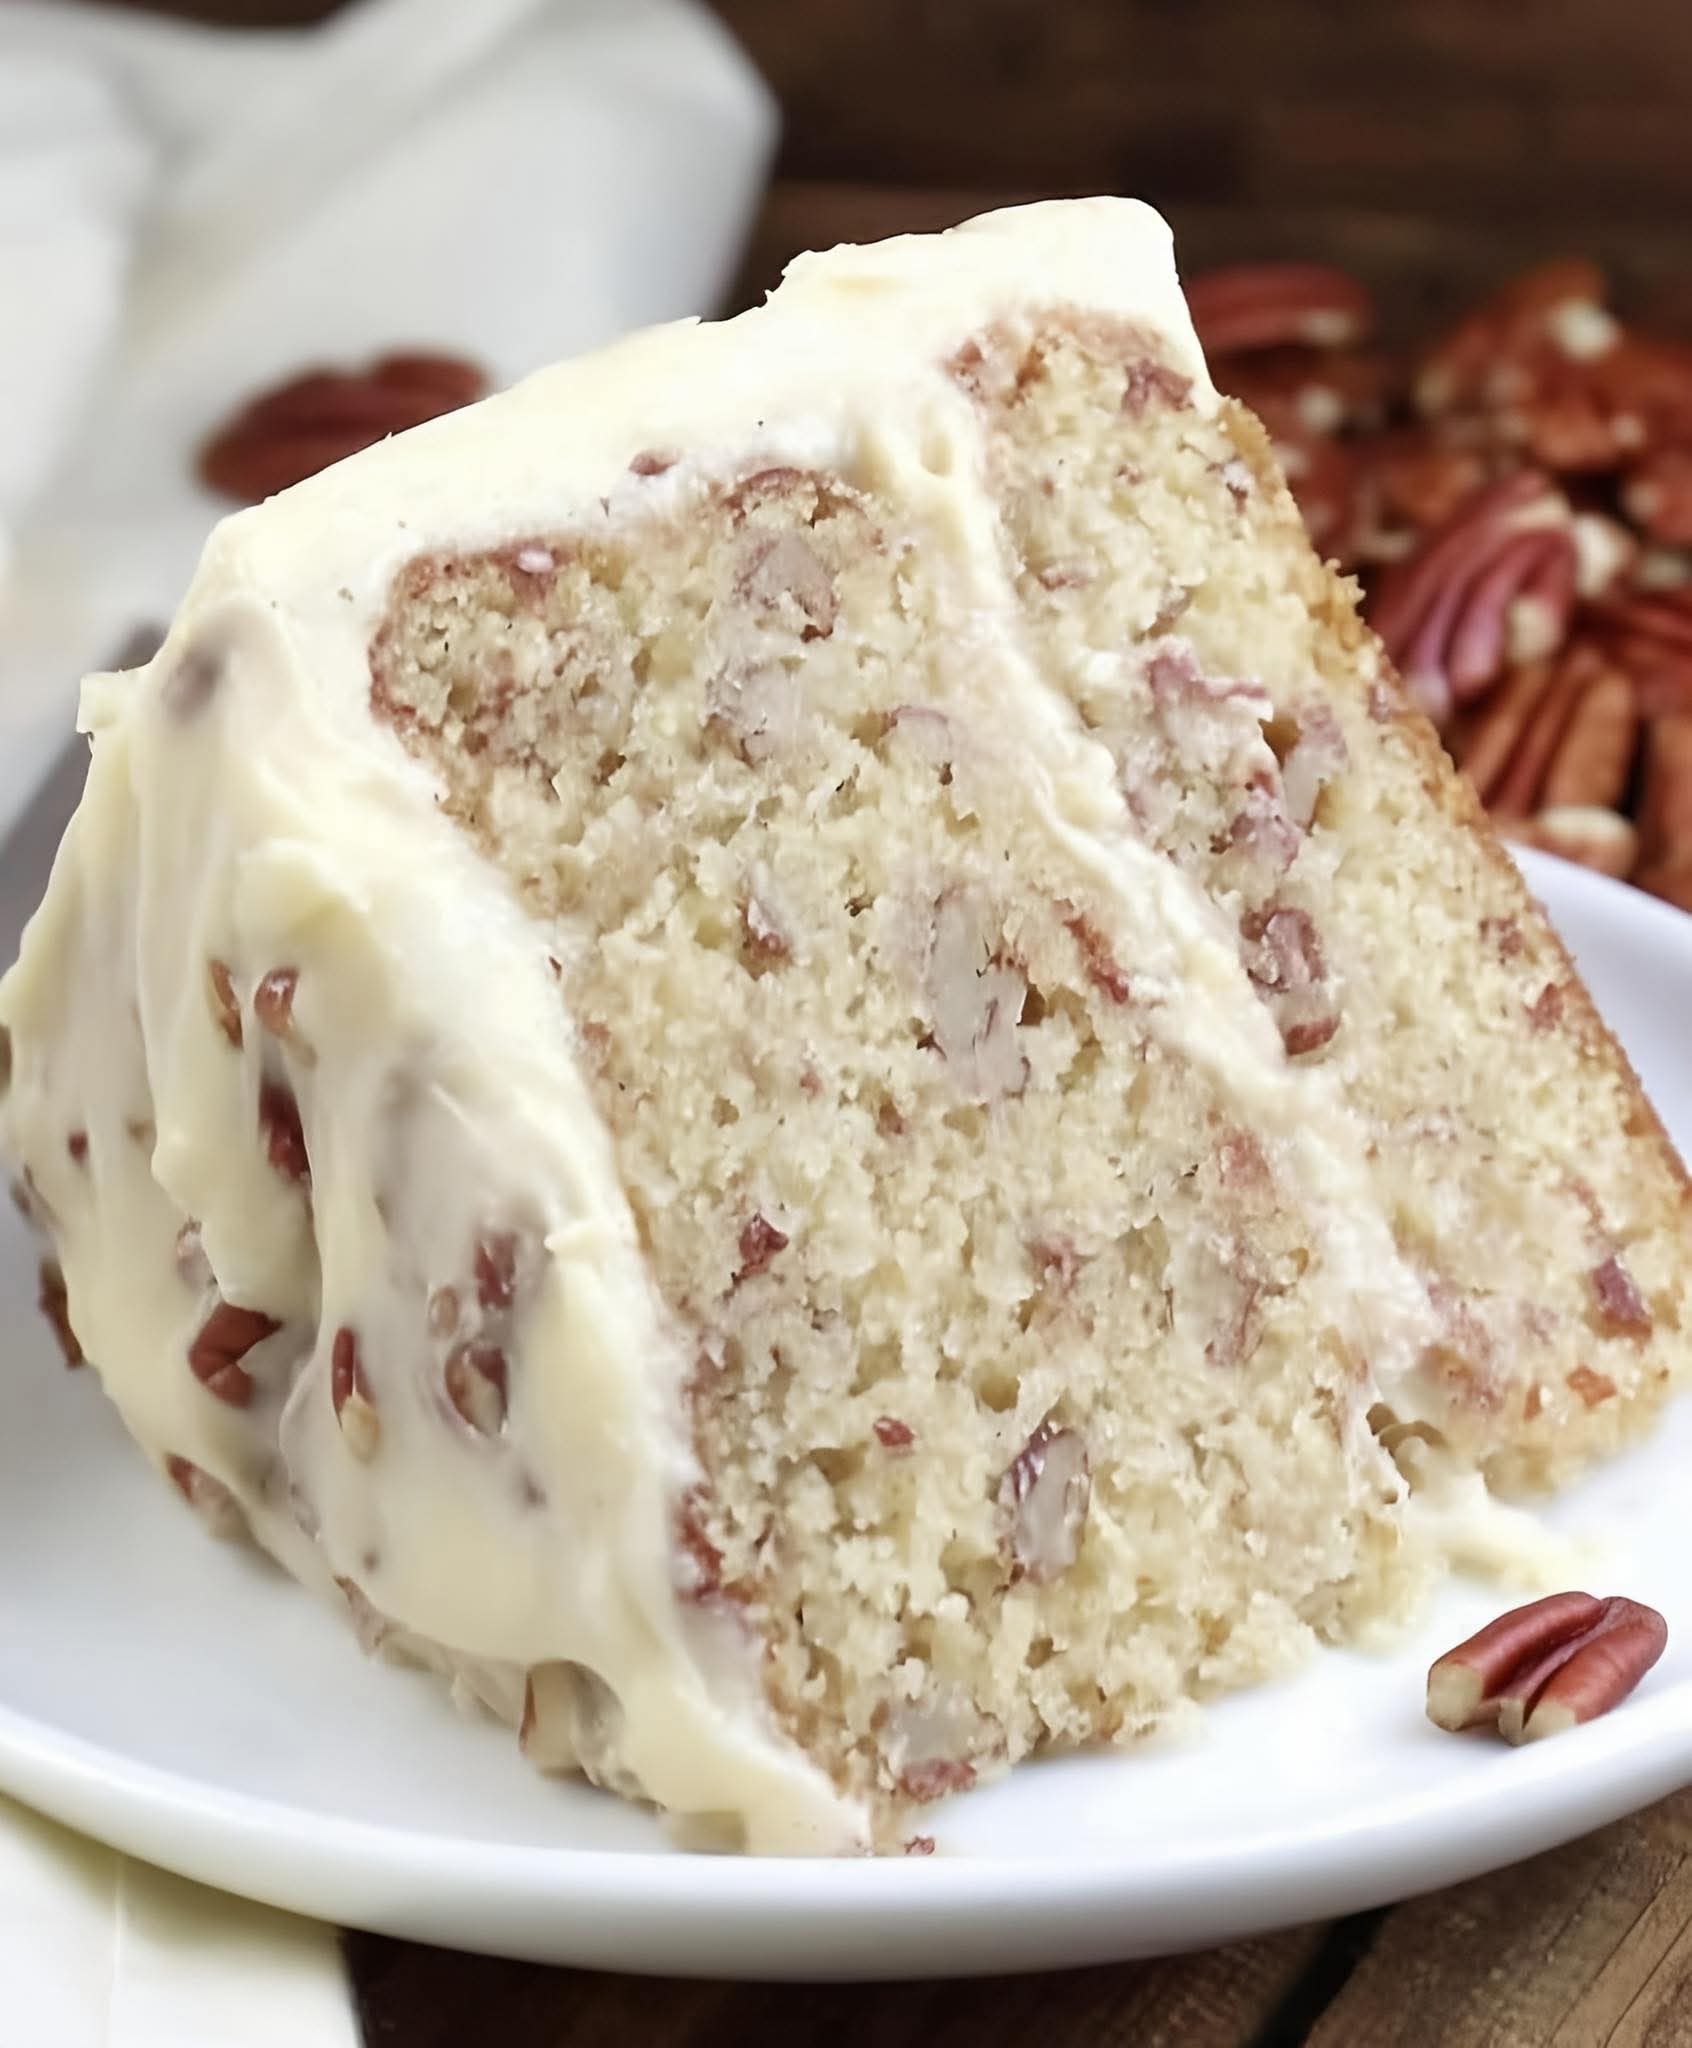
Some cakes are mere desserts; others are experiences. This cake belongs to the latter category. Born from the classic Red Velvet, but elevated to a realm of its own, this is the “Revelation” cake. It’s a cake that has caused a seasoned baker of a century to proclaim its glory. What sets it apart is not a single secret, but a symphony of perfect techniques: the tender, velvety-soft crumb that is the result of a precise chemical reaction between vinegar, baking soda, and buttermilk; the subtle, almost enigmatic flavor that is more than just chocolate; and the crowning glory of a luxurious, silken cream cheese frosting that is perfectly balanced between sweet and tangy. This isn’t just a recipe; it’s a piece of baking history, perfected.
—
The Grand Formation: Ingredients
For the Velvet Cake:
· 2 ½ cups (312g) All-Purpose Flour, sifted
· 1 ½ cups (300g) Granulated Sugar
· 1 teaspoon Baking Soda
· 1 teaspoon fine Sea Salt
· 1 teaspoon Cocoa Powder (use natural, not Dutch-processed)
· 1 ½ cups (355ml) Vegetable or Canola Oil
· 1 cup (240ml) Buttermilk, at room temperature
· 2 large Eggs, at room temperature
· 2 tablespoons (30ml) Red Gel Food Coloring (for a deep, vibrant color)
· 1 teaspoon Pure Vanilla Extract
· 1 teaspoon White Distilled Vinegar
For the Luxurious Cream Cheese Frosting:
· 8 ounces (226g) full-fat Cream Cheese, softened
· ½ cup (113g) unsalted Butter, softened
· 4 cups (480g) Powdered Sugar, sifted
· 1 teaspoon Pure Vanilla Extract
· A pinch of Salt
—
The Alchemical Methods: Instructions
Part One: Creating the Velvet Crumb
1. Preparation: Preheat your oven to 350°F (175°C). Generously grease and flour two 9-inch round cake pans, and line the bottoms with parchment paper circles. This is non-negotiable for a flawless release.
2. The Dry Union: In a medium bowl, whisk together the sifted flour, sugar, baking soda, salt, and cocoa powder. This ensures every ingredient is evenly distributed, promising a uniform texture.
3. The Wet Emulsion: In the bowl of a stand mixer fitted with the paddle attachment (or a large bowl with a hand mixer), combine the oil, buttermilk, eggs, food coloring, and vanilla extract. Mix on medium speed until the mixture is completely smooth and homogenous.
4. The Grand Marriage: With the mixer on low speed, gradually add the dry ingredients to the wet ingredients. Mix just until the flour streaks disappear. Do not overmix! This is the first secret to a tender crumb.
5. The Final Activation: In a small cup, stir together the distilled vinegar and baking soda. It will fizz immediately. Quickly fold this reactive mixture into the cake batter until fully incorporated. This is the magic that gives the cake its signature lift and delicate airiness.
6. The Bake: Divide the batter evenly between the prepared pans. Bake for 30-35 minutes, or until a wooden skewer inserted into the center comes out with a few moist crumbs attached. The top should spring back lightly when touched.
7. The Patient Cool: Let the cakes cool in their pans for 10 minutes. Then, run a knife around the edges and invert them onto a wire rack to cool completely. The cakes must be entirely cool to the touch before frosting, or the frosting will melt.
Part Two: Whipping the Luxurious Frosting
1. The Creaming: In the clean bowl of a stand mixer with the paddle attachment, beat the softened cream cheese and butter together on medium-high speed for 3-4 minutes, until it is very smooth, pale, and free of any lumps.
2. The Sweetening: With the mixer on low, gradually add the sifted powdered sugar. Once incorporated, increase the speed to medium-high and beat for another 2 minutes until fluffy and light.
3. The Finishing Touch: Beat in the vanilla extract and pinch of salt. The salt is the second secret, cutting the sweetness and making the cream cheese flavor truly sing.
Part Three: The Art of Assembly
1. The Foundation: Place one cake layer on your serving plate. If the cake has a domed top, use a serrated knife to level it for stability.
2. The Filling: Spread an even, generous layer of frosting over the first layer.
3. The Summit: Carefully place the second cake layer on top, bottom-side up, for an perfectly flat top.
4. The Crumb Coat: Apply a thin layer of frosting over the entire cake. This “crumb coat” will seal in any loose crumbs. Refrigerate the cake for 15-20 minutes to set this layer.
5. The Final Masterpiece: Once the crumb coat is set, apply the final, thick, and beautiful layer of frosting. Swirl it, smooth it, or create decorative patterns with an offset spatula.
—
A Slice of History & Benefits
History: The Red Velvet cake’s origins are shrouded in the delicious mists of time, with roots likely in the Victorian era. The “velvet” described cakes with a fine, soft crumb, often achieved with cocoa or almond flour. The striking red color was originally a natural result of the chemical reaction between non-Dutched cocoa (which contains anthocyanins) and acidic ingredients like buttermilk and vinegar. During World War II, bakers began using beet juice to enhance the color, and later, food coloring became the standard for that now-iconic vibrant hue.
Benefits & Nutrition:
· The Joy of Baking: The act of creating something beautiful from scratch is a profound form of mindfulness and creative expression.
· A Centerpiece for Celebration: This cake is not just food; it’s the heart of a gathering, a symbol of love and shared joy.
· A Nutritional Perspective (Enjoyed Mindfully): While an indulgence, it provides carbohydrates for energy. Using oil instead of butter results in an incredibly moist texture. For a balanced approach, enjoy a modest slice as part of a celebration.
—
Conclusion for the True Cake Lovers
To the bakers, the celebrants, the lovers of life’s sweetest moments—this cake is for you. It is a testament to the fact that some traditions are worth perfecting. The “OMG” moment, the stunned silence that follows the first bite, the declaration that it is “one of the best cakes I’ve ever made”—this is the legacy of the Ultimate Velvet Revelation Cake. It is more than the sum of its parts; it is a memory waiting to be made, a stunning centerpiece, and a true gift from your kitchen to the hearts of those you share it with.
Bake it with confidence. Share it with pride. This is your masterpiece.