Absolutely! Here’s a beautiful, full-length recipe post for your Rice Krispy Treat No-Bake Cheesecake, complete with an introduction, history, ingredients, method, and a fun conclusion for dessert lovers. 🍰✨
🍯 Rice Krispy Treat No-Bake Cheesecake
Introduction
If you’ve ever loved the snap, crackle, and pop of Rice Krispies and the creamy indulgence of cheesecake, this dessert is a dream come true. The Rice Krispy Treat No-Bake Cheesecake combines two nostalgic favorites — the gooey marshmallow cereal bars from childhood and the smooth, rich cheesecake we crave as adults. It’s a no-bake recipe, so it’s quick, easy, and perfect for when you want something decadent without turning on the oven.
A Little History
The original Rice Krispies Treat was created in 1939 by Kellogg’s employees Malitta Jensen and Mildred Day as a fundraiser for the Camp Fire Girls. Since then, these sticky-sweet squares have become a household classic. Meanwhile, cheesecake traces its origins back to ancient Greece — it was even served to athletes at the first Olympic Games! Combining these two timeless desserts into one modern masterpiece brings together history, nostalgia, and creativity in a single bite.
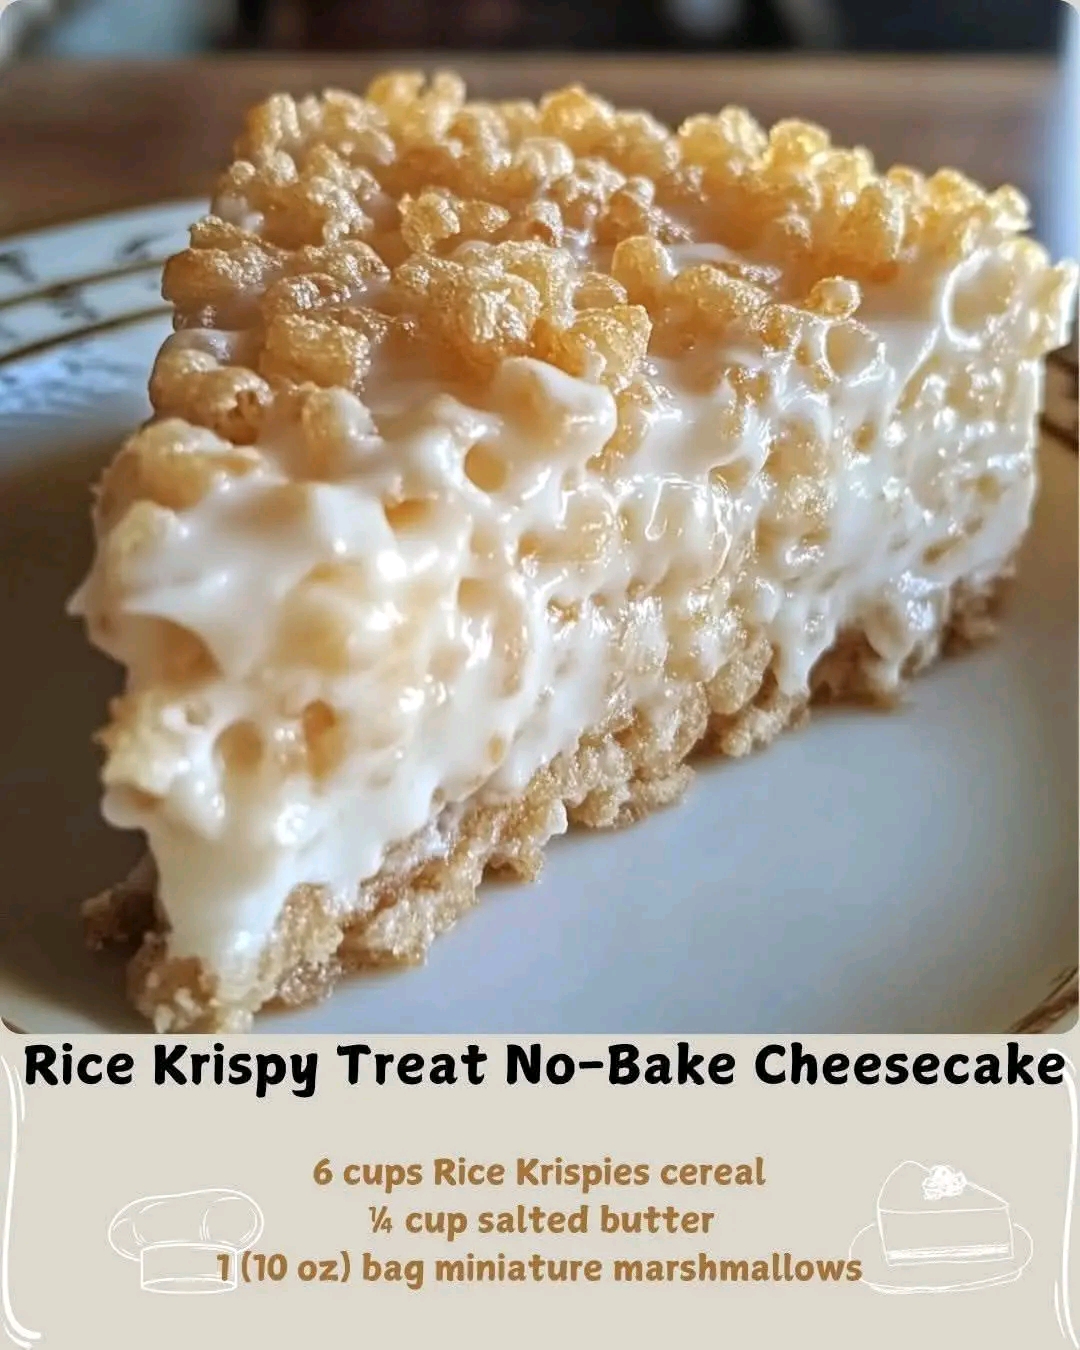
Ingredients
For the Crust:
- 6 cups Rice Krispies cereal
- ¼ cup salted butter
- 1 (10 oz) bag miniature marshmallows
For the Filling:
- 1 (8 oz) block cream cheese, softened
- ½ cup granulated sugar
- 1 tsp pure vanilla extract
- 1 (7 oz) jar marshmallow crème (like Fluff)
- 1 (8 oz) tub Cool Whip, thawed
Method & Instructions
🥣 Step 1: Prepare the Crust
- In a large pot, melt the butter over low heat.
- Add mini marshmallows, stirring until completely melted and smooth.
- Remove from heat and gently stir in the Rice Krispies cereal until evenly coated.
- Press the mixture firmly and evenly into the bottom of a greased 9-inch springform pan.
- Let it cool and set while you prepare the cheesecake filling.
🍰 Step 2: Make the Filling
- In a large mixing bowl, beat together the cream cheese, sugar, and vanilla extract until creamy and smooth.
- Add in the marshmallow crème and continue beating until well combined.
- Gently fold in the Cool Whip until the mixture is light, fluffy, and fully incorporated.
🍓 Step 3: Assemble the Cheesecake
- Spread the cheesecake filling evenly over the Rice Krispy crust.
- Smooth the top with a spatula.
- Refrigerate for at least 4 hours (overnight is even better) to allow the cheesecake to set completely.
🌟 Step 4: Serve & Enjoy
- Once set, remove from the springform pan.
- Slice and serve chilled.
- Top with chocolate drizzle, caramel, or fresh fruit if desired.
Formation
This cheesecake forms a perfect balance of textures: the crunchy, marshmallowy base holds up beautifully against the silky, cloud-like filling. The structure is sturdy enough to slice, yet soft enough to melt in your mouth.
For the Lovers
This dessert is made for sweet lovers, nostalgia seekers, and cheesecake enthusiasts alike. It’s the perfect treat for birthdays, family gatherings, or date nights — a dessert that makes hearts (and spoons) collide! 💖
Conclusion
The Rice Krispy Treat No-Bake Cheesecake is more than just a dessert — it’s a celebration of comfort, creativity, and childhood memories reimagined for grown-up taste buds. It’s easy, delightful, and irresistibly creamy with that signature crunch we all adore.
So, gather your ingredients, melt some marshmallows, and let the magic happen. ✨
Would you like me to format it for a blog post (with emojis, headings, and SEO-friendly tags) or for a recipe card (printable version)?