Of course! It’s wonderful that you want to preserve this cherished family recipe. There’s something truly special about an Old Fashioned Fudge made with cocoa. It has a rich, classic flavor that modern versions often lack.
Here is a beautifully formatted, detailed version of your “Don’t Lose This!” fudge recipe, expanded with everything you requested.
—
A Taste of Tradition: Old Fashioned Cocoa Fudge
This recipe is a treasure, passed down through generations on stained index cards and in the well-loved cookbooks of home bakers. Unlike fudge made with marshmallow fluff or chocolate chips, this “old-fashioned” version starts from scratch with basic pantry staples: cocoa, butter, sugar, and evaporated milk. The result is a fudge with a deep, authentic chocolate flavor that is both creamy and firm, with a slight crumble that melts perfectly on the tongue. It’s a testament to the magic of simple ingredients combined with a little bit of patience and care.
—
Ingredients
· 4 Tablespoons (approx. ¼ cup) Hershey’s Unsweetened Cocoa
· 1 stick (½ cup) Salted Butter
· 1 can (5 oz) Carnation Evaporated Milk
· 1 teaspoon Pure Vanilla Extract
· 4 cups (approx. 1 lb) Granulated Sugar
· 1 cup Chopped Walnuts or Pecans (optional, but traditional)
—
Instructions & Method
Method: Stovetop and Hand-Beaten
This method is classic and relies on your senses. Using a candy thermometer is highly recommended for perfect results every time.
Step 1: Prepare Your Pan
Grease an 8×8 inch square baking pan with a little butter.Alternatively, you can line it with parchment paper, leaving an overhang on two sides for easy removal.
Step 2: Combine and Cook
In a heavy-bottomed,medium-sized saucepan (at least 3-quart capacity to prevent boiling over), combine the granulated sugar, Hershey’s cocoa, and Carnation Evaporated Milk. Add the stick of salted butter.
Cook over medium heat, stirring constantly with a wooden spoon, until the butter melts and the mixture comes to a full, rolling boil.
Step 3: The Candy Thermometer Test
Once boiling,reduce the heat to medium-low to maintain a steady boil. Continue stirring frequently to prevent scorching. Clip a candy thermometer to the side of the pan, making sure the bulb does not touch the bottom.
Cook, without stirring, until the mixture reaches the “Soft-Ball Stage,” which is 234°F – 240°F (112°C – 116°C). This is the most critical step. At this temperature, a small amount of syrup dropped into cold water will form a soft, pliable ball that flattens when removed.
Step 4: Cool and Beat
Remove the pan from the heat immediately.Do not stir. Add the vanilla extract, but do not mix it in yet.
Let the fudge mixture cool, undisturbed, until the bottom of the pan feels lukewarm to the touch (about 110°F). This cooling period is essential for achieving the right creamy texture.
Once cooled, use a wooden spoon to beat the fudge vigorously. It will start to thicken, lose its gloss, and become lighter in color. This can take 5-10 minutes of strong beating. If you are adding nuts, stir them in just as the fudge begins to thicken.
Step 5: Set and Serve
Quickly pour the thickened fudge into your prepared pan and spread it evenly.
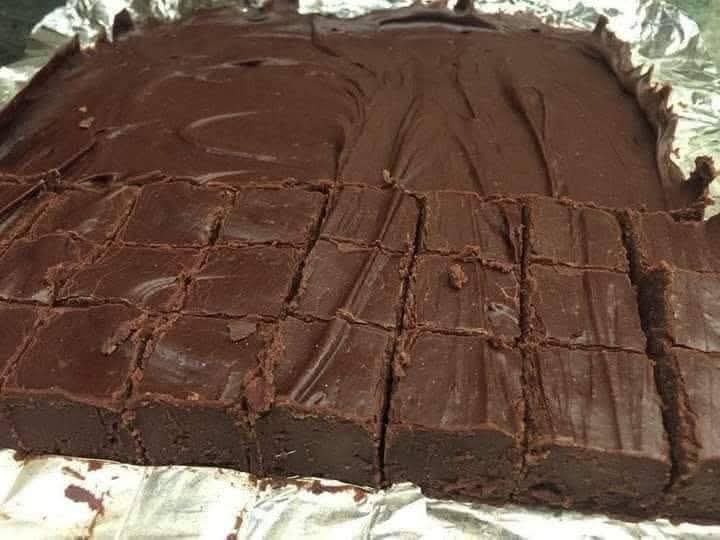
Let it set completely at room temperature for at least 2-3 hours. For the cleanest cuts, you can chill it in the refrigerator for 30 minutes before slicing. Cut into 1-inch squares.
—
A Brief History of Fudge
Fudge is a uniquely American confection. The first documented instances appeared in women’s colleges like Vassar in the late 19th century. It was a popular “dormitory candy” because it could be made easily in a communal kitchen over a gas lamp. The name “fudge” was likely derived from the interjection “Oh, fudge!” which was a polite exclamation used when a batch of caramels or toffees was messed up. This new, “fudged” candy was softer and grainier than its predecessors and became an instant hit.
—
Nutrition & Benefits
While fudge is undoubtedly a sweet treat to be enjoyed in moderation, this homemade version has some advantages over store-bought or fudge made with pre-melted chocolate:
· Control Over Ingredients: You know exactly what’s inside—no artificial preservatives, high-fructose corn syrup, or unpronounceable chemicals.
· Cocoa’s Benefits: Pure cocoa powder is rich in flavonoids, which are antioxidants linked to heart health. While sugar and butter offset these benefits, it’s a more direct source than processed chocolate.
· The Joy of Making: The psychological benefit of creating something with your own hands, following a tradition, and sharing it with loved ones is immeasurable. It’s a act of love and connection.
Nutritional Information (per square, without nuts, approximate):
· Calories: ~120
· Total Fat: 4g
· Saturated Fat: 2.5g
· Carbohydrates: 22g
· Sugars: 21g
· Protein: 0.5g
—
For the True Fudge Lovers
This recipe is for those who appreciate the craft of candy-making. It’s for the lovers of:
· Texture: The satisfying snap and the creamy, slightly grainy melt that defines true old-fashioned fudge.
· Ritual: The process of watching the thermometer, the patient waiting, and the therapeutic beating that transforms liquid syrup into a solid treat.
· Authenticity: The deep, less-sweet chocolate flavor that only comes from cocoa, a flavor that evokes memories of grandmothers’ kitchens and holiday gatherings.
—
Conclusion
This “Don’t Lose This!” Old Fashioned Fudge recipe is more than just a list of ingredients and steps; it’s a piece of culinary heritage. It requires a bit more effort than no-cook recipes, but the reward is a fudge of unparalleled character and charm. It’s a perfect project for a quiet afternoon, a wonderful gift from the kitchen, and a delicious way to keep a sweet tradition alive. So, tie on your apron, express your love for classic recipes, and create a batch of this timeless confection. The result is pure, unadulterated joy.