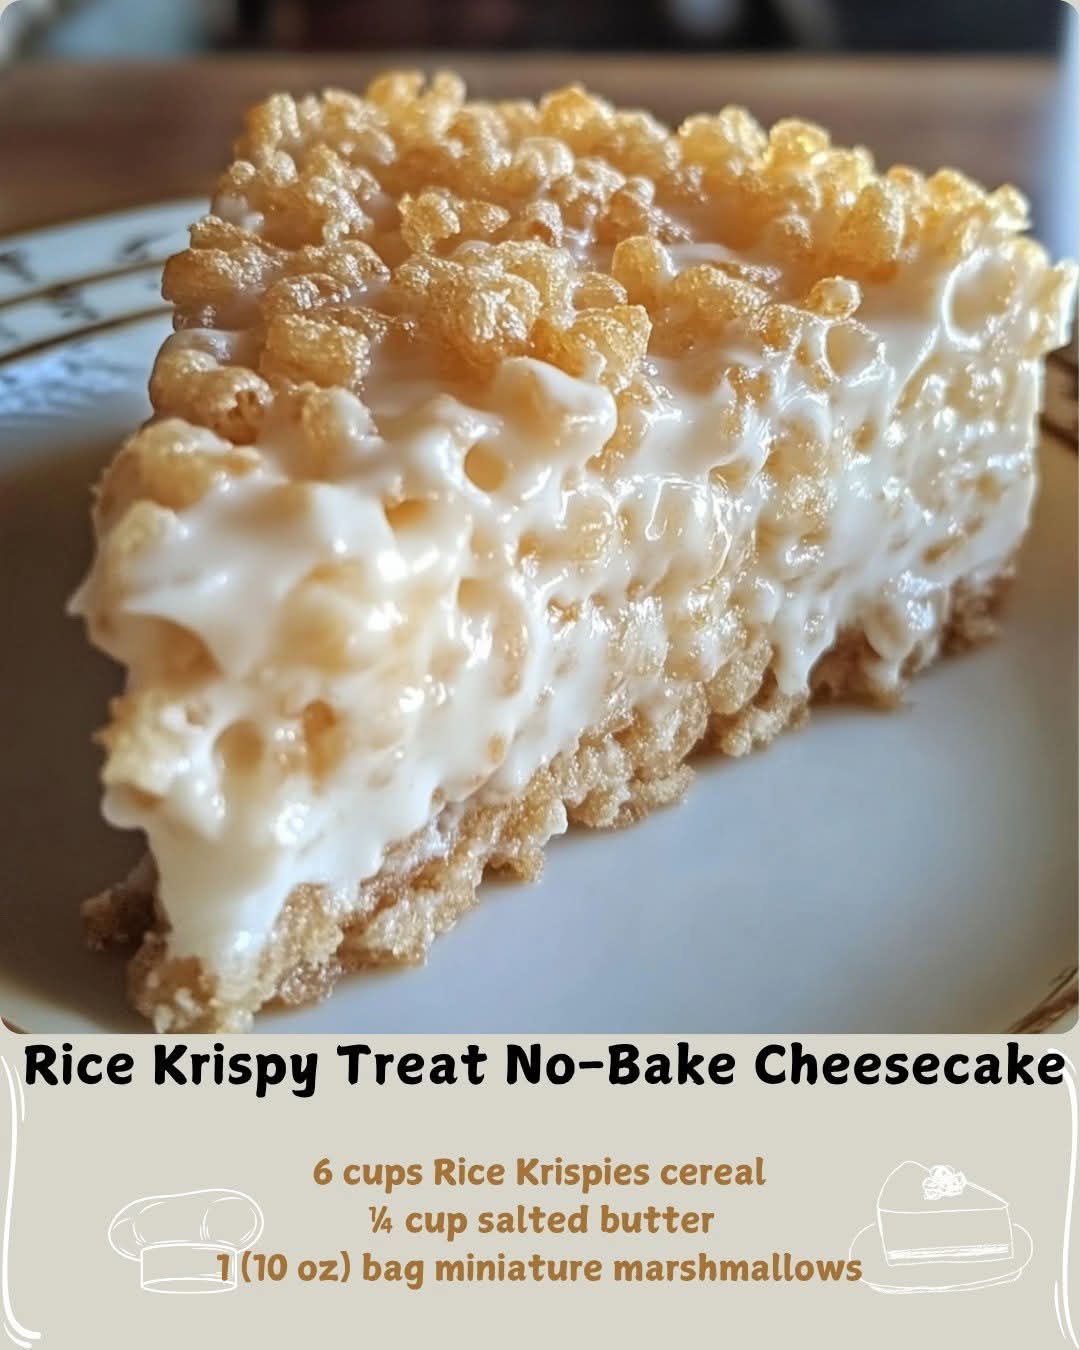
Rice Krispy Treat No-Bake Cheesecake Recipe
Introduction: Rice Krispy Treat No-Bake Cheesecake combines two beloved treats—the crispy, gooey, nostalgic Rice Krispies and the smooth, rich decadence of a classic cheesecake—into one irresistible dessert. This recipe is perfect for any occasion: from a casual family gathering to a festive celebration. Not only does it taste amazing, but it’s also incredibly easy to make, requiring no baking at all. With its playful texture from the crispy cereal crust and the creamy filling, this cheesecake offers a unique twist on traditional cheesecakes, all while being kid-friendly and fun to serve!
Ingredients:
For the Crust:
- 6 cups Rice Krispies cereal
- ¼ cup salted butter
- 1 (10 oz) bag miniature marshmallows
For the Filling:
- 1 (8 oz) block cream cheese, softened
- ½ cup granulated sugar
- 1 tsp pure vanilla extract
- 1 (7 oz) jar marshmallow crème (e.g., Fluff)
- 1 (8 oz) tub Cool Whip, thawed
For Garnish (optional):
- Whipped cream (homemade or canned)
- Cubed store-bought or homemade Rice Krispy Treats
Instructions:
1. Prep the Pan:
Generously grease a 9-inch or 10-inch springform pan with nonstick spray. This ensures that the cheesecake comes out cleanly after chilling.
2. Make the Crust:
- In a large mixing bowl, pour in the Rice Krispies cereal.
- In a medium saucepan, melt the salted butter and miniature marshmallows together over low heat. Stir constantly to ensure that the mixture is smooth and fully combined.
- Once melted and smooth, pour the marshmallow mixture over the cereal. Stir quickly to ensure the cereal is evenly coated with the sticky marshmallow-butter blend.
3. Form the Crust:
- Transfer the Rice Krispy mixture into your prepared springform pan. Using a spatula or a greased glass, firmly press the mixture into the bottom of the pan, and slightly up the sides. This helps form a sturdy crust.
- Let the crust set at room temperature for 15–20 minutes, allowing it to firm up.
4. Prepare the Filling:
- In a stand mixer or a large bowl, beat the softened cream cheese, granulated sugar, and vanilla extract together until smooth and creamy (about 1 minute).
- Add the marshmallow crème to the cream cheese mixture and mix until fully incorporated.
- Gently fold in the Cool Whip using a spatula. This preserves the fluffy texture of the Cool Whip, ensuring a light and airy filling.
5. Assemble the Cheesecake:
- Pour the creamy filling into the set Rice Krispy crust. Smooth the top with an offset spatula or the back of a spoon, making sure it’s even.
6. Chill:
- Refrigerate the cheesecake for at least 2 hours, or until the filling is firm and holds its shape when sliced.
7. Garnish & Serve:
- Before serving, you can pipe or dollop whipped cream around the edges of the cheesecake. For extra fun and texture, top the cheesecake with cubed Rice Krispy Treats.
- Carefully release the springform collar and slice the cheesecake with a warm knife to get clean cuts.
Methods:
- Crust Formation:
- The Rice Krispies crust is similar to the texture of Rice Krispy Treats but acts as a sturdy base for the cheesecake filling. The key here is to press it firmly into the pan without making it too tight, which would affect its crunch when served.
- No-Bake Filling:
- The no-bake filling is light and fluffy, combining cream cheese for richness and marshmallow crème for sweetness. The Cool Whip adds the perfect airy texture, making the filling smooth without being too dense.
- Chilling:
- Chilling the cheesecake ensures that the filling sets properly, holding its shape when sliced. It also helps to meld the flavors together, so patience during the chilling process is important!
History & Formation of Rice Krispy Treats:
Rice Krispy Treats have been a favorite in many households for decades. Created in 1939 by Malitta Jensen, the original recipe used Rice Krispies, butter, and marshmallows to make a simple but delicious no-bake snack. These treats quickly became popular, largely due to their ease of preparation and their ability to appeal to both kids and adults. Over the years, the versatility of Rice Krispies has led to countless variations of the classic treat.
The concept of using Rice Krispies as a crust for cheesecake is a modern twist on this iconic treat, merging the creamy luxury of cheesecake with the crunchy, chewy texture of Rice Krispy Treats. The no-bake version of this cheesecake ensures that it remains quick and easy to make, without sacrificing flavor or texture.
Lovers of This Dessert:
This dessert is ideal for:
- Families: Kids love the playful Rice Krispies crunch, and adults appreciate the creamy filling.
- Cheesecake Enthusiasts: Those who enjoy the smooth texture of cheesecake but crave a twist will appreciate this variation.
- Rice Krispy Treat Lovers: If you’re a fan of the nostalgic Rice Krispy Treats, this dessert will definitely hit the spot.
- No-Bake Dessert Fans: Those who want a simple, no-bake dessert without the hassle of an oven will enjoy the ease of this recipe.
Conclusion:
The Rice Krispy Treat No-Bake Cheesecake is a delightful fusion of two much-loved treats. With its simple ingredients, easy steps, and unique texture combination, this dessert is a perfect way to wow your guests, satisfy your sweet tooth, and enjoy a fun twist on traditional cheesecake. Whether you’re preparing it for a special occasion or just a weekend treat, it’s bound to be a hit! And with no baking involved, it’s ideal for hot summer days or when you’re just looking for a no-fuss, delicious dessert.
Fun Variations (Optional):
- Add Fruits: Incorporate fresh berries like strawberries or blueberries into the filling for a fruity twist.
- Chocolate Drizzle: Add a drizzle of chocolate ganache over the top of the cheesecake for a richer, indulgent finish.
- Nuts: Add chopped nuts (e.g., walnuts or pecans) to the crust for added texture.
This recipe is adaptable to many tastes and is sure to become a crowd favorite. Enjoy!