Here’s a complete, detailed, and rich version of the No-Bake Banana Split Cake recipe you requested—covering its introduction, ingredients, instructions, history, benefits, variations (formation), nutrition, and even a sweet conclusion for dessert lovers.
🍌🍫🍓 No-Bake Banana Split Cake Recipe
✨ Introduction
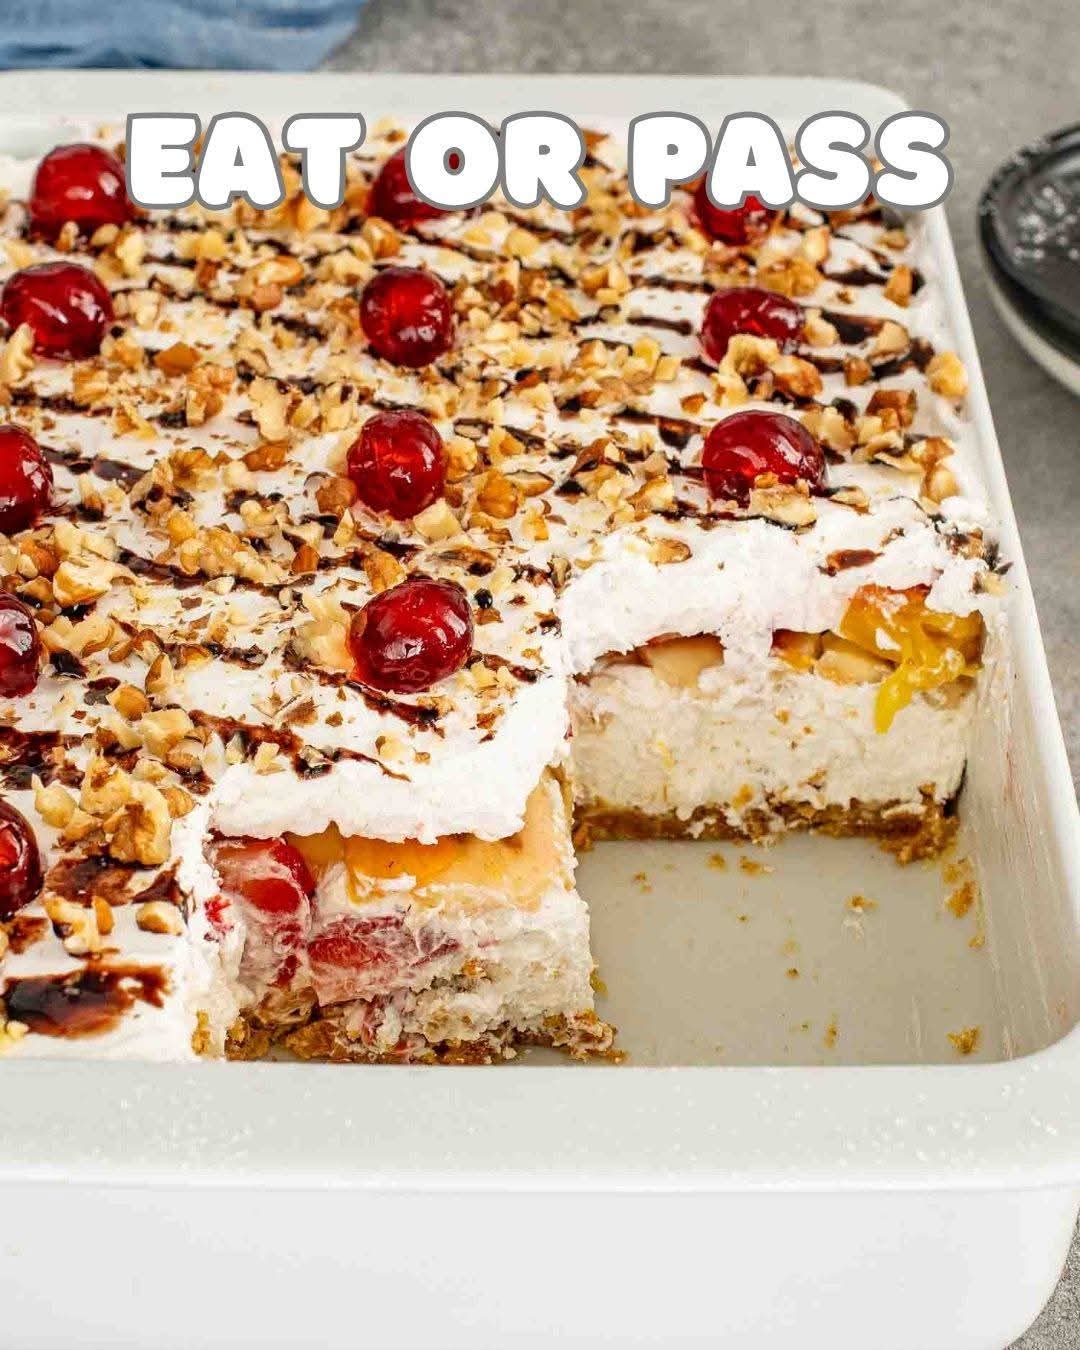
The Banana Split Cake is a no-bake dessert inspired by the beloved American ice cream sundae, the banana split. Traditionally, a banana split features bananas, scoops of vanilla, chocolate, and strawberry ice cream, topped with chocolate syrup, nuts, whipped cream, and cherries. This cake transforms those same flavors into a creamy, layered, indulgent dessert without the need for an oven. Perfect for summer parties, potlucks, or when you crave something refreshing yet decadent, it’s both easy to prepare and impossible to resist.
📝 Ingredients
For the Crust:
- 2 cups graham cracker crumbs (or digestive biscuits, finely crushed)
- ½ cup unsalted butter, melted
- ¼ cup granulated sugar
For the Cream Cheese Layer:
- 8 oz (225 g) cream cheese, softened
- 1 cup powdered sugar
- 1 cup whipped topping (or heavy cream whipped stiff)
For the Fruit & Layers:
- 3 ripe bananas, sliced
- 1 can (20 oz) crushed pineapple, drained well
- 2 cups fresh strawberries, sliced
For the Topping:
- 2 cups whipped topping (or fresh whipped cream)
- 1 cup chopped walnuts or pecans
- ½ cup chocolate syrup
- Maraschino cherries (for garnish)
🥣 Instructions / Methods
- Prepare the Crust
- Mix graham cracker crumbs, sugar, and melted butter in a bowl until crumbly.
- Press firmly into the bottom of a 9×13-inch dish to form a crust. Refrigerate for 15 minutes.
- Make the Cream Cheese Filling
- Beat cream cheese and powdered sugar until smooth.
- Fold in whipped topping until creamy. Spread evenly over the chilled crust.
- Add Fruit Layers
- Arrange banana slices evenly over the cream cheese layer.
- Spread drained pineapple on top.
- Add a layer of sliced strawberries.
- Top with Whipped Cream
- Spread a thick layer of whipped topping over the fruit.
- Finish with Garnishes
- Drizzle chocolate syrup on top.
- Sprinkle with nuts.
- Decorate with cherries.
- Chill & Serve
- Refrigerate at least 4 hours (overnight is best) to let flavors blend.
- Slice and enjoy chilled!
📜 History
The banana split was invented in 1904 by David Strickler, a 23-year-old pharmacist in Latrobe, Pennsylvania. He wanted to create a new sundae, and the banana—then considered an exotic fruit—became the star. Over time, the banana split became a nostalgic American dessert. The Banana Split Cake is a later adaptation, emerging in mid-20th-century potluck culture, turning the sundae into a no-bake cake perfect for gatherings.
🌱 Benefits
- No baking required → Perfect for hot days.
- Rich in fruits → Bananas, pineapple, and strawberries bring vitamins and fiber.
- Customizable → Easy to adapt with different fruits, toppings, or even a chocolate crust.
- Crowd-pleaser → A large dish that serves many.
🎨 Formation (Variations)
- Mini Banana Split Cups → Make in small glass cups or jars for parties.
- Chocolate Lover’s Version → Add cocoa powder to the crust or chocolate pudding layer.
- Tropical Twist → Use mango, kiwi, or passionfruit instead of strawberries.
- Healthier Option → Swap whipped cream for Greek yogurt and reduce sugar.
🍽️ Nutrition (per serving, approx. 1/12 slice)
- Calories: ~380
- Carbohydrates: 38 g
- Protein: 4 g
- Fat: 24 g
- Fiber: 2 g
- Sugar: 27 g
(Values vary depending on ingredients and toppings used.)
❤️ Conclusion
The No-Bake Banana Split Cake is more than just a dessert—it’s a celebration of creamy, fruity, and nostalgic flavors. Loved by kids and adults alike, it’s a treat that brings joy to every table, making it perfect for birthdays, barbecues, or even a cozy family weekend.
💕 For Dessert Lovers
This cake is especially loved by:
- Fruit lovers → for the natural sweetness.
- Chocolate lovers → for the rich drizzle.
- Party hosts → for its stunning presentation and easy prep.
- Nostalgic souls → for bringing back childhood banana split memories.
Would you like me to also create a step-by-step photo guide (visual recipe card) for this cake so it’s easier to follow and share?