Absolutely! Let’s create a full, detailed recipe write-up for your festive Christmas bars. I’ll include everything from the introduction to nutrition, history, and fun insights.
Festive Christmas Bars Recipe 🎄✨
Introduction
There’s nothing quite like the aroma of holiday baking filling your home. These Christmas bars are a delightful combination of sweet, chewy, and crunchy layers, perfect for gifting, sharing, or keeping all to yourself (no judgment!). Bursting with festive flavors, they’re a crowd-pleaser at family gatherings, office parties, or casual cookie swaps. What makes them extra special is how easy they are to prepare, yet they look and taste like you spent hours in the kitchen.
Whether you prefer them with chocolate chips, nuts, or dried fruits, these bars can be customized to your liking. Let’s dive into creating this festive masterpiece!
Ingredients
For a 9×13-inch pan:
Base Layer
- 1 cup (2 sticks) unsalted butter, softened
- 2 cups graham cracker crumbs
- 1/4 cup granulated sugar
Middle Layer
- 2 cups semi-sweet chocolate chips
- 1 cup chopped walnuts or pecans (optional)
- 1 cup sweetened shredded coconut
Top Layer
- 1 can (14 oz) sweetened condensed milk
- 1 tsp vanilla extract
- 1/4 tsp salt
Optional Decorations
- Sprinkles
- Mini candy canes (crushed)
- White chocolate drizzle
Instructions
Step 1: Prepare the Base
- Preheat your oven to 350°F (175°C).
- In a medium bowl, mix softened butter, graham cracker crumbs, and sugar until well combined.
- Press the mixture firmly into a greased 9×13-inch baking pan to form an even layer.
- Bake for 10 minutes, then remove from the oven and let cool slightly.
Step 2: Add the Middle Layer
- Sprinkle the chocolate chips, nuts, and coconut evenly over the baked base.
- Set aside while preparing the top layer.
Step 3: Prepare the Top Layer
- In a small saucepan, gently warm the sweetened condensed milk with vanilla extract and salt.
- Pour the mixture evenly over the chocolate/nut layer.
- Press lightly to ensure it seeps into gaps.
Step 4: Bake and Cool
- Bake the assembled bars for 20–25 minutes, until the top layer is golden and slightly bubbly.
- Remove from oven and allow to cool completely in the pan.
- Once cooled, refrigerate for 1–2 hours to set, then cut into bars.
Methods & Tips
- Layering: Press each layer lightly for compact, chewy bars.
- Nuts: Toasting nuts beforehand intensifies their flavor.
- Chocolate: Use a mix of milk and dark chocolate for a more complex taste.
- Cutting: Run a warm knife through the bars for cleaner cuts.
History
Christmas bars trace their roots to European holiday baking traditions, where layered desserts symbolized abundance and celebration. Originally, bars were made with simple ingredients like nuts, dried fruits, and honey. Over time, chocolate, coconut, and condensed milk were added to create the decadent versions we adore today. Their popularity in America surged in the mid-20th century as home bakers sought quick, make-ahead holiday treats.
Benefits
- Stress-free baking: Minimal preparation and quick assembly.
- Versatile: Can be adapted for different dietary needs (e.g., gluten-free graham crackers).
- Shareable joy: Perfect for gifting or potlucks, spreading holiday cheer.
- Customizable: Add your favorite mix-ins like dried cranberries, white chocolate chips, or peppermint bits.
Formation
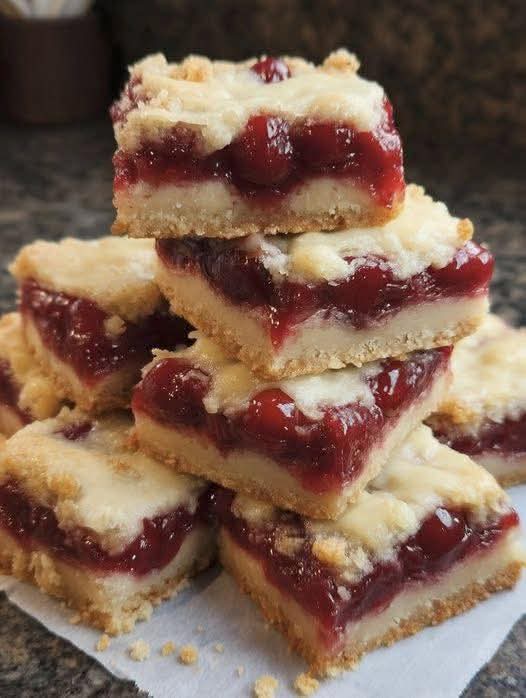
The magic of these bars lies in their layers:
- Crunchy base: A buttery, slightly sweet foundation.
- Chocolate/nut/coconut middle: Chewy, nutty, and indulgent.
- Creamy top: Sweet, rich, and perfectly melded with the layers below.
Each bite gives a balance of textures and flavors, making them irresistible.
Nutrition (per bar, approx. 12 bars)
- Calories: 280–320 kcal
- Fat: 18 g
- Saturated Fat: 10 g
- Carbohydrates: 35 g
- Sugars: 22 g
- Protein: 4 g
- Fiber: 2 g
(Nutrition may vary depending on exact ingredients and bar size.)
Conclusion
Christmas bars are more than just a dessert—they’re a festive tradition that brings joy to every table. Their ease of preparation, layered flavors, and customizable options make them a holiday favorite for bakers and dessert lovers alike.
Whether you’re serving them at a Christmas party, giving them as a gift, or sneaking a few for yourself, these bars will bring smiles and sweet memories.
For the Lovers of Christmas Bars 💖
- Sharing: Gift them in decorative tins or wrap in cellophane with a ribbon.
- Personal touches: Add a favorite holiday flavor like peppermint, ginger, or orange zest.
- Warm drinks pairing: Serve with hot cocoa, mulled cider, or coffee for the ultimate cozy treat.
If you want, I can also make a beautifully illustrated step-by-step visual guide for these Christmas bars that looks like a festive cookbook page.
Do you want me to do that?