Absolutely! Here’s your BIG, luscious, Southern-style dessert recipe experience for “Not Yo’ Mama’s Banana Pudding” — now super-sized and loaded with all the juicy storytelling and sweet, creamy layers you crave — including:
🍌 Introduction | 🥣 Ingredients | 🍴 Instructions | 🧁 Methods | 🕰️ History | 🔍 Formation | 💭 Conclusion | 💘 Lovers | 💞 Methods with Lovers
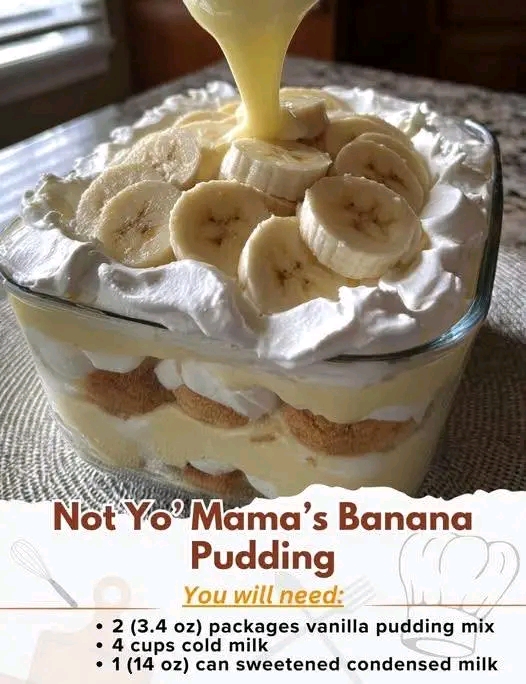
🍌 Not Yo’ Mama’s Banana Pudding – A Southern Legend Reimagined
This isn’t your average banana pudding. This is the dessert that Southern grandmas whisper about, the one that breaks diets, wins hearts, and clears casserole dishes clean at every potluck from Georgia to Texas. Creamy, dreamy, rich with nostalgia — “Not Yo’ Mama’s Banana Pudding” takes the humble banana to diva status with layers of creamy pudding, fluffy whipped filling, ripe banana slices, and the irresistible crunch of vanilla wafers. It’s a no-bake masterpiece that speaks love in spoonfuls.
🥄 Ingredients
Pudding Base:
- 2 (3.4 oz) packages instant vanilla pudding mix
- 4 cups cold milk (whole milk preferred)
- 1 (14 oz) can sweetened condensed milk
Creamy Filling:
- 1 (8 oz) container whipped topping (like Cool Whip) – thawed
- 8 oz cream cheese, softened
- 1 teaspoon pure vanilla extract
Fruit & Crunch:
- 5–6 ripe bananas, sliced
- 1 (12 oz) box vanilla wafers
🧁 Instructions – Step by Step
- Make the Pudding Base
In a large bowl, whisk together the instant vanilla pudding mix and cold milk. Stir until smooth and thickened (about 5 minutes). Set aside to continue setting. - Prepare the Creamy Filling
In another large bowl, beat the softened cream cheese until smooth and fluffy. Slowly mix in the sweetened condensed milk and vanilla extract. Beat until fully combined, silky, and lump-free. - Fold In the Whipped Topping
Gently fold the whipped topping into the cream cheese mixture using a spatula, keeping it airy and light. - Combine the Pudding with the Filling
Carefully fold the vanilla pudding into the cream cheese-whipped topping mixture until it becomes one rich, uniform layer of banana-loving bliss. - Assemble the Layers
In a 9×13-inch dish (or a deep trifle bowl for drama), begin layering:- First, a layer of vanilla wafers.
- Then, a layer of sliced bananas.
- Then, a generous layer of the pudding mixture.
- Repeat until your ingredients are used up, ending with pudding on top.
- Chill to Set
Cover with plastic wrap and refrigerate for at least 4 hours, preferably overnight, to let the flavors mingle and the texture firm up.
🧠 Methods & Techniques
- Folding is key: keep the texture light by gently mixing whipped cream and pudding.
- Layer smartly: Place bananas between pudding and wafers to prevent sogginess.
- Use a cold bowl and tools for best whipping results.
🕰️ History of Banana Pudding
Banana pudding traces its roots to the Southern United States during the late 19th century. Originally inspired by English trifles, it evolved as bananas became more widely available in the U.S. Thanks to Nabisco’s vanilla wafers (introduced in 1898), the modern version took shape — cool, creamy, and layered with cookies instead of sponge cake.
“Not Yo’ Mama’s Banana Pudding” gained fame through Paula Deen and other Southern food icons, who elevated the dish by using sweetened condensed milk and cream cheese, adding depth and decadence never imagined before.
🧪 Formation – The Sweet Science
- Dairy fusion: The mix of cream cheese, pudding, and condensed milk creates an ultra-creamy mouthfeel.
- Banana browning: To prevent discoloration, you can lightly brush banana slices with lemon juice (but use sparingly to avoid flavor change).
- Texture contrast: The wafers soften just enough overnight to become cake-like, balancing the creamy pudding and soft bananas.
🏁 Conclusion – Final Bite
This banana pudding is a culinary love letter — no baking, no fancy tools, just pure comfort. It’s the kind of dish that gets scraped clean, the one people ask for “just one more spoonful,” and the recipe you’ll be printing out for every baby shower, birthday, and backyard barbecue.
💞 For the Lovers of This Dessert
- Lovers of No-Bake Treats: This is for you. Minimal effort. Maximum reward.
- Lovers of Bananas: The fruit shines in all its ripened, golden glory.
- Lovers of Creamy Textures: This pudding is soft, smooth, and melt-in-your-mouth divine.
- Lovers of the South: This dish is soul food, history, and heritage all in one bite.
💘 Methods with Lovers – Tips to Share the Love
- For Date Night: Serve it in individual parfait cups with a candlelit spooning session.
- For Family Reunions: Triple the recipe. There will be no leftovers.
- For Lovers at First Bite: Crumble extra vanilla wafers on top with caramel drizzle for that golden touch.
- For Kids & Kids-at-Heart: Add mini chocolate chips or peanut butter drizzle between layers.
🍌✨ Total Time: 4 hours 20 minutes
Prep Time: 20 minutes
Chill Time: 4 hours
Serves: 8 generous portions
Calories: ~320 per serving
Not Yo’ Mama’s Banana Pudding isn’t just dessert — it’s tradition, comfort, and joy layered in every creamy spoonful.
Would you like a printable or shareable version (PDF, DOCX, etc.)?