Sure! Here’s a big, beautiful recipe for a No-Bake Cherry Cheesecake, complete with an introduction, ingredients, step-by-step instructions, method, history, formation, conclusion, and even a dash of love. 💖🍒
🍒 No-Bake Cherry Cheesecake Recipe 🍰
Creamy. Dreamy. Effortless. A summer dessert classic.
🌟 Introduction:
No-bake cherry cheesecake is a timeless dessert that’s been gracing kitchen tables since the mid-20th century. Loved for its smooth texture, rich cream cheese filling, and luscious cherry topping, it became especially popular in American households during the 1950s, when refrigeration-based desserts rose in popularity.
Unlike traditional baked cheesecakes, this version skips the oven entirely, making it perfect for hot summer days, quick celebrations, or any time you want a delicious treat without the fuss.
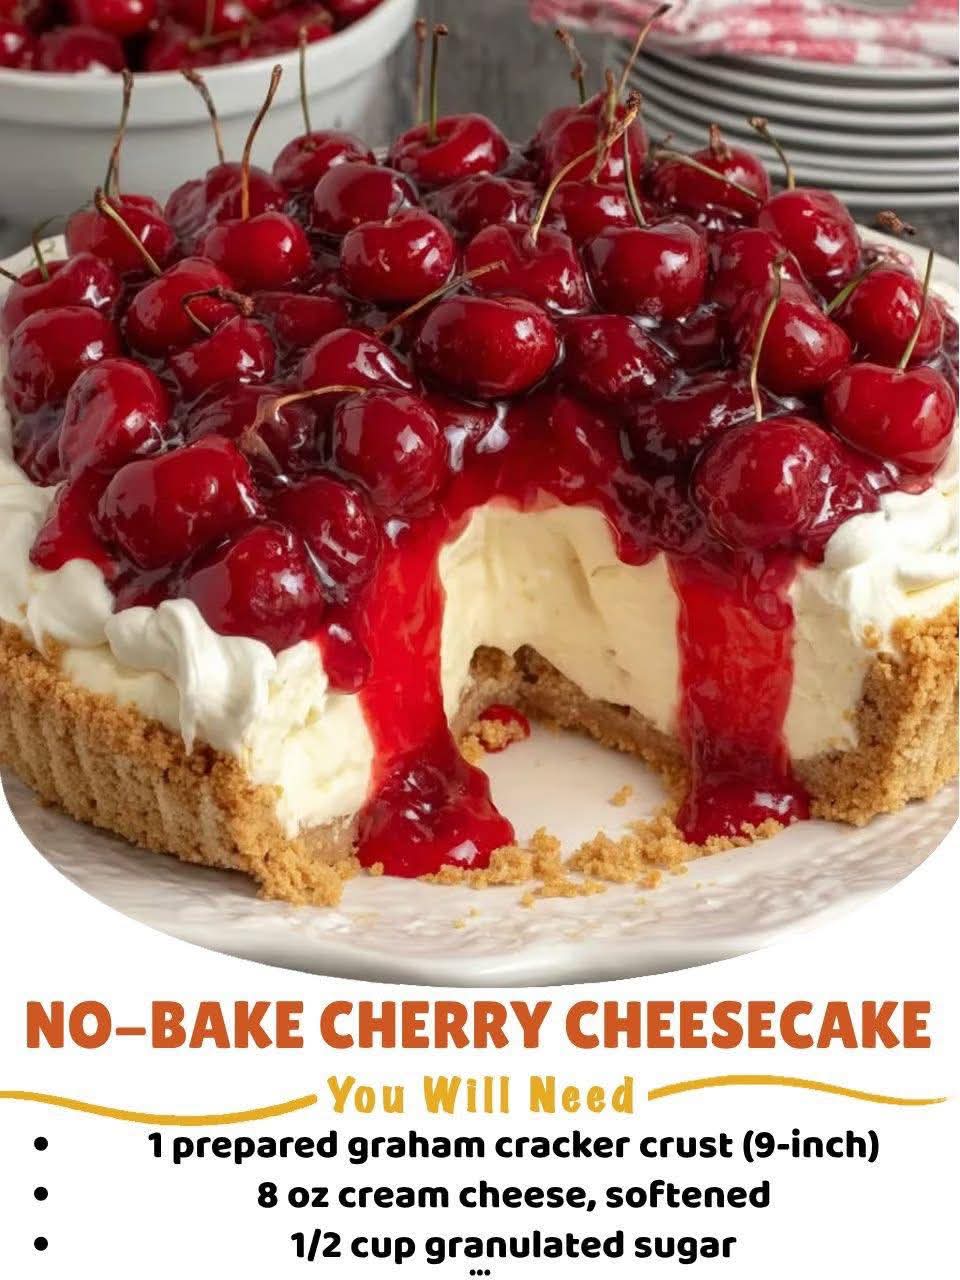
🛒 Ingredients:
For the Crust:
- 1 pre-made 9-inch graham cracker crust (or make your own: 1½ cups graham cracker crumbs + ¼ cup sugar + ⅓ cup melted butter)
For the Filling:
- 8 oz (225 g) cream cheese, softened
- 1 can (14 oz or 397 g) sweetened condensed milk
- 1 teaspoon vanilla extract
- 2 tablespoons lemon juice (fresh is best for brightness)
For the Topping:
- 1 can (21 oz or ~600 g) cherry pie filling
📝 Instructions & Method:
✨ Step 1: Prepare the Base
- If making your own crust: Combine graham cracker crumbs, sugar, and melted butter in a bowl. Press into a 9-inch pie dish. Chill for 15 minutes in the fridge to firm up.
✨ Step 2: Make the Cheesecake Filling
- In a large mixing bowl, beat the softened cream cheese until smooth and creamy.
- Gradually mix in the sweetened condensed milk until well combined and silky.
- Add vanilla extract and lemon juice. Beat until everything is fully incorporated and smooth. The lemon juice helps thicken and stabilize the mixture.
✨ Step 3: Assemble
- Pour the cream cheese filling into the prepared crust. Smooth the top with a spatula.
✨ Step 4: Chill
- Cover with plastic wrap and refrigerate for at least 4 hours (overnight is even better) to allow the filling to set.
✨ Step 5: Add the Cherry Topping
- Once set, spoon the cherry pie filling over the top. Spread it evenly for that iconic look.
📜 History & Formation:
This dessert became a household favorite during the “Jell-O & Refrigerated Pie Era” of the 1950s in the U.S., when home refrigeration became common. Recipes that required no baking yet delivered indulgence were heavily promoted in magazines. Brands like Philadelphia Cream Cheese and Eagle Brand Sweetened Condensed Milk popularized no-bake cheesecakes through ads and recipe cards.
Its formation is simple yet genius — combining acid (lemon juice) with cream cheese and sweetened condensed milk causes the mixture to thicken naturally, no gelatin or baking needed.
❤️ Lovers of This Dessert:
- Busy parents who want a showstopper dessert without the oven.
- Summer party hosts needing a cool treat.
- Kids and teens who love helping in the kitchen — no heat required!
- Classic dessert lovers who adore that retro taste.
🍽️ Conclusion:
No-Bake Cherry Cheesecake is easy, elegant, and endlessly loved. It’s proof that simplicity can be beautiful. With minimal ingredients and maximum flavor, it continues to win hearts at potlucks, holidays, or even just a Tuesday night.
Whether you make it for someone special or sneak forkfuls straight from the fridge, one thing’s for sure — this dessert never disappoints.
💕 Final Notes (with love):
- Want to switch it up? Try it with blueberry or strawberry topping!
- Make individual mini cheesecakes in jars for a cute twist.
- Use full-fat cream cheese for best texture.
Enjoy every creamy, cherry-filled bite! 🍒🍰💕
Let me know if you want a graphic post, video-style steps, or printable card version!