🍓 Classic Jelly Slice Recipe – A Nostalgic No-Bake Treat 🍓
🧁 Introduction
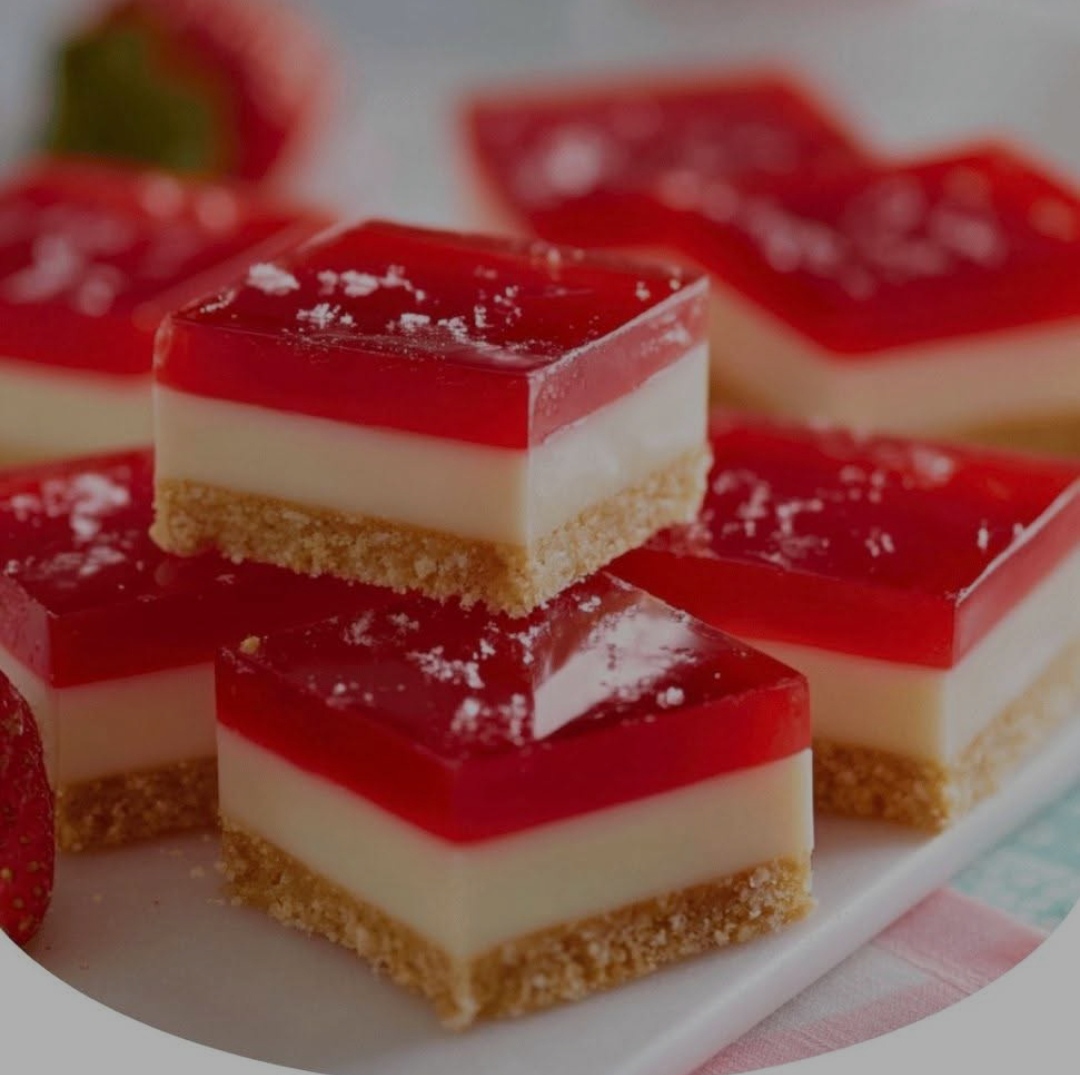
The Jelly Slice is a cherished dessert that evokes sweet memories of childhood parties, family barbecues, and tea-time gatherings. With its distinct tri-layered look — a buttery biscuit base, zesty creamy center, and glossy jelly top — this Australian favorite is as beautiful to look at as it is delightful to eat. It’s simple, no-bake, and irresistibly refreshing, especially on warm days.
This recipe is perfect for beginners and dessert lovers alike, with a balance of creamy and fruity that’s hard to resist.
🧺 Ingredients
🔸 Biscuit Base
- 250 g plain sweet biscuits (Marie or Nice), crushed finely
- 125 g unsalted butter, melted
🔸 Creamy Filling
- 395 g can sweetened condensed milk
- ½ cup freshly squeezed lemon juice
- 2 tsp gelatine powder
- ¼ cup boiling water
🔸 Jelly Topping
- 85 g packet strawberry (or raspberry) jelly crystals
- 1 cup boiling water
- ½ cup cold water
🥣 Instructions & Methods
1. Prepare the Biscuit Base
- Crush biscuits using a food processor or by placing them in a ziplock bag and rolling with a rolling pin.
- Mix crushed biscuits with melted butter until well combined.
- Press mixture firmly into a lined 20cm square or rectangular slice tin.
- Refrigerate for 20–30 minutes until set.
2. Make the Creamy Layer
- Dissolve gelatine in ¼ cup boiling water. Stir until completely dissolved. Let cool slightly.
- In a mixing bowl, combine condensed milk and lemon juice. Stir well.
- Add the dissolved gelatine and mix until smooth.
- Pour the mixture over the chilled biscuit base and smooth the top.
- Return to the fridge and chill for at least 1 hour, or until firm.
3. Prepare the Jelly Topping
- In a separate bowl, dissolve jelly crystals in 1 cup boiling water.
- Stir in ½ cup cold water. Let it cool to room temperature (do not let it set).
- Gently pour cooled jelly mixture over the firm creamy layer.
- Refrigerate for 3–4 hours, or until jelly is completely set.
4. Slice and Serve
- Once set, remove from tin using the lining paper.
- Cut into clean squares or bars using a hot, sharp knife.
- Serve chilled and enjoy!
🕰 History of Jelly Slice
The Jelly Slice is believed to have originated in Australia, gaining popularity in the mid-20th century as refrigeration became widespread in homes. It was a go-to for housewives because of its ease and visual appeal — a no-bake, layered dessert that looked more complex than it was. Over time, it has become a staple at birthday parties, picnics, and community bake sales.
💡 Benefits of Jelly Slice
- No baking required – perfect for summer days or limited kitchen setups.
- Customizable – swap the jelly flavor, use different biscuits, or add fruit in the creamy layer.
- Kid-friendly – loved by both kids and adults.
- Quick to make – prep in minutes with only a few steps.
- Great for sharing – ideal for parties and gatherings.
🧬 Formation & Layer Science
- The base provides texture and support. Butter binds the crumbs into a firm crust.
- The middle layer uses acid (lemon juice) to react with condensed milk, thickening it. Gelatine stabilizes it.
- The top jelly layer sets due to protein chains in gelatine forming a network as it cools.
Together, they form a stable, structured dessert with a delightful mouthfeel.
❤️ For the Lovers of Jelly Slice
Those who adore tangy-sweet desserts, vibrant layers, and old-school charm will fall in love with this treat. Whether you’re into vintage recipes or just love easy, eye-catching desserts, the Jelly Slice is for you.
🧾 Nutrition (Per Slice – Approximate)
| Nutrient | Amount |
|---|---|
| Calories | ~210 kcal |
| Carbohydrates | ~30 g |
| Sugars | ~22 g |
| Fat | ~9 g |
| Protein | ~3 g |
| Fiber | ~0.5 g |
(Note: May vary depending on slice size and specific brands used.)
🔁 Methods Recap
- Use cold layers to help each set properly.
- Let each layer fully set before adding the next to prevent mixing.
- Use a hot knife (dipped in hot water) for clean slices.
💬 Conclusion
The Classic Jelly Slice stands as a testament to simple pleasures — a few pantry staples transformed into a crowd-pleaser. It’s fun, colorful, refreshing, and always nostalgic. Perfect for picnics, parties, or just when you want something sweet without turning on the oven.
💕 From Jelly Lovers to Jelly Lovers
Jelly slice is more than a dessert — it’s a memory, a tradition, and a joy to make and share. Whether passed down from grandma or discovered on social media, it’s a dessert that connects generations. Go ahead, slice into that jelly glow — your tastebuds will thank you.
Let me know if you’d like a chocolate version, low-sugar option, or video tutorial! 🍓🍰