Absolutely! Here’s a BIG, detailed, drool-worthy recipe for Gooey Brownie Pie—complete with history, ingredients, step-by-step methods, tips, and even a little love. 🥰🍫🥧
🍫 Gooey Brownie Pie
Decadently rich, fudgy, and irresistible—a dessert that brings lovers together, bite by bite.
❤️ Introduction
Somewhere between a rich, fudgy brownie and a warm, comforting pie lies the Gooey Brownie Pie—a dessert masterpiece that wraps you in nostalgia and indulgence. Perfect for lovers, celebrations, heartbreaks, or just a cozy night in, this dessert has become a favorite for people who love chocolate, gooey centers, and golden crusts.
Whether you serve it warm with a scoop of vanilla ice cream or chilled for a dense chocolate hit, this pie will win hearts. 🥰
🏛️ A Short History of Brownie Pie
The brownie itself was born in the late 19th century in the USA, rumored to have been created at the Palmer House Hotel in Chicago. Meanwhile, pies are one of the oldest dessert forms, dating back to Ancient Egypt and evolving through Medieval Europe. The fusion of these two—brownie and pie—is a relatively modern twist, becoming popular in the 1990s and 2000s in American diners and Pinterest-worthy bakeries.
This dessert is a celebration of both tradition and innovation.
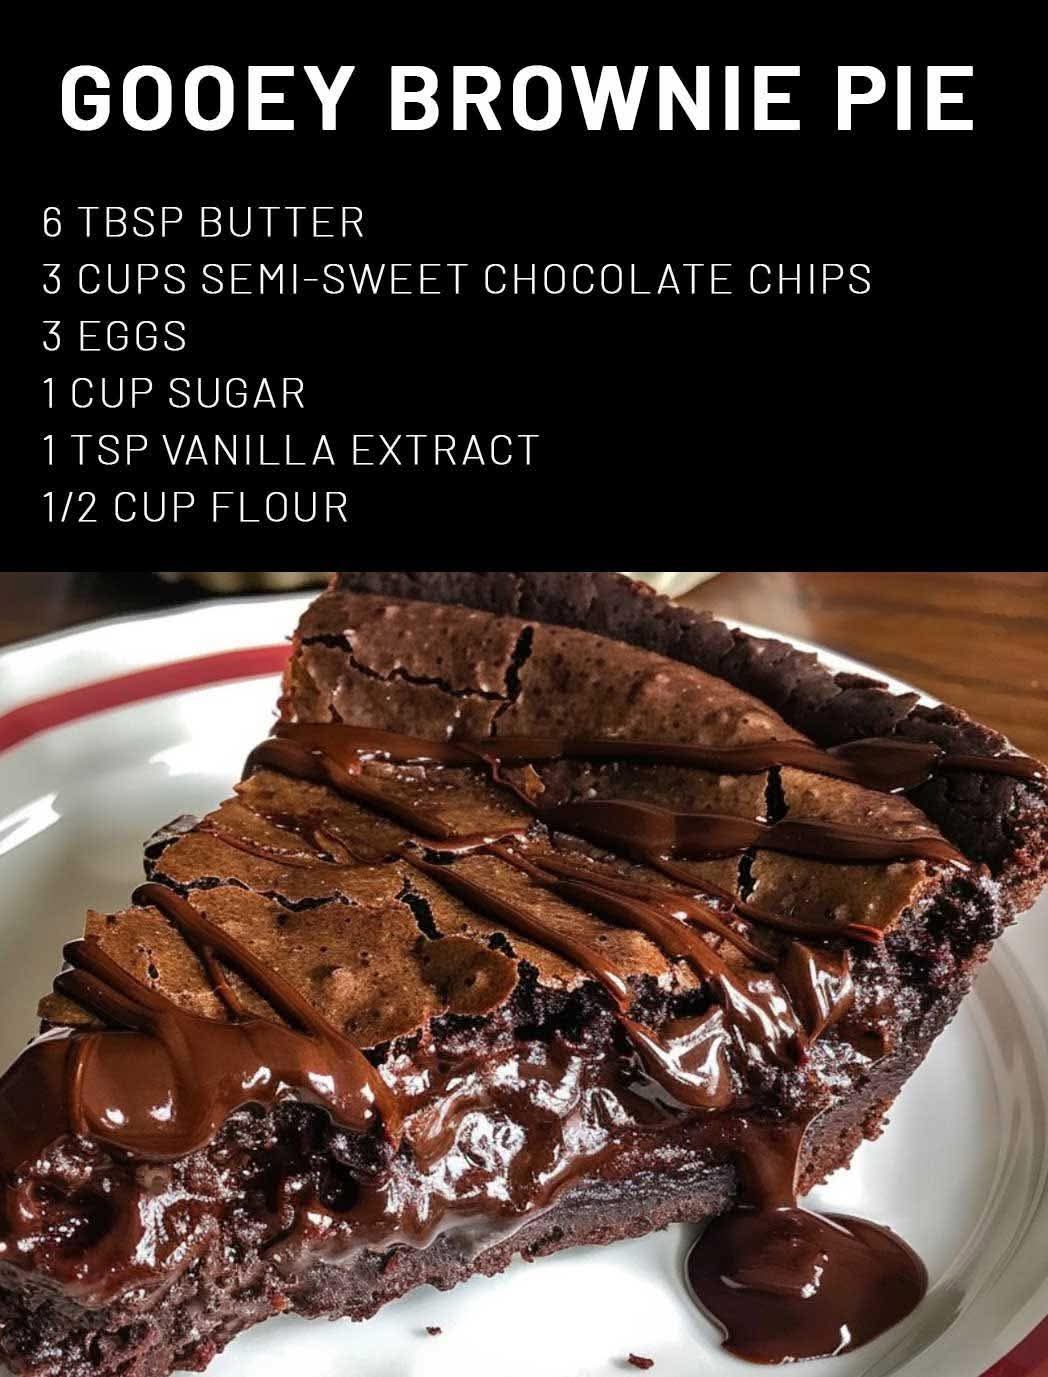
🍫 Ingredients
For the Crust (Optional but heavenly!):
- 1 ½ cups crushed graham crackers OR Oreo crumbs
- 6 tbsp unsalted butter, melted
- 2 tbsp sugar
- Pinch of salt
For the Gooey Brownie Filling:
- 1 cup (2 sticks) unsalted butter
- 1 ½ cups semi-sweet chocolate chips (or chopped dark chocolate)
- 1 cup granulated sugar
- ½ cup brown sugar
- 3 large eggs
- 1 tsp vanilla extract
- ¾ cup all-purpose flour
- ¼ cup unsweetened cocoa powder
- ½ tsp salt
- Optional: ½ cup chopped walnuts or pecans
- Optional: ½ cup chocolate chunks for extra gooeyness
👩🍳 Instructions & Method
1. Prepare the Crust
- Preheat oven to 350°F (175°C).
- In a bowl, mix crushed graham crackers or Oreos with melted butter, sugar, and a pinch of salt.
- Press mixture into the bottom of a 9-inch pie dish to form a firm base.
- Bake crust for 8-10 minutes. Let cool while preparing filling.
2. Make the Brownie Filling
- In a saucepan over low heat, melt the butter and chocolate chips together. Stir until smooth.
- Remove from heat and stir in granulated and brown sugar. Let it cool for 5 minutes.
- Add eggs one at a time, whisking well after each addition. Stir in vanilla.
- In a separate bowl, sift together flour, cocoa powder, and salt.
- Slowly fold dry ingredients into wet chocolate mixture until combined.
- If using nuts or extra chocolate, fold them in now.
3. Assemble and Bake
- Pour brownie batter into the cooled crust. Smooth out the top.
- Bake at 350°F (175°C) for 30–35 minutes, or until the edges are set but the center is still a little wobbly.
- Do NOT overbake—gooey is the goal!
- Let it cool for 15 minutes for a molten center, or cool completely for cleaner slices.
🍨 Serving Suggestions
- Warm with vanilla ice cream and hot fudge sauce
- Chilled with whipped cream and chocolate shavings
- Topped with strawberries or raspberries for a romantic twist
- Add a pinch of sea salt for that salty-sweet magic
🫶 Why Lovers Love It
This pie is perfect for:
- Date nights ❤️
- Valentine’s Day 💌
- Late-night cravings 🤤
- Comfort after a breakup 💔🍫
- Sharing with your BFFs or sweethearts 🫶
Something about the warm, melting center brings people closer. It’s comfort food for the soul—a love language in dessert form.
🧠 Tips for Gooey Perfection
- Don’t overmix the batter—gentle folds keep the texture fudgy.
- Slight underbaking = maximum gooeyness.
- Let it rest for 10-15 minutes after baking for the best texture.
- You can skip the crust and bake the brownie filling directly in a greased pie pan.
🥰 Conclusion
The Gooey Brownie Pie is more than a dessert—it’s an experience. Rich, comforting, sweet, and a little sinful. Whether you’re making it for someone you love or just yourself (because you deserve it), this pie will always satisfy.
So go ahead—bake it, share it, devour it. Let your oven tell your love story. 💕
If you’d like a printable recipe card or video walkthrough, just let me know!