Sure! Here’s a full-length, detailed recipe article for Cool Whip Cookies with everything you’re looking for: introduction, ingredients, instructions, history, benefits, method, nutrition, and more.
Cool Whip Cookies: A Delightfully Simple Treat for Any Occasion
Introduction
Looking for a quick, easy, and crowd-pleasing treat? Whether you’re celebrating Bike to Work Day, a birthday, or just need a sweet pick-me-up after a long commute, Cool Whip Cookies are the perfect bite-sized indulgence. With just three core ingredients, these cookies come together in minutes and deliver a soft, chewy texture with a slightly crisp edge. Adding M&M’s makes them fun, colorful, and extra tasty!
These cookies are ideal for busy mornings, quick celebrations, potlucks, or baking with kids. They’re so simple, you’ll wonder how such minimal effort can produce such maximum flavor.
History of Cool Whip Cookies
The original idea for Cool Whip Cookies emerged from the broader trend of cake mix baking in the 1970s and 1980s. As home cooks looked for convenience and speed, many began experimenting with cake mixes beyond traditional cakes—cookies, bars, and even pancakes. Cool Whip, introduced by Kraft in 1966, became a beloved shortcut ingredient for mousse, pies, and cookies. The light, whipped texture helped create incredibly soft cookies with a chewy, airy consistency.
Over the years, bakers have adapted the recipe to suit every flavor—from chocolate to lemon to strawberry—with just one box of cake mix and a dollop of creativity.
Ingredients
- 1 box (16.25 oz) white cake mix
(or try chocolate, lemon, or strawberry for a fun twist) - 1 large egg
- 2 ½ cups Cool Whip (thawed)
- 1/3 cup powdered sugar (for rolling)
- 1 cup M&M’s, divided (half for mixing, half for topping)
Method: How to Make Cool Whip Cookies
Step-by-Step Instructions
- Preheat Oven:
Set your oven to 350°F (175°C) and line a baking sheet with parchment paper. - Mix the Dough:
In a large mixing bowl, combine the cake mix, egg, and Cool Whip. Stir until smooth and well blended. The dough will be very sticky—this is normal! - Add M&M’s:
Gently fold in ½ cup of the M&M’s. Chill the dough for 15–30 minutes if it’s too sticky to handle. - Form Cookies:
Scoop dough using a spoon or small cookie scoop. Drop each ball into the powdered sugar and roll to coat. This gives the cookies their signature crinkle look. - Bake:
Place the coated cookie dough balls onto the prepared baking sheet, spacing about 2 inches apart. Press a few extra M&M’s on top of each cookie. - Bake for 10–12 minutes, or until cookies are set but still soft in the center. Do not overbake—they’ll firm up as they cool.
- Cool and Enjoy:
Let cookies rest on the baking sheet for 2–3 minutes, then transfer to a wire rack to cool completely.
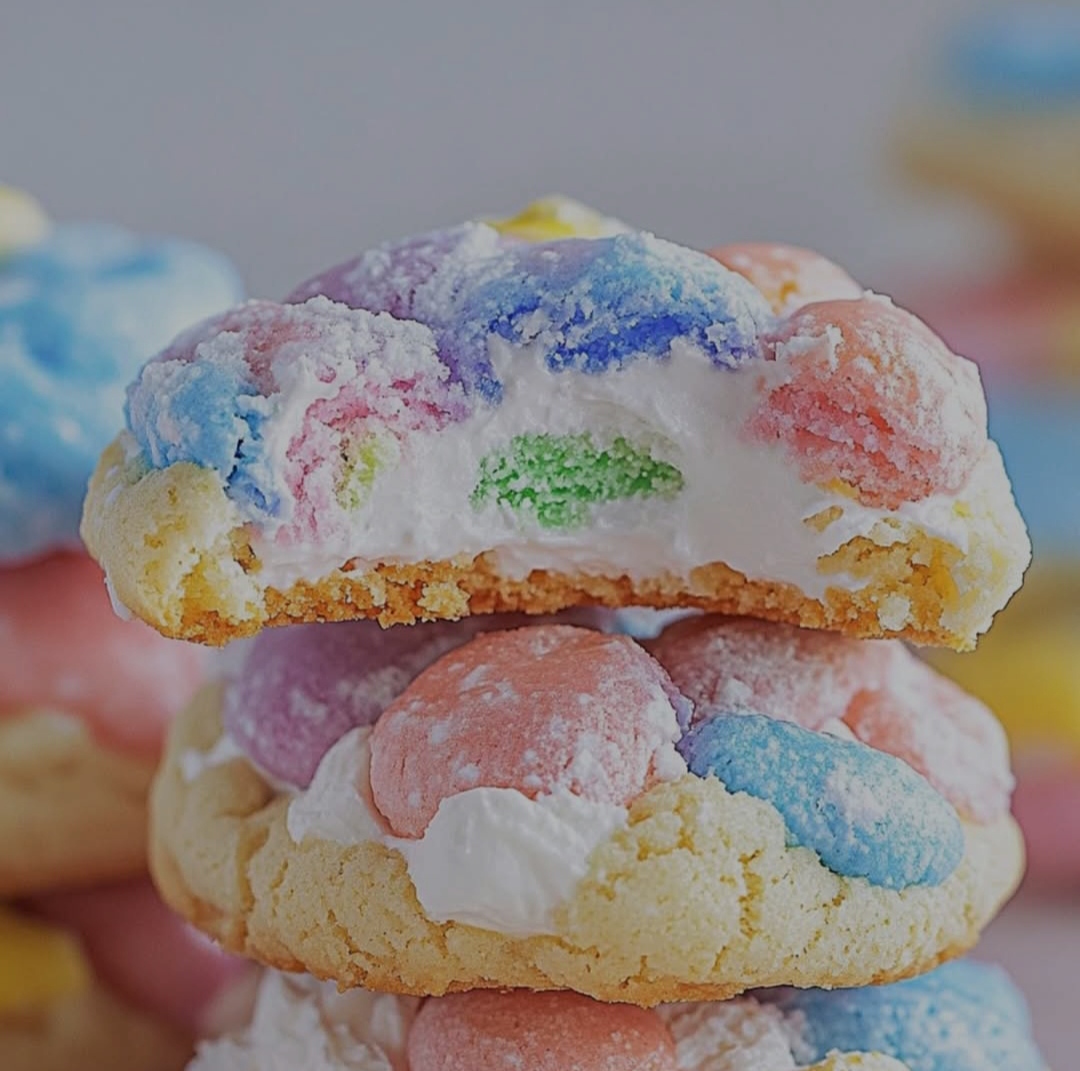
Formation and Texture
These cookies have a crackled surface from the powdered sugar, a soft and airy interior, and a subtle chew. The M&M’s add bursts of chocolate and a colorful crunch that makes each bite more exciting.
Health Benefits (Yes, Some!):
While Cool Whip Cookies are clearly a treat, they can be part of a balanced lifestyle when enjoyed in moderation:
- Portion-controlled: Small size makes it easy to enjoy just one or two.
- Low in fat: Thanks to the Cool Whip, which is lighter than butter.
- Customizable: Use sugar-free cake mix or reduced-sugar Cool Whip for a lighter option.
Nutritional Information (Per Cookie, Approximate)
- Calories: 110
- Fat: 3g
- Carbohydrates: 18g
- Sugar: 12g
- Protein: 1g
- Fiber: <1g
Note: Nutrition may vary based on cake mix brand and amount of M&M’s used.
Why People Love Cool Whip Cookies
Kids love them for the bright colors and soft texture.
Parents love them for the easy prep and fun baking with little ones.
Bakers love them for the endless flavor variations—try chocolate cake with peanut butter chips, or lemon cake with white chocolate!
They’ve become a go-to cookie for office parties, bake sales, and lazy Sunday afternoons.
Conclusion
Cool Whip Cookies prove that baking doesn’t have to be complicated to be delicious. In under 30 minutes and with just a few ingredients, you can whip up a batch of colorful, soft, and irresistible cookies that will bring a smile to anyone’s face—especially after a bike ride to work.
So grab your helmet, ride with joy, and reward yourself with a cookie that’s just as fun as the journey itself!
If you want, I can also turn this into a printable recipe card or a social media post. Just let me know!