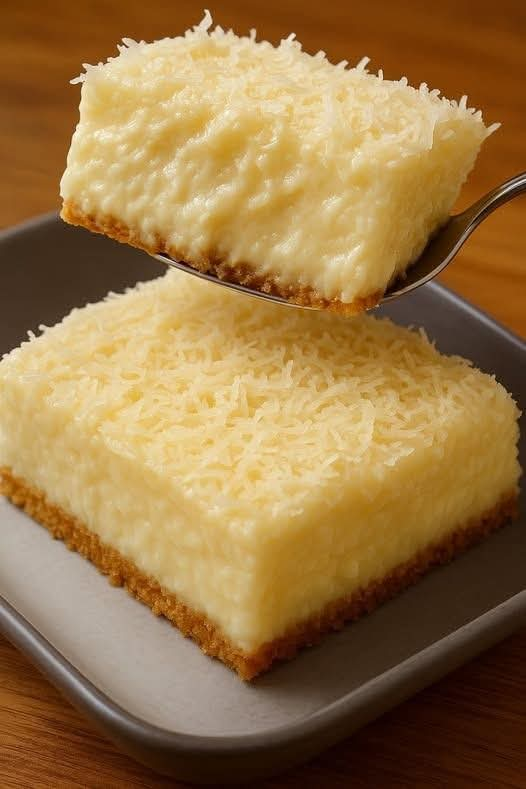
🥥❄ Cold Coconut Sponge Cake 🍰✨
A divine and refreshing dessert, Cold Coconut Sponge Cake is the ultimate treat for coconut lovers. With a delicate, airy texture and rich coconut flavor, this cake is a perfect balance of lightness and indulgence. Served chilled, it becomes even more irresistible, making it an excellent dessert for warm days or special occasions.
History of Coconut Sponge Cake
Coconut has been a beloved ingredient in tropical and coastal cuisines for centuries. Historically, coconuts have been used in desserts across South Asia, the Caribbean, and South America. The combination of coconut milk and shredded coconut in baked goods has been popularized in various cultures, leading to recipes like the coconut sponge cake.
This particular version of Cold Coconut Sponge Cake has roots in Latin American and European baking traditions, where moist cakes infused with milk mixtures (such as tres leches cake) have been popular. By combining the tenderness of sponge cake with the tropical flavors of coconut, this dessert has earned a special place in the hearts of dessert enthusiasts worldwide.
Ingredients
For the Sponge Cake:
- 4 eggs 🥚
- 1 cup granulated sugar
- 1 cup all-purpose flour
- 1 teaspoon baking powder
- 1/2 cup milk 🥛
- 1 jar (200 ml) coconut milk 🥥
- 1 teaspoon vanilla extract
- A pinch of salt
For the Coconut Soak:
- 1 cup condensed milk
- 1/2 cup evaporated milk
- 1/2 cup coconut milk
For Topping:
- 1 cup whipped cream
- 1/2 cup shredded coconut (toasted or fresh)
- 1 tablespoon powdered sugar (optional, for dusting)
- Maraschino cherries or coconut flakes for garnish (optional)
Instructions
Step 1: Preparing the Sponge Cake
- Preheat the oven to 350°F (175°C). Grease and line a 9×13-inch baking dish with parchment paper.
- In a mixing bowl, beat the eggs and sugar together until light, fluffy, and pale in color.
- Sift together the flour, baking powder, and salt.
- Gradually fold the dry ingredients into the egg mixture, ensuring you don’t deflate the batter.
- Warm the milk slightly and mix it with the coconut milk and vanilla extract.
- Slowly incorporate the milk mixture into the batter, stirring gently.
- Pour the batter into the prepared baking dish and bake for 25-30 minutes, or until a toothpick inserted in the center comes out clean.
Step 2: Preparing the Coconut Soak
- In a bowl, whisk together condensed milk, evaporated milk, and coconut milk.
- Once the cake is baked and slightly cooled, poke holes all over the surface with a fork or skewer.
- Slowly pour the coconut soak over the cake, allowing it to absorb fully.
- Cover and refrigerate for at least 4 hours (preferably overnight) for maximum flavor.
Step 3: Adding the Topping
- Spread an even layer of whipped cream over the chilled cake.
- Sprinkle toasted shredded coconut on top.
- Garnish with maraschino cherries or extra coconut flakes for an elegant touch.
- Dust with a light sprinkle of powdered sugar if desired.
Serving Suggestions
- Serve this cake chilled, straight from the refrigerator, for the best texture and flavor.
- Pair with a cup of coffee or tropical fruit tea.
- Store leftovers in an airtight container in the fridge for up to 3-4 days.
Why You’ll Love This Cake
- Moist and Fluffy: The sponge cake absorbs the coconut soak, making it incredibly soft.
- Rich Coconut Flavor: A paradise for coconut lovers!
- Perfect for Any Occasion: Ideal for birthdays, holidays, or summer gatherings.
- Easy to Make: No complicated techniques required—just mix, bake, soak, and enjoy.
Conclusion
Cold Coconut Sponge Cake is a dreamy dessert that brings tropical flavors and irresistible sweetness together in every bite. Whether you’re a coconut enthusiast or just looking for a refreshing, creamy, and indulgent cake, this recipe is sure to be a hit. Enjoy making and sharing this delightful treat with your loved ones!
Here’s the complete and detailed recipe for Cold Coconut Sponge Cake! Let me know if you’d like any adjustments or additional details. Happy baking!
