Homemade Reese’s Cups
Reese’s Cups are one of the most beloved chocolate treats in the world, combining the perfect balance of creamy peanut butter and rich chocolate. Making them at home is not only fun but also allows you to customize the ingredients to suit your taste and dietary preferences. This guide will walk you through the history, benefits, detailed step-by-step preparation, nutritional facts, and why so many people love Reese’s Cups.
History of Reese’s Cups
Reese’s Peanut Butter Cups were created by H.B. Reese in 1928. Reese, a former dairy farmer and Hershey employee, experimented with candy-making and developed a delicious peanut butter-filled chocolate cup. The product quickly became popular, and by 1963, the Hershey Company acquired Reese’s brand. Since then, Reese’s Cups have remained a top-selling candy worldwide, available in various sizes and flavors.
Benefits of Homemade Reese’s Cups
Making Reese’s Cups at home has several advantages:
Healthier Alternative – You can control the ingredients, reducing sugar, using organic peanut butter, or choosing dark chocolate for more antioxidants.
Customizable Flavors – Add sea salt, caramel, or even a crunchy layer to personalize your cups.
No Artificial Preservatives – Store-bought candy contains preservatives, but homemade versions are free of unnecessary additives.
Fun and Engaging – A perfect recipe for families, friends, and chocolate lovers to enjoy together.
Ingredients
To make approximately 12 homemade Reese’s Cups, you’ll need:
For the Chocolate Layer:
2 cups (12 oz) semi-sweet or milk chocolate chips
2 tbsp coconut oil or butter
For the Peanut Butter Filling:
1 cup creamy peanut butter
1/4 cup powdered sugar (adjust for sweetness)
1/4 cup unsalted butter, melted
1/2 tsp vanilla extract
1/4 tsp salt
Optional Toppings:
Crushed peanuts
Sea salt flakes
Chocolate drizzle
Instructions & Methods
Step 1: Prepare the Chocolate Layer
- Melt the chocolate chips with coconut oil using a double boiler (a heatproof bowl over simmering water) or in the microwave in 30-second intervals, stirring each time until smooth.
- Line a muffin tin with paper liners and spoon about 1 tsp of melted chocolate into each liner, tilting to coat the sides.
- Place the muffin tin in the refrigerator or freezer for 10 minutes to set.
Step 2: Make the Peanut Butter Filling
- In a bowl, mix peanut butter, powdered sugar, melted butter, vanilla extract, and salt until smooth.
- Scoop about 1 tsp of peanut butter mixture and roll it into small discs that fit inside the chocolate layer.
Step 3: Assemble the Reese’s Cups
- Place the peanut butter filling over the chilled chocolate base.
- Spoon more melted chocolate over the peanut butter, ensuring it’s fully covered.
- Gently tap the muffin tin to remove air bubbles and smooth the chocolate.
Step 4: Chill and Serve
- Refrigerate for at least 30 minutes until firm.
- Remove from the liners and enjoy!
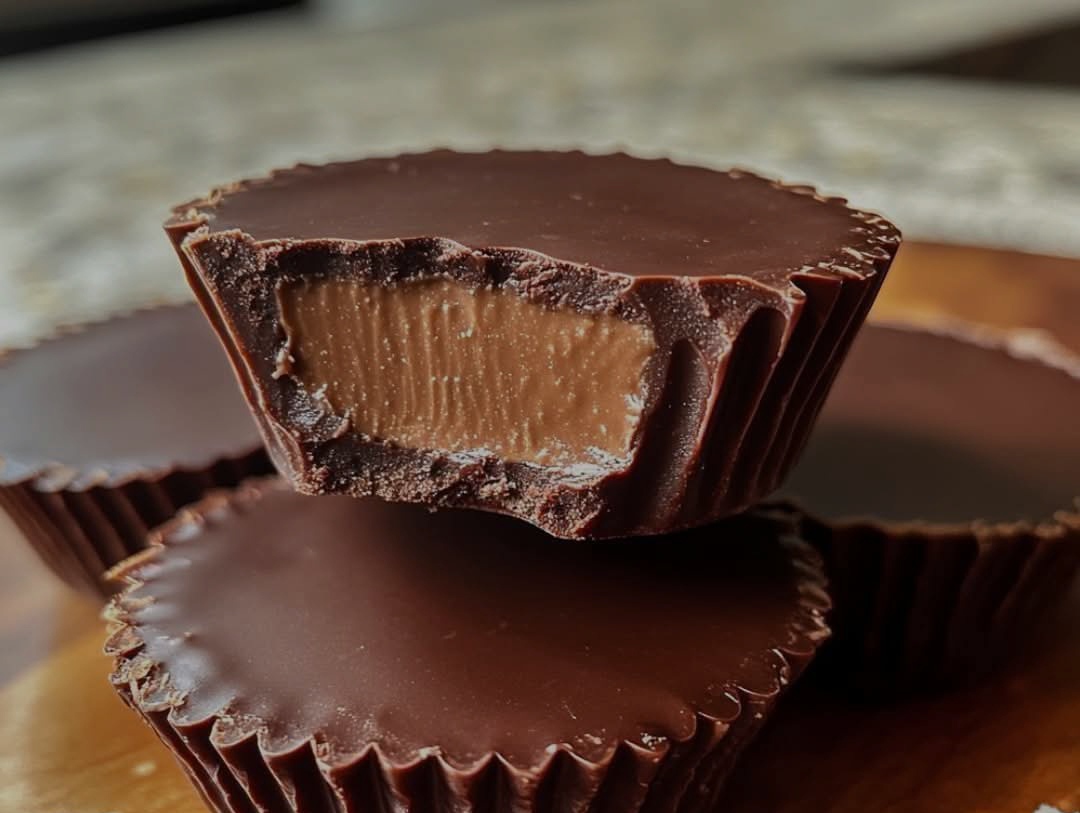
Formation of Reese’s Cups
Reese’s Cups have a distinct layered structure, with a smooth chocolate shell encasing the creamy peanut butter center. The homemade version mimics this formation, allowing you to adjust the thickness of the chocolate and peanut butter layers to your preference.
Nutritional Facts (Per Serving – Approx. 1 Cup)
For a healthier version, use dark chocolate, natural peanut butter, and a sugar substitute like stevia.
Why People Love Reese’s Cups
Perfect Sweet-Salty Balance – The creamy peanut butter contrasts beautifully with the rich chocolate.
Smooth and Crunchy – The texture combination makes every bite satisfying.
Nostalgic and Comforting – Many grew up enjoying Reese’s Cups, making them a childhood favorite.
Endless Variations – Mini cups, jumbo cups, white chocolate, dark chocolate, and even seasonal flavors keep fans excited.
Conclusion
Homemade Reese’s Cups are a delightful, easy-to-make treat that allows you to enjoy the classic flavor with a healthier and customizable twist. Whether you make them for yourself, share them with loved ones, or gift them on special occasions, they’re sure to be a hit. Try experimenting with different fillings and toppings to create your perfect version!
Would you like a recipe for a sugar-free or keto-friendly variation?